|
|
xplorer²Exponential growth to file management productivity |

|
|
xplorer²Exponential growth to file management productivity |

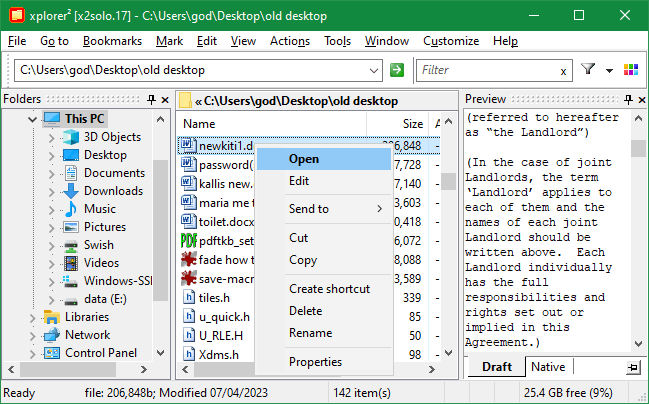
Use the tree to locate folders, and select file items with the mouse. The preview pane will show a draft preview of the focused item. Double click to open the selected document in its registered application, or use the right click context menu to perform file operations as copy, delete, rename and so on (these commands are also available from File menu). To transfer copied files, switch to the destination folder and use Edit > Paste menu command, or use drag-drop. These are all elementary actions and will not be elaborated further.
If you hold down <SHIFT> key as you right click, you get an extended menu with more commands. For example, the context menu of executable files will include a Run As command that allows you to run a program impersonating a different user.
|
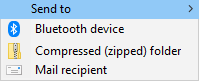
An underused hidden gem is Send to submenu. You can create a compressed folder out of the selection, attach files to emails (mail recipient command) and more — you can even customize this menu for special targets.
Right click on some empty spot to open the active pane's background menu. In there you will find commands to create new files and folders, change the pane style etc. Thus, just using the mouse and context menus, ignoring the entire menu system in xplorer², you can do all the basic file operations! |
|
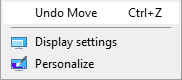
| All these basic file operations like drag/drop, copy/paste, rename and delete can be undone, albeit not by xplorer², but from windows explorer! If you find you have made a mistake, minimize xplorer² and any other window that obscures the desktop, then right click on the background and you will find the undo menu command. As xplorer² uses windows explorer for its basic file operations, it is possible to undo them in this roundabout way. |
|
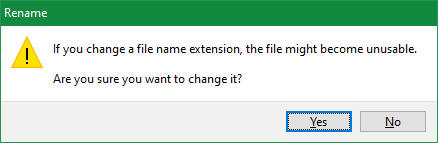
When you create a new file or folder using Actions (or a pane's background menu), the item is created in the active folder and immediately you get in rename mode, to change the default New File.txt. We saw that changing extensions is potentially dangerous that's why xplorer² selects only the base name when you rename 
| For plain text files, changing extensions is legitimate, e.g. changing a newly created file from New File.TXT to Stdafx.CPP. If you change the extension with inplace rename, you will be pestered by warnings against it. For fewer warnings of this kind use File > Change type menu command. This is also useful when extensions for known file types are hidden from system folder options. |
|
Only local filesystem files and those in USB-connected hard disks are moved to the recycle bin; other locations are deleted directly. Files that cannot be recycled include:
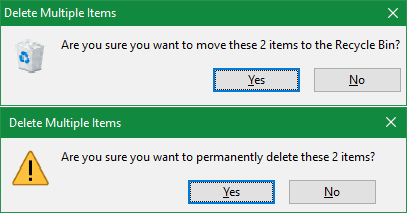
You must be extra careful when you delete files in any of the above folder types. It is recommended that you have delete confirmations enabled (using recycle bin properties) as an insurance policy. Delete confirmations that go into the recycle bin look slightly different than permanent deletions. Please study the following confirmations; the second one (permanent) requires special care because it is very hard to undo. |
|
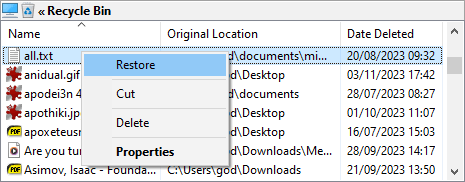
You can browse recycle bin in xplorer², just like any other special folder in the shell namespace. Note that instead of the regular filesystem columns, you see details like Original location and Date deleted, which is information related to this special folder. Sort by Date deleted column to see the most recently deleted items first. Then select one or more deleted items and use Restore context menu command to undo their deletion:
Don't forget to empty your recycle bin from time to time, using the context menu on the recycle bin desktop icon. If you accumulate too many recycled items, deletion will become sluggish.
|
|
When you drag, you must find the desired drop destination. Most UI elements in xplorer² window accept drops, like the active and inactive folder pane, the folder tree and so on. If a pane contains too many items and you cannot see your target, you can scroll the window (while dragging) if you place your mouse pointer near the window edge where you want to move towards. You can drop to a different folder tab if you leave your mouse a second or two over a hidden tab — it will then activate to accept your drop. This spring-loaded folder feature also works in the tree, where you can open tree branches by hovering over them.
Drop targets are usually folders but you can also drop on program icons (EXE files, they will receive the dragged files as arguments to open them) — this method also works for user commands you place on a toolbar. Naturally you can drag-drop to other windows programs, not just inside xplorer². Use <ALT+TAB> or the windows taskbar to select a different window to drop into.
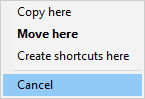
The default file operation when dropping is Move if you are working within the same drive (e.g. reorganizing files under C:\) or Copy when you drop to a different drive (e.g. from C:\ to E:\). You can override these defaults using keyboard modifiers:
|
|
Except for regular information like file sizes and dates, xplorer² offers access to the contents of files, as long as they are in normal or near-normal (e.g. zip) folders.
The most convenient option is to turn the quick viewer pane on from View menu. Then as you move the cursor around in a folder pane you can see the preview of the focused item. The quick viewer can show text (including RTF, Unicode and UTF-8), graphics, HTML, office documents, even audio and video files. There are 2 modes selectable by tabs at the base of the previewer panel. The figure below shows draft and native previews of the same document. The left one is plain text, the right one shows also formatting.
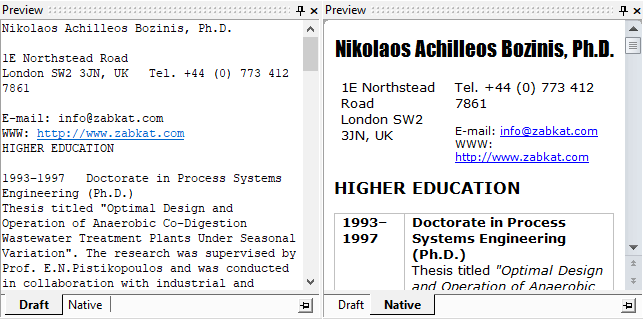
The Draft tab shows fast previews of most file types.
For photos and graphics of all sorts you see a large thumbnail, which can be zoomed in/out and rotated through a toolbar  or touch gestures. xplorer² uses windows system thumbnail cache to offer quick image previews. It embeds Windows Media Player to offer previews of music and movies. or touch gestures. xplorer² uses windows system thumbnail cache to offer quick image previews. It embeds Windows Media Player to offer previews of music and movies.
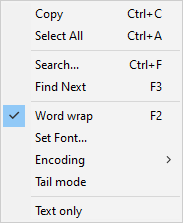
For plain text files like TXT or CPP, it loads and displays the first few KB (the limit is adjustable). Using the context menu (see right pic) you can change the preview font (Set Font command), select and copy text, Search for text in the preview etc. Normally xplorer² can figure out the encoding automatically; for the rare cases it won't, use Encoding submenu to pick a code page or indicate the text format (UTF-8, unicode etc). If you turn Tail mode menu command on, xplorer² loads the last few lines of the text file instead of the beginning. This makes sense for log files. Finally if you turn on Text only menu, xplorer² will show all file types as text — e.g. images will show a hex dump (47 49 46 38 GIF8 00000) instead of the thumbnail. Select this menu item again to turn on regular image previews. Advanced office document types like PDF, DOC and XLS are also previewed as unformatted text using text filters meant for desktop search. When a document was scanned for text (e.g. a file search result), any matching keywords are highlighted so you can quickly see the surrounding text context. Use Find next menu to find the next search keyword match.
The internal text viewer called editor² is also aware of search hits. If you open a plain text file (a search result) in editor² using File > View menu, then <F3> key will find the keyword you searched for in xplorer²!
|
|
The little pin at the right end of the previewer's tab strip is the equivalent of View > Lock viewer menu command. When you lock the preview panel, it will stop following the focused file and remain fixed to the present file. A possible application is to listen to music while you browse. Unpin the previewer to resume normal previewing as you click around the panes.
Click on Native tab to switch to more accurate, slower previews. This mode is identical to the preview panel in windows explorer. To see accurate previews for your file types, you need to install preview handlers. Luckily when you install an office suite, it automatically adds preview handlers and text filters for its associated file types. If you have problem with certain document types, you can search for preview plugins.
As you can see in figure 14 above, native preview looks nicer, and you can preview the entire document, not just the first few lines. However it feels cramped in the narrow space available, so opening the document in its native program may be the better option. Draft mode is quicker and adequate for most preview needs.
The previewer is one of the adjustable panes so you can resize and dock it to various locations. To see bigger previews you can use the splitter bar to resize the pane. But this larger preview comes at the expense of other panels, that end up shrunk.
Instead of a permanently docked preview pane, an alternative method is View > Peek preview menu, which pops a large window previewing the selected item. Hit any key (except PageUp/Down) and the preview goes away! The preview is similar to the Draft quick preview tab, so it will show images and plain text (including text extracted from DOC/PDF/XLS documents) only. For music/video or accurate Native preview you must still use the regular quick preview panel.
Likewise you can press both left and right mouse buttons together simultaneously to preview the file under the mouse cursor. Just enable "Mouse peek preview" from options. Then let go of the mouse keys and the preview will go away!
A variation of this command can show popup previews for two files simultaneously. Select 2 items that have thumbnail previews (e.g. photos) and press <Alt+Shift+Q> keys and a popup window will show their large previews side by side for easy comparison. This is especially useful when considering similar photos before you decide which one to keep. Press any key or click the mouse to hide the preview window.
NOTE: if just one item is selected and you are in dual pane mode, this command compares the focused items in the left and right folders.
Edit > Copy columns menu likewise copies all details, but only for selected files. The information is placed in the clipboard as text, which you can paste wherever you like.
This command also works in the folder tree where it copies all expanded branches under the selected one.
If you are interested in filenames only, there are 2 options in Edit menu:
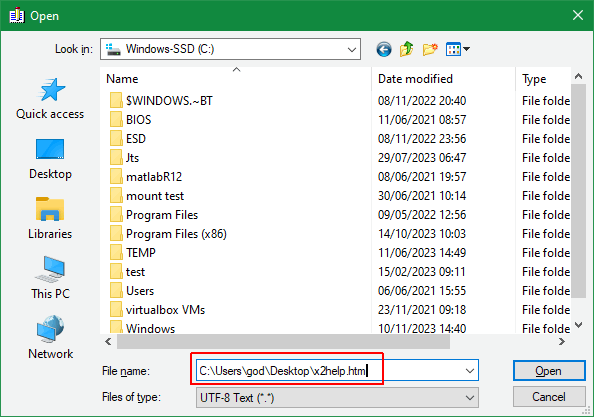
You don't have to find the exact folder to open, pasting the full path will do the job nicely! Here is a demo video
On a different note, Edit > Extract text menu command is meant for formatted text documents like DOCX and PDF, where it will extract pure (unformatted) text and save it in a separate file, using text filter modules available for desktop search. For example text from ESTATEMENTS.PDF will be saved in ESTATEMENTS.PDF.TXT.
One possible use is to compare PDF documents for modifications, using a text comparison tool like WinDiff.
If there's no text to extract you will see an error message on the statusbar:
![]()
The filesystem shell supports many file properties, simple stuff like size and file attributes, as well as more advanced ID3 tags, document information like subject and author and so on. Some of these properties are innate and cannot be changed directly (like file size in bytes), whereas others are adjustable like various file dates. You can browse file details in a number of ways:
|

|
The most intuitive way to change properties is straight into the detailed view mode. Like in-place file rename, you can slow double-click (click twice but not too fast) on any property that is changeable, and you can edit its contents as such:

You can think of the active folder pane as a little MS Excel spreadsheet, where you can change cells of various properties, like date modified as above. All properties are edited as text, so you must make sure you stick to the expected format — or an error will result. In the above pic, Name, Modified and Keywords can all be modified in-place, but Size cannot (it is innate.)
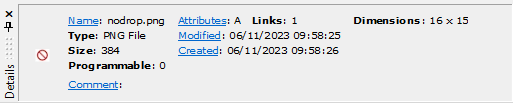
In figure 15 a PNG (image) file happens to be selected. We can see a little thumbnail preview on the left, followed by standard information as Name, size and date modified, but as this is an image we also see its dimensions in pixels. The most important type-specific information is shown e.g.:
Properties that appear as links (like name and comment in figure 15) can be modified. If you click on such a property link, it's like you used the menu command that changes said property. Innate properties like Size just show a bold title, since they cannot be changed directly.
|

|