|
xplorer²
Exponential growth to file management productivity
|
Program Interface overview 
xplorer² window presents the contents of one or more folders, and offers a palette of file management commands to work with the files you see. The figure below demonstrates all the window features — it may look complicated but you can turn off GUI elements you don't need using View menu.
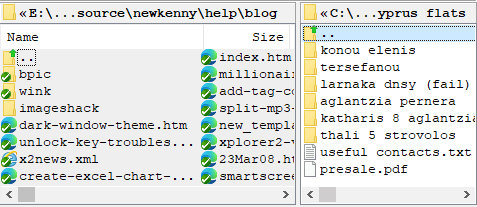
Figure 1. The main window
Here is a brief description of the main window elements, by their reference number in the red circle:
- ① Active pane.
Contains the items in the active folder, the one you are working with. Each file is displayed in a list with its name and an icon representing its type, as in windows explorer. In this example the view is set to details, showing file information in columns. The pane's titlebar is showing the folder's full path, whose parts are clickable. The active pane is drawn with a brighter background color for easy identification. All menu and toolbar commands operate on items in the active pane.
- ② Second pane.
In dual pane mode, you get to browse another folder, facilitating easy file transfers. The inactive folder behaves like the active pane, only it shows with a darker background color. The inactive pane will become active if you click on it or press <TAB> key, deactivating the previously active pane. The two folder panes are independent and can be setup differently (e.g. in the figure the second pane is set in list view mode). If you don't need the second pane, turn it off using View > Dual pane menu command.
The menu bar is organized in categories. There are top level menus like File and View, which open up submenus, and some items in those may open a sub-sub menu, and so on. The separator > is used to refer to menu command "paths" to guide you finding them. E.g. View > Dual pane means you open the View menu and use Dual pane command inside it.
- ③ Folder tabs.
Each folder pane can host multiple folders in tabs (there are 4 shown in the figure). You open a new tab using File > New tab menu command. When first created, a tab inherits the active pane's properties (folder browsed and pane style), but from then on it is independent. You can change the style to something else and browse to different folders. The label of each tab shows the folder name (the full path is shown as a tooltip). Tabs let you switch between folders quickly, but note that only one can be active at a time. Click on a different tab to activate its folder. Use [x] button to the right of the tab strip to close the active tab.
- ④ Menu bar.
The standard windows menu bar holds all the program commands, organized in standard file management categories. Each menu item shows a brief help message on the statusbar ⑬ explaining its use. Popular commands show a little icon, and if there's any keyboard shortcut (accelerator key) it is also shown. If you don't use most of the commands, you can switch to Plain menus ticking the relevant program option, then only the most basic commands will show.
- ⑤ Address bar.
Here you type the path (address) of the folder you want to browse in the active pane. It holds a history of recently and frequently browsed folders in a drop-down section (use the down-arrow
 to access them). xplorer² addressbar isn't clickable but you can use each folder's titlebar pane for the equivalent functionality. Addressbar also accepts typed DOS and windows external commands to execute. Here you will also find the quick filter box where you can quickly filter, select and search for files in the active folder. Right click on any toolbar to turn the addressbar on/off using the context menu.
- ⑥ Drivebar.
This toolbar shows all top level disk drive letters, both internal and externally connected via USB cable, as well as mapped network drives. Click on any drive button to browse the root of said drive. Root drives are also available from a pane's titlebar. Use View > Toolbars > Drivebar submenu to turn the drivebar on/off.
- ⑦ Command toolbar.
Holds the most frequently used menu commands as buttons for quick access. If you right click on the toolbar you can use the context menu to turn buttons' Text labels on/off, use large or Small icons and Customize which buttons appear on the toolbar (any menu command with an icon can be easily placed on the toolbar).
- ⑧ Quick Preview.
This resizable and detachable panel shows a preview of the selected file, if possible, depending on the content. So for photos you will see a thumbnail, for videos a mini media player and so on. The draft preview tab is for quick and dirty previewing; switch to native preview tab for more accurate office and PDF previews (including formatting, not just plain text). Right click for the context menu which allows to search for text, choose the preview font and some other text content related menu commands. Use View > Quick viewer menu command to turn this pane on/off.
TIP: Press both mouse buttons on a file to see its draft preview in a big, easy to dismiss peek preview popup window
- ⑨ Folder tree.
Shows a hierarchical tree representation of your entire filesystem, including local and network folders. Use the arrows to extend (or collapse) tree branches and reveal subfolders. Optionally you can manage a quick access list of your mostly used folders for easy access in a separate tree branch. A number of tree options exist, e.g. showing two trees in dual pane mode, automatically aligning the tree with the active folder and so on. Use View > Show tree menu command to show and hide the tree.
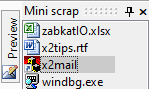
- ⑩ Mini scrap.
Here you can drag-drop files and folders for easy access, e.g. files or programs you frequently open, folder bookmarks etc. Scrap windows are generic containers for files and folders that can be located anywhere in your filesystem; the miniscrap is a full file manager pane but it is mostly used as a quick access list. Activate using View > Mini scrap menu command.
- ⑪ Help videos.
You will find a selection of demo videos that explain how the program works. It is recommended you watched at least the first few ones that explain the basic window and file operations. Help > How do I? menu command turns this pane on/off.
- ⑫ Details pane.
Shows a small thumbnail preview and type-specific information for the selected file in the active pane. For example, for images you see their dimensions, for movies the total duration etc. Some basic properties can be changed by clicking on the underlined "links", offering shortcuts to the equivalent menu commands. This pane can be customized to add any file property you want to see. Enabled using View > Details pane menu command.
- ⑬ Status bar.
The bottom edge of the window shows information about the active item and any selected files and other status information as the presence of a visual filter that hides some of the folder contents. Hover the mouse pointer over a status bar pane to see what it does in a tooltip. When you issue file management commands, the progress and results (or errors) are shown on the statusbar as a message that automatically goes away after a while. If you don't want to see the statusbar, turn it off from View > Toolbars > Status bar menu; in such a case error messages will show up as messageboxes.
You only work with one of all these panes at a time. The easiest way to switch activation is to click on a pane with your mouse, but there are also keyboard shortcuts that jump to particular panes — e.g. <SHIFT+TAB> focuses the addressbar ⑤.
As with all windows programs, xplorer² can be resized or maximized to see more file contents. Within the window, the dual panes and all the peripheral panes like the tree can be resized using splitter bars. Place your mouse over the lines dividing the panes, and it should turn into a resizing cursor  ; then you can grab the splitter with your mouse and move it left/right (or up/down) to change the relative pane sizes.
As in windows explorer, with xplorer² you work with one folder at a time, which is the active tab of the active pane (either ① or ②). The active folder path is shown in the addressbar ⑤ and in the active pane's titlebar (the window titlebar is showing summary paths of both active and inactive panes). Use the folder tree, drivebar or type paths in the addressbar to browse a different folder.
xplorer² dual panes share the auxiliary panels like drivebar and tree. You won't see two separate drivebars for example; whenever you click on a drive letter it will affect the active pane; hold down <ALT> key as you click on a drive button to change the folder in the inactive pane. <ALT> modifier works for all browsing actions.
|
In the active folder pane you select one or more files with the mouse or the keyboard (or using a command from Mark menu) to operate on them, using a menu or toolbar command.
Selected items show with a blue background color. In multi-selections, a single item is the focus, which is drawn with a dotted rectangle as in the pic to the right. It is usually the item you clicked on last. The focused item is special as it is the one that gets previewed in panel ⑧, whose details show in pane ⑫ and the statusbar. When only one item is selected, it is also the focus obviously.
|

|
Selecting multiple files can be tricky, as one accidental click may unselect all files.
xplorer² doesn't offer checkboxes for selection; for safe selection use Mark > Sticky selection menu command. When this mode is active, clicking on an item toggles its selection state without affecting any previously selected items. Use Mark > Sticky selection again to turn this mode off and resume normal item selection.
Many commands require a selection to work. If there's nothing selected then the command is disabled; the menu command or/and toolbar button appear ghosted to indicate the disabled state. Other commands are toggles, turning a feature on/off: when enabled a tick appears on the menu item — or the toolbar button appears depressed. On the right you can see examples of normal, disabled and ticked menu and toolbar states
Command availability also depends on the folder type being browsed; some commands are only available in regular (filesystem) folders and will be disabled if you are working in a special folder like ThisPC or Control Panel.
|

|
xplorer² uses context sensitive menus depending on where you right click on. It presents the commands that are relevant to the area you clicked. For example if you right click on a tab you see tab-related commands, if you right click on the list header you see commands related to columns and so on. Thus you don't need to search among the hundreds of main menu bar ④ available commands; always try a right click first.
xplorer² user interface is using standard windows OS components that are easy to automate with accessibility tools (NVDA/JAWS for visually impaired users).
Further reading
◪ xplorer² main window flexibility: screenshots with possible
pane arrangements
Working with files
A standard list view windows control shows the files (and subfolders) of the active folder. This is exactly as the content pane you see in windows explorer, and behaves the same, e.g. a double click on an item will open it. Here are the main parts of the active pane:

Figure 2. The active folder pane (and view mode submenu)
- ① Titlebar.
Shows the full path of the browsed folder. The path segments are clickable, offering an easy way to browse a parent folder. If you right click on a path segment it pops a menu with its subfolders allowing you to select any neighboring folder. The leftmost ThisPC
 icon pops a drive selection menu for all the local and external drive letters when clicked.
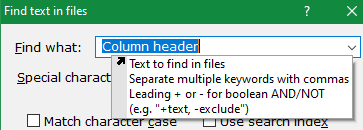
- ② Column header.
When you see file details like name, size and date modified, the list header shows the column names and sort order information. Click on any column to change the sort method and ascending/descending sort direction. In the pic above pane contents are sorted by date modified (descending), as you can tell by the little arrow over the column

Drag the column header splitters to resize a column, or double click on the divider to automatically size the column based on its file contents. If you right click on the header you can Select columns from the context menu. There are hundreds of file properties to choose from.
- ③ Folder contents list.
Shows the files and subfolders of the browsed folder, see below for more details.
- ④ Infobar.
This is like a separate status bar for each pane, showing properties for the focused (selected) item. Right click on the infobar to choose the columns you want to see. It also can show information about the selected items. Use View > Toolbars > Info bars menu command to turn it on/off.
The folder contents are shown with file type icon and the filename, and possibly more details. Use View > Pane style submenu to choose the preferred viewing mode (this is also available from the background context menu, when you right click on a blank spot). The most important view modes are:
- Details (as in the snapshot above). Shows file properties, each file takes a whole line
- Thumbnails. This mode is for folders with lots of photos or videos, where you get to see a thumbnail preview and a filename only. You can combine details with a small thumbnail using Detailed thumbs view mode.
- List mode. This only shows a small icon and the filename, but it is the most compact, allowing you to see many items simultaneously. It can be combined with infobars or the details pane to see properties for one item (the focus).
If a folder contains too many items, horizontal or vertical scroll bars appear so you can see all the contents. You can quickly jump to a particular file name if you start typing a few starting letters of the name rather quickly. If you type 4 or more letters then you activate the quick filter box that will show you only files that match the name fragment you typed.
You manage files by clicking on them to select them, then use any toolbar or menu command. Right click on the selected files to show the standard shell context menu with windows explorer commands like copy, delete, rename etc. You can drag selected items with the mouse and drop them to other locations e.g. move them to different folders.
|
Another standard shell item is the background menu. Find an empty spot (without any text information) and right click to see the menu. If you have difficulty showing the background menu — can't find where to click? — then right click on the folder icon on the pane's titlebar ①. In there you will find Explorer submenu with more shell related commands, e.g. create new word documents etc. To see extended commands press <SHIFT> key as you right click.
|
|
Dual panes and tabs
When transferring files you need to see both source and destination folders. That's why xplorer² shows two folders simultaneously, so you can copy files easily. Dual panes are also useful for comparing and synchronizing folders. xplorer² also allows browsing many folders simultaneously in tabs, but only two folders will be visible at any given time. Inactive tabs are hidden from view.
When you are not copying or comparing folders, you can turn off the dual pane mode with View > Dual pane menu command, giving you more room to work with folder contents. Use the same menu to turn dual panes back on. The main window figure above shows the dual panes stacked vertically, but you can also place them side by side with View > Tile horizontally menu. Drag the splitter (divider line) to make one pane bigger than the other; <CTRL+E> keyboard shortcut will make the panes equal size.
Only one pane is active at a time, the one with lighter background color (the left one in the picture to the right). All menu commands operate on the active pane. The right hand side pane is inactive, drawn with a darker background color. Press <TAB> key to make the other pane active — or click on it with the mouse. The background colors will swap, signalling the change of activation.
|
|
Usually both panes are set in the same style, e.g. both showing details, however you can configure the 2 panes independently. Click on the first pane to make it active and choose a mode from View > Pane style menu, e.g. List. Then click on the other pane to activate it, and choose its view mode from the same menu. Remember all file management occurs within the active pane, whichever it may be. It is the single focus of your workflow.
You can add more folders using File > New tab menu command. A freshly opened tab inherits the folder and view properties of the previously active tab, but from then on it is totally independent. You can browse different folders, change its style to thumbnails, or whatever you desire.
You can create new tabs from the folder tree and the miniscrap pane too, if they happen to be active. Whichever folder you have selected in the tree will be opened in a new tab. If you have more than one folder selected (this is possible in the miniscrap), then multiple tabs will open, one for each item selected.
You probably have worked with tabs before (e.g. your internet browser) so you will know about the little tabs that represent each folder. Only one tab is active at a time; click on a different tab to bring up another folder (and simultaneously hide the previously active folder). You can add tabs for both the left and right (dual) panes, however only the 2 visible folder tabs are in business (one active, one inactive). You can open as many tabs as you like, but if you have too many of them, it may get confusing — use Window > Find tab menu command in such cases to find a particular folder by its (partial) name.
|
Each tab shows the folder icon and its name. To see the full path, hover the mouse on a tab and a popup window will appear showing the path. The active tab is drawn with an orange highlight to tell it apart (if you cannot see this color use advanced options, "Folder tab highlight"). You can have tabs on top or to the bottom of the pane to suit your style.
|
|
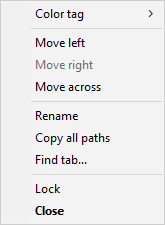
To close a tab you can double-click on it or press <CTRL+F4> keys. Use Window > Close all tabs menu command to close all tabs except for the active one. If you close a tab by accident, you can bring it back using Window > Reopen tab. You will find more tab related commands if you right click on a tab to see its context menu.
- You can move a tab left or right using the respective menu commands. You can also drag-drop a tab to a different location. Move across command sends the tab to the inactive (dual) pane.
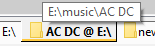
- You can make a tab stand out by giving it a color tag (this actually tags the folder) or Rename it — then you see your own tab title instead of the folder name.
- Copy all paths menu command copies all the paths as clipboard text. Paths are separated with commas. One possible use is to start a file search inside all tabs.
- When you Lock a tab, then you freeze its location. Locked tabs will not change folders. If you attempt to change folder, a new tab will open. Locked tabs show a little lock
 instead of the folder icon. Use Lock menu again to unlock a tab. For more information here's a demo video instead of the folder icon. Use Lock menu again to unlock a tab. For more information here's a demo video
|
|
You can save a set of folder tabs using Customize > Folder groups > Add current menu command. Then you can easily restore the set, picking it from folder groups menu again. The same menu appears when you right click on the empty space past the last tab (or on the [X] button to the far right of the tab strip). The list of tab sets is managed in the same way as bookmarks, so you can make them easily accessible with Organize menu eg. you can add a folder group on any toolbar. If you want to change the folder tabs in a previously saved set, setup the active pane with the tabs you want, then save the set with the same name.
Moveable panes
Except for the dual panes showing folder contents, all the other panes are auxiliary and optional. This includes toolbars and the preview, tree and other panes appearing in Figure 1 (panes ⑤ — ⑫). You turn them on and off using commands in View menu. All these panes share the same functionality, they can be resized, docked or floated, even minimized to a button, as will be shortly explained.
Let's start with the toolbars, including the addressbar. Toolbars can be rearranged with the mouse, if you drag them by their handle on the left edge, that looks like a dotted vertical line
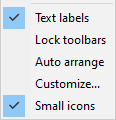
 . You can put two or more toolbars in the same row, or split them into separate rows. Or right click on a toolbar and pick Auto arrange command from the context menu, if you don't mind the default widths. Other commands in the toolbar context menu:
- Text labels turn button labels on-off. You can turn off labels to save space; in such a case you can see the label as a tooltip window when you hover the mouse on a button.
- Tick Small icons to switch to smaller button images, again in the interest of saving space. Or tick the option off to see larger, more clearly identified icons.
- Once you are done arranging the layout use Lock toolbars to fix their position. The drag handles disappear. The only way you can move the toolbars is if you use the menu command again to unlock them (toggle)
- Toolbars can be customized, so you can remove default buttons you don't need, and add the menu commands you use more frequently for easy access.
|
|
All peripheral panes (tree, quickviewer etc) can be rearranged to taste if you grab them by their titlebar and move them around to another side of the xplorer² window (all 4 sides are available for docking). An outline rectangle indicates the new docking location. You can have more than one pane docked to the same side. Using splitter bars you can resize both the entire dock side width (or height for top/bottom docks) and the relative sizes of panes within each dock. For clarifications please watch the demo video
If you hold down <CTRL> key while dragging a panel it will stay floating (detached). This way you can make it bigger without affecting the usable area of xplorer² window. Another space saving idea, especially for panes you don't need visible all the time, is to have them minimized. Use the little pin  on a pane's titlebar to auto-hide it. It then turns into a button (see Preview vertical button in the image to the right). If you hover your mouse over such a button, the minimized pane appears, taking up the entire side of the window. Move the mouse away and the pane will again hide. This is best understood with the demo video . The little [x] to the right of the titlebar will permanently close a panel. All these actions (float/dock/etc) are also available from a titlebar's context menu. on a pane's titlebar to auto-hide it. It then turns into a button (see Preview vertical button in the image to the right). If you hover your mouse over such a button, the minimized pane appears, taking up the entire side of the window. Move the mouse away and the pane will again hide. This is best understood with the demo video . The little [x] to the right of the titlebar will permanently close a panel. All these actions (float/dock/etc) are also available from a titlebar's context menu.
|
|
Once you setup the panes to your liking, use View > Toolbars > Lock dock sites command to fix their position. Note when you resize the entire xplorer² window, the dock widths and heights are adjusted proportionately, to keep the same relative sizes.
Folder tree
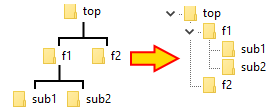
Filesystems are organized like a folder tree, one folder can have subfolders, and these in turn can have sub-sub folders, and so on to greater tree depths. Folders on the same level are called siblings, and their direct subfolders are their children. Windows represents tree hierarchies in a more compact fashion using indentation to represent levels. Sibling folders are at the same (left) indentation, and their children are indented further to the right, as you can see in the pic to the right. Dotted vertical lines help identifying the branch levels.
Most people are familiar with tree controls, where the little arrows in front of each folder node are used to expand and collapse a sub-branch. If you prefer the keyboard, use up/down arrows to select a folder, then use right and left arrow keys to expand and collapse a branch, respectively.
|
|
xplorer² folder tree can be turned on/off using View > Show tree menu command, or pressing <CTRL+T> keys. It contains the entire filesystem starting with the Desktop root node. Once you find your desired folder, expanding tree branches as necessary, click on it and its contents will be read in the active pane. The selected folder will appear with bold letter in the tree. If you are a keyboard person, use the arrow keys to locate your folder. With the default "single click to change folder" option the last folder selected will be activated (there's a small timeout). If you want to browse the tree without activating folders, either disable the single click mode, or hold down <ALT> key as you move around the tree nodes.
As the name suggests, the folder tree only shows folders, not files, but there's a loophole. ZIP archives and other compressed formats (7z, RAR) have a folder structure that can be browsed by xplorer². If you want to see compressed folders and subfolders in the tree, untick the
advanced option "Sort zip folders as files"
Except for choosing folders to browse, the tree can be set to follow the folder you browse in the active pane. This makes sense if you consider that you can switch to folders with all sorts of means in xplorer², not just with the tree. This behavior is enabled ticking "Keep synchronized with folder in active view pane" tree option. Then you can see the nearby siblings of the active folder. Without this setting, you can manually align the tree and folder pane using View > Locate in tree menu command.
By default xplorer² shows only a single tree that is shared among the dual folder panes. Some people prefer to have a separate tree for each pane, and this is yet another option called "Show 2 trees". In this setup, the tree(s) become part of the dual panes and cannot be moved around the docks.
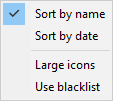
Each tree branch is arranged by Name, but it is also possible to sort sibling folders by date modified, using the background context menu, which displays when you right click on some empty space. With the same menu you can choose whether you want small or large folder icons (toggle). Finally you can turn the folder exclusion filter on/off with Use blacklist menu.
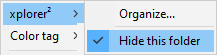
The entire tree namespace may include folders you never use, e.g. Libraries or some duplicate folders that appear in multiple locations. You can hide such unwanted folders by right clicking on them and then picking xplorer² > Hide this folder context menu command. Hiding a folder automatically enables the blacklist. If you want to see all the folders again (perhaps to un-blacklist some), pick Use blacklist from the background menu, to turn off the exclusion filter.
|
|
Formerly blacklisted folders have Hide this folder menu ticked, just untick the menu item to cancel the blacklisting. This command appears in the customizable xplorer² submenu, that is added on top of the standard shell context menu for files and folders. Note that only top level folders can be blacklisted.
For more information watch this demo video
|
|
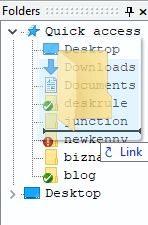
Quick Access List
The tree holds all your folders and their subfolders in a huge and unwieldly structure. The Quick Access List (QAL) is a user configurable mini-tree where you put the folders you use the most. In fact it isn't even a tree, it is a flat structure that happens to be stored in the folder tree under Quick access node — which itself opens the system Recent items folder when clicked.
To begin with QAL is populated by your most frequently used folders, but you can add more folders with drag-drop
(make sure you watch the demo video). Select a single folder either from the tree or a regular pane, and drag it over the QAL tree section. Be careful to drop it inbetween existing folders (you will see a horizontal insertion mark and the drop action will be Link), otherwise you'll end up moving the new folder inside the one existing in the QAL! For safety you can drag-drop new folders using the right mouse button, so if something goes wrong you can cancel the drop. Using drag-drop you can also reorganize items in the QAL, e.g. move them up or down.
Folders in the QAL can be used as bookmarks for browsing, drop targets for copy operations etc. The QAL branch can do everything the "normal" tree nodes do. There are only two exceptions:
- You can rename items in QAL without affecting the real folder name. This way you can provide more descriptive names and avoid duplicate folder names. Use the context menu or select a folder and press <F2> to rename it.
- When you press <DEL> key on a QAL folder, it merely removes said folder from the list, whereas if you tried the same in the "regular" tree, you'd actually delete the folder itself! To avoid mishaps, right click on the unwanted QAL item and use Remove from pane context menu command, which is clearer to understand.
|
|
If you don't need the QAL, untick "Show quick access list" tree option. Then only the desktop-rooted folder hierarchy will show. Also note that QAL is not available when you opt for 2 trees.
Windows explorer also has a quick access list, but that is only related to xplorer² QAL by name. Adding or removing folders in windows explorer QAL has no effect to xplorer² QAL (and vice versa). Use drag drop to manage the QAL as explained above.
Status information
The bottom line of xplorer² window is the status bar. It shows useful information about the program state, selected files and important messages. It is split up in several panes (up to 8, depending on your settings). Most panes show text information, and a couple show icons. If you hover your mouse pointer over a pane you will see a brief information about it in a tooltip, as below:

Figure 3. Status bar panes
- Status and messages. The leftmost pane marked [1] shows the result of the last command (e.g. 10 items found). If there was some problem, it shows an error message with a warning icon (and usually a beep sound)
 . Such messages stay on for a few seconds and then they are dismissed automatically. Double click on the leftmost pane to repeat the last message (in case you didn't have enough time to see it); for extended error information use Help > Last error menu command.
If you prefer error messages to stand out, tick the
advanced option "Always make error messages a dialog...". Then whenever some error occurs, a modal message box will show up which you must acknowledge before you can resume with your work.
- Active item information. The second pane [2] shows size and date information about the unique focused item (the one with the dotted rectangle around it). This is useful when you don't see file details in the folder (eg. if you use list view mode).
- Item index. This pane is off by default but you can enable it through program options (Tools > Options menu, then Advanced property page). It shows the focused item index number in the list, beginning with 1 (first item), 2 for the second and so on.
- Selection information. When nothing is selected this pane shows how many items are in the folder altogether. Once you start selecting 2 or more items, this pane shows how many items are selected and their total size e.g.
 means there are 2 files selected and their total combined size is 1393455 bytes.
- Visual filter indicator. When a visual filter (e.g. a wildcard) is active, obscuring some folder items, a green filter icon appears here; when there's no filtering involved (all items show normally) pane [5] is blank. You can double click on this status bar pane to toggle the visual filter on/off
- Hidden files indicator. Special files like DESKTOP.INI and such with System or Hidden attributes, can be filtered out in bulk if you tick off "Show hidden files" option. In this case the eye icon will appear in this pane indicating some files may be hidden from view. Double click on this pane to toggle hidden files mode on/off.
- Disk free space. The rightmost pane shows the free space in the current hard disk (e.g. if you are browsing C:\TEMP folder it will show the free space in C:\ drive), both as an absolute GB magnitude and a percentage. To see free space for both left & right pane disks simultaneously, use Tools > Free space menu — this will show in the leftmost pane.
- Custom folder indicator. An icon appears at [8] when you browse folders with special view modes (saved folder settings).
For regular folders this pane is blank.
But the status bar usefulness doesn't stop here. If you browse the menu commands, you will see a brief explanation of what each command does on the statusbar! This also applies when you hover your mouse pointer over a toolbar button. It is a mini instruction manual. Often while xplorer² is busy executing one of your commands, a progress bar shows on the statusbar, giving you an idea how much more is left to be done.
Not bad for a little bottom line, isn't it? If nevertheless you don't want any of the above, you can disable the statusbar altogether using View > Toolbars > Status bar menu command. If you disable the statusbar, all error messages will show as message boxes.
Status information is taken from the active folder, wherever it may be (left or right dual pane). If you prefer a separate mini-status bar for each pane, turn on infobars (View > Toolbars > Info bars menu command). You can customize infobar panes using the right click context menu, to show any piece of file information available.
Ribbon toolbar
The ribbon user interface combines the menu bar and toolbar in a tabbed multiline super toolbar UI. It is simpler and groups commands better in tabs and groups within each tab. Use View > Ribbon menu command to turn on the ribbon interface. This will automatically hide the menu bar and toolbar (compare with figure 1)

Figure 4. Ribbon toolbar interface
The ribbon has 3 command tabs (item ② in the above figure).
The basic Home tab contains the most frequently used commands, whereas other tabs offer more detailed control for advanced features. The leftmost File tab is a traditional drop-down menu where you can exit the program, get help, and get back the original menu if you don't like the ribbon!
The command buttons in each tab are split in categories (see ① Browse, Clipboard, etc), or logical groups. Many ribbon buttons are split into a main command like Paste and a drop-down portion that shows variations of the main command (e.g. Paste link). You can get information on what each button does if you hover the mouse over it.
The ribbon offers limited customization support. You can right click on a button you use frequently and put it on the Quick Access Toolbar ③, the little toolbar the ribbon puts on the window titlebar. You can put up there all the commands you need then right click on the ribbon to minimize it, and reclaim the space it uses.
Most of the commands in the full menu system appear in the ribbon, albeit at different, more intuitive locations.
This is a basic choice you have to make early, because if you learn the ribbon version of the commands it will be hard to revert to the menu bar interface (and vice versa).
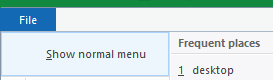
If you want to get the menu bar back, you can remove the ribbon using Show normal menu command under the leftmost File ribbon tab. Or if you just want to use an advanced command that's not available in the ribbon, use the command finder, the little question mark button  on the quick access toolbar.
|
|
Most xplorer² users opt for the traditional menu bar instead of the ribbon UI. Therefore most of this help file is talking about the menu version of the user interface. If you want to use the ribbon and cannot find a particular command described in the help, use the command finder with the exact command name. Also try to use the context menu whenever possible, most UI elements support them with most relevant commands.
Typical workflow experience
When you first install the program you'd probably need to decide how xplorer² window looks like, how big it is, which panes it shows, so that the layout feels comfortable for your style and needs. In fact you can save multiple window layouts, one for each type of task you perform. Other major decisions at this stage are whether to use the ribbon or a normal menu, and whether to opt for dark mode user interface.
Your everyday interaction with xplorer² is to browse one or more folders, then click on files to manage them this way or the other.
xplorer² helps you get to your folders quickly, and ultimately find the files you are after, with pin-point accuracy. Then use menus and toolbars to work with your files.
Most of the time you work in one folder at a time, as your filesystem is organized in your drives. Using scrap windows you can work with items from many folders simultaneously — e.g. modify files in a folder and all its subfolders.
Working with the mouse is easy, but for increased productivity xplorer² is keyboard friendly. Almost everything can be done with the keyboard. Lots of commands have keyboard shortcuts; if you are used to different accelerator keys, you can remap keys to your taste. You will find reminders of keyboard shortcuts in menus
 and toolbar infotips
 so you know that pressing <CTRL+F> is a quicker way to access the file search command!
To move around the various panes, there are many keyboard shortcuts that involve the <TAB> key, e.g. <SHIFT+TAB> jumps to the addressbar. There are more useful hidden keyboard shortcuts in the appendix
so you know that pressing <CTRL+F> is a quicker way to access the file search command!
To move around the various panes, there are many keyboard shortcuts that involve the <TAB> key, e.g. <SHIFT+TAB> jumps to the addressbar. There are more useful hidden keyboard shortcuts in the appendix
When browsing menus and dialog boxes, look out for underlined letters e.g. Browse (you may hold down <ALT> key to see the underlines). For menus just press the underlined letter (e.g. B) and the respective command will execute. In dialog boxes, you can jump quickly to an input field using its underlined letter pressing <ALT+B>. In dialogs, pressing <ENTER> is like clicking on OK button and to cancel press <ESC>.
Here are some concepts to keep in mind for your everyday file management:
- Focus. Despite the apparent complexity of the user interface, there is only one active folder at a time, the pane where you last clicked in. In this active folder, there is only one item that is the focus , again the one you last clicked on. All information panes, previews etc show information about this special file or folder item.
- Selection. Using simple clicking or any precise selection methods, you choose one or more items to operate on simultaneously. All menu commands work with the selected items in the active pane. Note the focused item is usually also selected.
xplorer² is built to be fast, efficient and responsive, even when you work in large folders with thousands of files and complex properties. When it needs to extract slow information, e.g. a movie duration, it does so in a background thread. When you browse a big folder, you can start working with files immediately even though it may seem that the reading job is only half done. xplorer² is busy fetching information in the background and will present it whenever it becomes available. File icons are extracted last of all, because they are not essential to file management.
Most menu commands will open a dialog box that lets you setup the file operation to taste. All these dialogs are described in detail in this documentation. All of them include an OK button you use to start the command procedure, and CANCEL which you click to abort the operation before it even begins — in case you picked the wrong menu by accident. Some dialogs are resizable, look out for the sizing handle  at the lower right corner.
To help you focus on the active dialog, xplorer² shades (darkens) its main window till you finish setting up the dialog's parameters. If you find this behaviour distracting tick the advanced option "Disable main window alpha shading..."
at the lower right corner.
To help you focus on the active dialog, xplorer² shades (darkens) its main window till you finish setting up the dialog's parameters. If you find this behaviour distracting tick the advanced option "Disable main window alpha shading..."
When xplorer² is really busy working on your commands, especially if the job is big and hard, then you need to wait a while (a wait cursor  will show). Most lengthy operations show a progress dialog that lets you see how much is left to be done, as well as buttons to pause or cancel the job altogether, as such:

Some less intensive jobs may show a progressbar on the statusbar instead, which again gives you an idea how much work is left to be done. To cancel such commands press <ESC> key (if it doesn't respond immediately, try keeping ESCape pressed down for a few seconds).
Some jobs need time, and there's not much you can do about it. Usually xplorer² doesn't require any response from you during the work, so you can just leave it unattended. If you want to keep on working with other files and folders, you can use Window > Clone menu to open another xplorer² window (but do so before you get busy), or start another xplorer² instance from its desktop icon. xplorer² is designed to work with multiple windows in a single process, being gentle with your system resources.
During file operations, it may happen that folder contents get changed, files added or deleted or modified. xplorer² senses such changes automatically and refreshes the active folder pane so it stays up to date. This feature is working most of the time but if you find that xplorer² didn't pick up all the changes use View > Refresh menu command to force a re-read of the contents. Working inside a constantly modified folder (e.g. Downloads folder during an active file download) may waste too many resources, so you should consider suspending the autorefresh feature using View > Hold autorefresh menu item.
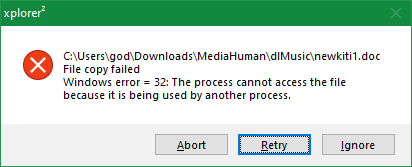
During file operations, problems are possible for a variety of reasons and causes. In case of errors, xplorer² will pause what it's doing and alert you to the problem. Some errors can be ignored or skipped, but it depends on the command being executed, the folder type and so on. Some errors are terminal, so xplorer² will abort the operation and issue a warning message on the status bar (you will hear the dreaded ding sound as well).
In general errors are caused by inadequate permissions, e.g. you are trying to copy into a folder that belongs to another user. Sometimes you can work around UAC restrictions launching an elevated xplorer² process via Window > Administrator menu command. However it is not recommended to run in administrator mode all the time. You can tell when xplorer² is running elevated by the * showing after the program name in the window titlebar. Window > Administrator command is then disabled.
See the troubleshooting section for some common problems and workarounds.
|
|
xplorer² is well tested and stable, so it shouldn't crash or hang very often. There are thousands of active users so real problems get reported and fixed quickly. However you cannot expect taxes and program death <g> so crashes are possible, especially if you use buggy shell extensions. If you find a reproducible bug please report it using Help > Crash information menu command. See the appendix for the kind of information required to troubleshoot crashes and hangs.
Under normal circumstances, xplorer² automatically saves its settings on exit, which means next time you run it, it should look exactly like last time you used it (window size and position, folder tabs, the lot). If you want to start xplorer² at fixed locations, use command line arguments to specify fixed folder paths for the left and right panes.
When xplorer² cannot re-establish connections to folders you browsed last time you used it — e.g. disconnected network drives, some tabs may end up browsing Desktop instead. If you reconnect those remote folders, use Customize > Folder groups > Startup menu to restore the original tab locations.
Input history
Most user interface elements that accept typed input, maintain a history of past inputs (30 items by default). This history is available from the drop-down portion of combo-box controls — the most frequently used UI element. So next time you use some command, you can scan past inputs and quickly reuse them avoiding extra typing.
To access this history, either click on the drop-down arrow button of the combo-box, or start typing and xplorer² will find all the matching items from the history and present them to you as such:
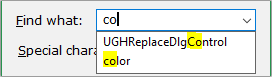
Notice that the partial string you type is matched both at the beginning or the middle of history strings. Once you see the item you need to repeat, press <Down> arrow a few times to select it, then <ENTER> key to close the autocompletion popup. Press <ESC> key to close the popup without selecting anything.
How to get help
xplorer² can do many things for you, so when you reach for advanced commands beyond simple drag and drop, things can get complicated. However there's good help to guide you, right inside the program:
- The statusbar shows brief explanations as you scroll through the menu commands or fly your mouse over toolbar buttons.

- Many dialog box controls show a help tooltip to describe their function, especially the more complicated ones. Leave the mouse hovering over a dialog control and the explanatory tooltip (balloon help) will appear as such:
- Most command dialog boxes are linked to this help file. Press <F1> key (or the question mark [?] on the dialog's titlebar right end) and the help for the current dialog will be loaded, where you will find detailed explanations.
- Use Help > How do I? menu to open the onboard demo video panel. Press <CTRL+F> keys to search within the video panel for the function you need. It is recommended you watched the first few demo videos, they will teach you the basics and give you a quick start using xplorer²
- Use Help > Online support menu to send an email to xplorer² support team. If you have any question, don't hesitate to ask!
There are also many online help resources you can use:
- The Frequently Asked Questions (FAQ) page
- The xplorer² forum where you ask questions and search for previous answers
- Our facebook and twitter pages
- zabkat's youtube channel for more demo videos
- Search the blog for past articles explaining xplorer² and windows file management in general
Use Help > Tip of the day to see bitesize, helpful tips and tricks every time you start xplorer². The tips window is modeless, meaning you can read the tip and try it out at the same time. When you had enough of these tips, untick "Show me tips every day" checkbox — but leave them on for a while, you will be surprised by what there's to learn!
All the tips are available in a single file called X2TIPS.RTF in xplorer² installation folder, if you prefer to search in them, print them out etc.
Further reading
◪ The most useful xplorer² tips and tricks for better everyday file management
|
|
From our experience with customer support, some commands tend to confuse users. In such cases xplorer² shows a 1-off clarifying message. If you don't want to see that message again, tick Don't show this message again and you won't be bothered with it again.
Command finder
If you cannot remember where's the menu command to perform some action, use Help > Command finder menu command. That's the only menu command you need to remember! A search dialog will appear where you can use one or more keywords to find matching commands, and you should be able to find what you're after quickly.
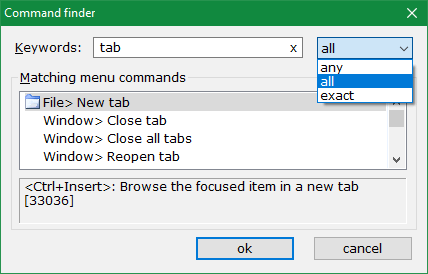
Figure 5. Command finder dialog
The command search algorithm uses menu text and the brief explanation messages that appear on the statusbar describing each command — so you don't need to remember the menu name, you can search for what the command does, too. Use the Keywords input box for your search keywords; any matching menu commands will be listed in the results box. Note searches are case insensitive, so you can use capitals or lowercase keywords. If your query returned too many results or no results, try changing your search keywords.
If you are using a translation of xplorer² GUI, you must use the same language for search keywords. You search for commands as they appear in the menu bar — but you don't need to worry about accented letters: rôle is the same as role.
If you search with 2 or more keywords, you can specify the context from the drop down list next to the keyword box. Use All to find all your keywords (in any order); this option combines accuracy with flexibility ("tab new" will find New tab command). Exact option will only match whole phrases ("tab new" will not find New tab command). Finally use Any match option to find commands that contain any one of your search keywords. This will return many results, perhaps too many — but it is useful when you cannot find a command any other way.
The search results box lists all commands that match your query, one command per line. The full "menu path" is presented e.g. File > New tab means open File from the menu bar and use New tab command from File menu. Some commands may have 3 or more segments if they are in submenus (the > character separates submenus). However you don't need to remember the whereabouts of the menu, just double click on a command in the results pane and you immediately execute the command — just as if you used the menu! If you prefer the keyboard, select the command row and press <ENTER> key to execute it.
The dialog shows the quick description for each matching command, including the accelerator key (
<Ctrl+Ins> in this example), and the actual
command ID number (33036 for new tab). This number is handy for writing
macros
© 2002-2024 ZabKat LTD, All Rights Reserved
zabkat.com