
xplorer² user manual

|
|
xplorer²Exponential growth to file management productivity |

Whether you work with documents in your office or school, or collect photos as an amateur, you will have lots of files. Windows explorer is a basic file manager that will soon annoy you with its inconsistencies and limitations. If you deal with many files and folders you need a heavy duty file manager like xplorer², which will help you be productive, with almost every kind of file you possess:
xplorer² integrates fully with Windows Shell model, so it can browse in all locations, even within "virtual" folders like compressed archives and SFTP. It can utilize more than 300 system file properties and integrates with any shell extensions you install to see more properties, icon overlays, document previews and so on.
With its small size (around 3 MB) and low system resource use, advanced multi-threaded multi-window design for speed and efficiency, customization, a clean minimalist interface and keyboard shortcuts for most frequently used commands, we trust you won't be disappointed for choosing xplorer² for your file management needs. In fact chances are you'll never look back to explorer or any other file manager!
This HTML document has many internal cross references and links that jump to other parts of information, possibly far away from what you were reading. To come back where you were (before clicking on any anchor), use your browser's Back button or press <Alt+LeftArrow> keys.
At major section boundaries, you will find links to jump to the previous and next sections, and the table of Contents .
Each section begins with a quick overview of the subject at hand, followed by more in-depth information. Various popouts are sprinkled all over the place with extra information or warnings. Most sections include further reading articles and demo videos, which you recognize by these symbols:
 Extra information and tips for increased productivity
 Warnings whenever an operation is potentially dangerous or confusing
 Advanced information for expert users, which may be ignored by most
 Links to demo videos, which may be more to your liking if you prefer video explanations to reading manuals
Instructions often refer to commands in the menu bar and are shown in bold print, including the menu "full path", the names of all main and submenus you need to open to access the command. Menu paths are separated by > symbols. E.g. File > New tab means you open File from the main menu and find New tab somewhere in it.
Some explanations include keyboard shortcuts you press to invoke a command, as an alternative to using the menu. Keyboard shortcuts are placed in angle brackets and can combine more than one keys, e.g. <CTRL+C> means you must press CTRL and C keys together.
Most of the information herein regards the professional xplorer² edition. A few advanced commands are only available in ultimate edition and are clearly marked as such with ![]() icon. Note that many features are missing from the free lite version. Such commands are marked with [P] in the lite version menu system
icon. Note that many features are missing from the free lite version. Such commands are marked with [P] in the lite version menu system
Browsing the shell namespace
Folder types |
Folder bookmarks |
Column mode |
Namespace extensions |
Deep path support |
File properties |
Folder views |
Group mode |
Folder view settings
Simple file management
Rename |
Recycle and delete |
Advanced drag-drop |
Previewing and launching items |
Extract information |
Changing properties
Industrial folder management
Filtering visibility |
Selection engine |
Defining hyper-filters |
Quick filter/selection box |
Manage color tags |
Color coding filetypes
Scrap containers
Populating scrap panes |
Managing collections |
Mini scrap
Advanced file management
Advanced copy/paste |
Robust file transfer |
Robust deletion |
Mass renaming |
Changing timestamps and attributes |
Splitting and merging |
File and folder comments (tags)
Examine and maintain your filesystem
Comparing & synchronizing folders |
Checking file transformations |
Visualize disk space usage |
Detecting duplicate files |
Photo cleanup |
Fuzzy groups |
Convert groups to folders
Search for files and folders
Windows Desktop Search
Automation of DOS (and windows) commands
$-Tokens |
Command output redirection |
Automatic script generation |
User commands |
Optional command line arguments
User interface automation
Macro commands |
Programmable columns
User Interface customization
Keyboard customization |
Toolbar customization |
xplorer² context menu |
Program options |
Window layouts
Installation and registration
Ultimate edition |
Program registration |
Suspected bugs |
Troubleshooting
Appendix
Keyboard shortcuts |
Stock properties |
editor² |
Sample UI macros |
All menu commands

xplorer² window presents the contents of one or more folders, and offers a palette of file management commands to work with the files you see. The figure below demonstrates all the window features — it may look complicated but you can turn off GUI elements you don't need using View menu.
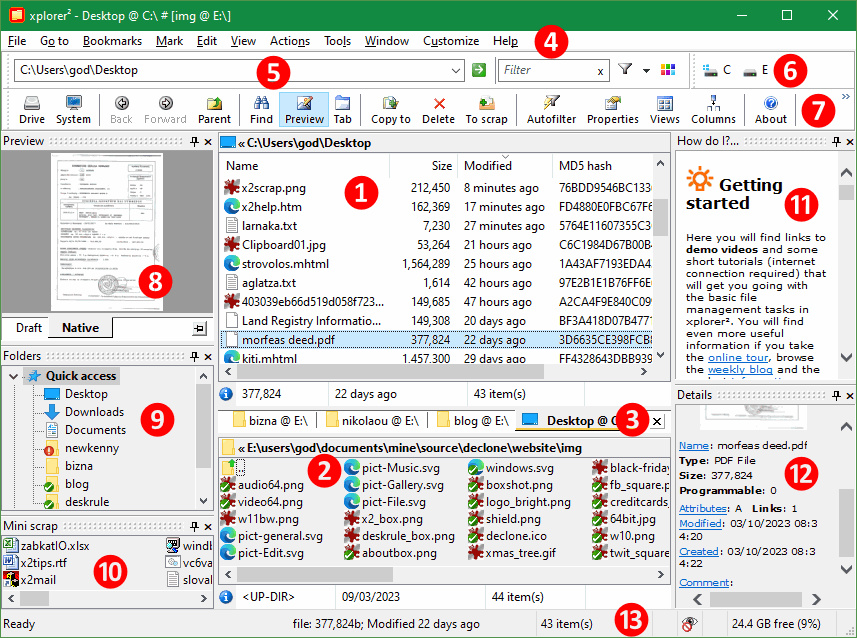
Here is a brief description of the main window elements, by their reference number in the red circle:
 Each folder pane can host multiple folders in tabs (there are 4 shown in the figure). You open a new tab using File > New tab menu command (or click on the rightmost dummy [+] tab). When first created, a tab inherits the active pane's properties (folder browsed and pane style), but from then on it is independent. You can change the style to something else and browse to different folders. The label of each tab shows the folder name (the full path is shown as a tooltip). Tabs let you switch between folders quickly, but note that only one can be active at a time. Click on a different tab to activate its folder. Use [x] button to the right of the tab strip to close the active tab.
As with all windows programs, xplorer² can be resized or maximized to see more file contents. Within the window, the dual panes and all the peripheral panes like the tree can be resized using splitter bars. Place your mouse over the lines dividing the panes, and it should turn into a resizing cursor ; then you can grab the splitter with your mouse and move it left/right (or up/down) to change the relative pane sizes.
As in windows explorer, with xplorer² you work with one folder at a time, which is the active tab of the active pane (either ① or ②). The active folder path is shown in the addressbar ⑤ and in the active pane's titlebar (the window titlebar is showing summary paths of both active and inactive panes). Use the folder tree, drivebar or type paths in the addressbar to browse a different folder.
| In the active folder pane you select one or more files with the mouse or the keyboard (or using a command from Mark menu) to operate on them, using a menu or toolbar command. Selected items show with a blue background color. In multi-selections, a single item is the focus, which is drawn with a dotted rectangle as in the pic to the right. It is usually the item you clicked on last. The focused item is special as it is the one that gets previewed in panel ⑧, whose details show in pane ⑫ and the statusbar. When only one item is selected, it is also the focus obviously. |
|
|
Many commands require a selection to work. If there's nothing selected then the command is disabled; the menu command or/and toolbar button appear ghosted to indicate the disabled state. Other commands are toggles, turning a feature on/off: when enabled a tick appears on the menu item — or the toolbar button appears depressed. On the right you can see examples of normal, disabled and ticked menu and toolbar states
Command availability also depends on the folder type being browsed; some commands are only available in regular (filesystem) folders and will be disabled if you are working in a special folder like ThisPC or Control Panel. |
|
xplorer² uses context sensitive menus depending on where you right click on. It presents the commands that are relevant to the area you clicked. For example if you right click on a tab you see tab-related commands, if you right click on the list header you see commands related to columns and so on. Thus you don't need to search among the hundreds of main menu bar ④ available commands; always try a right click first.
xplorer² user interface is using standard windows OS components that are easy to automate with accessibility tools (NVDA/JAWS for visually impaired users).
You manage files by clicking on them to select them, then use any toolbar or menu command. Right click on the selected files to show the standard shell context menu with windows explorer commands like copy, delete, rename etc. You can drag selected items with the mouse and drop them to other locations e.g. move them to different folders.
| Another standard shell item is the background menu. Find an empty spot (without any text information) and right click to see the menu. If you have difficulty showing the background menu — can't find where to click? — then right click on the folder icon on the pane's titlebar ①. In there you will find Explorer submenu with more shell related commands, e.g. create new word documents etc. To see extended commands press <SHIFT> key as you right click. |

|
|
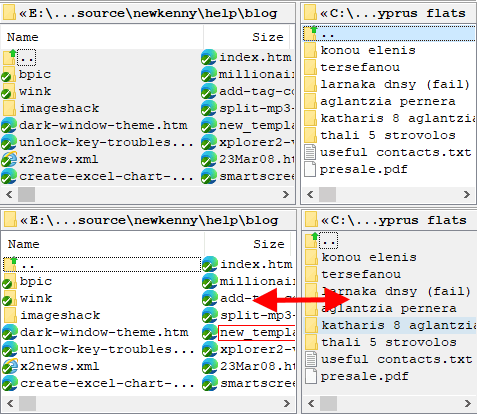
When you are not copying or comparing folders, you can turn off the dual pane mode with View > Dual pane menu command, giving you more room to work with folder contents. Use the same menu to turn dual panes back on. The main window figure above shows the dual panes stacked vertically, but you can also place them side by side with View > Tile horizontally menu. Drag the splitter (divider line) to make one pane bigger than the other; <CTRL+E> keyboard shortcut will make the panes equal size.
Only one pane is active at a time, the one with lighter background color (the left one in the picture to the right). All menu commands operate on the active pane. The right hand side pane is inactive, drawn with a darker background color. Press <TAB> key to make the other pane active — or click on it with the mouse. The background colors will swap, signalling the change of activation.
If you have trouble recognizing which pane is active, you can choose a darker color for the "inactive background" through settings. For extra visibility tick "Bright active titlebar" option.
|
|
You can add more folders using File > New tab menu command. A freshly opened tab inherits the folder and view properties of the previously active tab, but from then on it is totally independent. You can browse different folders, change its style to thumbnails, or whatever you desire.
You probably have worked with tabs before (e.g. your internet browser) so you will know about the little tabs that represent each folder. Only one tab is active at a time; click on a different tab to bring up another folder (and simultaneously hide the previously active folder). You can add tabs for both the left and right (dual) panes, however only the 2 visible folder tabs are in business (one active, one inactive). You can open as many tabs as you like, but if you have too many of them, it may get confusing — use Window > Find tab menu command in such cases to find a particular folder by its (partial) name.
| Each tab shows the folder icon and its name. To see the full path, hover the mouse on a tab and a popup window will appear showing the path. The active tab is drawn with an orange highlight to tell it apart (if you cannot see this color use advanced options, "Folder tab highlight"). You can have tabs on top or to the bottom of the pane to suit your style. |

|
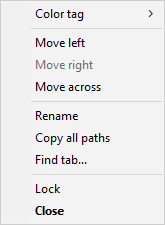
To close a tab you can double-click on it or press <CTRL+F4> keys. Use Window > Close all tabs menu command to close all tabs except for the active one. If you close a tab by accident, you can bring it back using Window > Reopen tab. You will find more tab related commands if you right click on a tab to see its context menu.
|
|

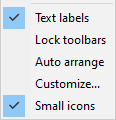
Let's start with the toolbars, including the addressbar. Toolbars can be rearranged with the mouse, if you drag them by their handle on the left edge, that looks like a dotted vertical line
. You can put two or more toolbars in the same row, or split them into separate rows. Or right click on a toolbar and pick Auto arrange command from the context menu, if you don't mind the default widths. Other commands in the toolbar context menu:
|
|
| If a toolbar is too narrow to show all its buttons, a chevron » appears at the right side. Click on the chevron button to see the hidden commands in a menu. |
|
All peripheral panes (tree, quickviewer etc) can be rearranged to taste if you grab them by their titlebar and move them around to another side of the xplorer² window (all 4 sides are available for docking). An outline rectangle indicates the new docking location. You can have more than one pane docked to the same side. Using splitter bars you can resize both the entire dock side width (or height for top/bottom docks) and the relative sizes of panes within each dock. For clarifications please watch the demo video
If you hold down <CTRL> key while dragging a panel it will stay floating (detached). This way you can make it bigger without affecting the usable area of xplorer² window. Another space saving idea, especially for panes you don't need visible all the time, is to have them minimized. Use the little pin  . The little [x] to the right of the titlebar will permanently close a panel. All these actions (float/dock/etc) are also available from a titlebar's context menu. . The little [x] to the right of the titlebar will permanently close a panel. All these actions (float/dock/etc) are also available from a titlebar's context menu.
|

|
Once you setup the panes to your liking, use View > Toolbars > Lock dock sites command to fix their position. Note when you resize the entire xplorer² window, the dock widths and heights are adjusted proportionately, to keep the same relative sizes.
|
Filesystems are organized like a folder tree, one folder can have subfolders, and these in turn can have sub-sub folders, and so on to greater tree depths. Folders on the same level are called siblings, and their direct subfolders are their children. Windows represents tree hierarchies in a more compact fashion using indentation to represent levels. Sibling folders are at the same (left) indentation, and their children are indented further to the right, as you can see in the pic to the right. Dotted vertical lines help identifying the branch levels.
Most people are familiar with tree controls, where the little arrows in front of each folder node are used to expand and collapse a sub-branch. If you prefer the keyboard, use up/down arrows to select a folder, then use right and left arrow keys to expand and collapse a branch, respectively. |

|
xplorer² folder tree can be turned on/off using View > Show tree menu command, or pressing <CTRL+T> keys. It contains the entire filesystem starting with the Desktop root node. Once you find your desired folder, expanding tree branches as necessary, click on it and its contents will be read in the active pane. The selected folder will appear with bold letter in the tree. If you are a keyboard person, use the arrow keys to locate your folder. With the default "single click activation" option the last folder selected will be activated (there's a small timeout). If you want to browse the tree without activating folders, either disable the single click mode, or hold down <ALT> key as you move around the tree nodes.
Except for choosing folders to browse, the tree can be set to follow the folder you browse in the active pane. This makes sense if you consider that you can switch to folders with all sorts of means in xplorer², not just with the tree. This behavior is enabled ticking "Follow active folder" tree option. Then you can see the nearby siblings of the active folder. Without this setting, you can manually align the tree and folder pane using View > Locate in tree menu command.
By default xplorer² shows only a single tree that is shared among the dual folder panes. Some people prefer to have a separate tree for each pane, and this is yet another option called "Show 2 trees". In this setup, the tree(s) become part of the dual panes and cannot be moved around the docks.
|
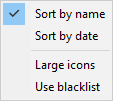
Each tree branch is arranged by Name, but it is also possible to sort sibling folders by date modified, using the background context menu, which displays when you right click on some empty space. With the same menu you can choose whether you want small or large folder icons (toggle). Finally you can turn the folder exclusion filter on/off with Use blacklist menu.
The entire tree namespace may include folders you never use, e.g. Libraries or some duplicate folders that appear in multiple locations. You can hide such unwanted folders by right clicking on them and then picking xplorer² > Hide this folder context menu command. Hiding a folder automatically enables the blacklist. If you want to see all the folders again (perhaps to un-blacklist some), pick Use blacklist from the background menu, to turn off the exclusion filter. |
|
|
Formerly blacklisted folders have Hide this folder menu ticked, just untick the menu item to cancel the blacklisting. This command appears in the customizable xplorer² submenu, that is added on top of the standard shell context menu for files and folders. Note that only top level folders can be blacklisted.
For more information watch this demo video 
|

|

|
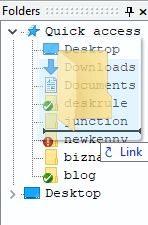
To begin with QAL is populated by your most frequently used folders, but you can add more folders with drag-drop
(make sure you watch the demo video). Select a single folder either from the tree or a regular pane, and drag it over the QAL tree section. Be careful to drop it inbetween existing folders (you will see a horizontal insertion mark and the drop action will be Link), otherwise you'll end up moving the new folder inside the one existing in the QAL! For safety you can drag-drop new folders using the right mouse button, so if something goes wrong you can cancel the drop. Using drag-drop you can also reorganize items in the QAL, e.g. move them up or down.
Folders in the QAL can be used as bookmarks for browsing, drop targets for copy operations etc. The QAL branch can do everything the "normal" tree nodes do. There are only two exceptions:
If you remove QAL folders only to find them present again when you restart xplorer², you must disable the feature that automatically adds the most frequently used folders in the QAL using advanced options (search for "Frequent items in tree")
|
|
If you don't need the QAL, untick "Quick access list" tree option. Then only the desktop-rooted folder hierarchy will show. Also note that QAL is not available when you opt for 2 trees.

But the status bar usefulness doesn't stop here. If you browse the menu commands, you will see a brief explanation of what each command does on the statusbar! This also applies when you hover your mouse pointer over a toolbar button. It is a mini instruction manual. Often while xplorer² is busy executing one of your commands, a progress bar shows on the statusbar, giving you an idea how much more is left to be done.
Not bad for a little bottom line, isn't it? If nevertheless you don't want any of the above, you can disable the statusbar altogether using View > Toolbars > Status bar menu command. If you disable the statusbar, all error messages will show as message boxes.


The ribbon has 3 command tabs (item ② in the above figure). The basic Home tab contains the most frequently used commands, whereas other tabs offer more detailed control for advanced features. The leftmost File tab is a traditional drop-down menu where you can exit the program, get help, and get back the original menu if you don't like the ribbon!
The command buttons in each tab are split in categories (see ① Browse, Clipboard, etc), or logical groups. Many ribbon buttons are split into a main command like Paste and a drop-down portion that shows variations of the main command (e.g. Paste link). You can get information on what each button does if you hover the mouse over it.
The ribbon offers limited customization support. You can right click on a button you use frequently and put it on the Quick Access Toolbar ③, the little toolbar the ribbon puts on the window titlebar. You can put up there all the commands you need then right click on the ribbon to minimize it, and reclaim the space it uses.
|
Most of the commands in the full menu system appear in the ribbon, albeit at different, more intuitive locations.
This is a basic choice you have to make early, because if you learn the ribbon version of the commands it will be hard to revert to the menu bar interface (and vice versa).
If you want to get the menu bar back, you can remove the ribbon using Show normal menu command under the leftmost File ribbon tab. Or if you just want to use an advanced command that's not available in the ribbon, use the command finder, the little question mark button |

|
Your everyday interaction with xplorer² is to browse one or more folders, then click on files to manage them this way or the other. xplorer² helps you get to your folders quickly, and ultimately find the files you are after, with pin-point accuracy. Then use menus and toolbars to work with your files. Most of the time you work in one folder at a time, as your filesystem is organized in your drives. Using scrap windows you can work with items from many folders simultaneously — e.g. modify files in a folder and all its subfolders.
Working with the mouse is easy, but for increased productivity xplorer² is keyboard friendly. Almost everything can be done with the keyboard. Lots of commands have keyboard shortcuts; if you are used to different accelerator keys, you can remap keys to your taste. You will find reminders of keyboard shortcuts in menus
and toolbar infotips
so you know that pressing <CTRL+F> is a quicker way to access the file search command!
To move around the various panes, there are many keyboard shortcuts that involve the <TAB> key, e.g. <SHIFT+TAB> jumps to the addressbar. There are more useful hidden keyboard shortcuts in the appendix
Here are some concepts to keep in mind for your everyday file management:
Most menu commands will open a dialog box that lets you setup the file operation to taste. All these dialogs are described in detail in this documentation. All of them include an OK button you use to start the command procedure, and CANCEL which you click to abort the operation before it even begins — in case you picked the wrong menu by accident. Some dialogs are resizable, look out for the sizing handle at the lower right corner.
To help you focus on the active dialog, xplorer² shades (darkens) its main window till you finish setting up the dialog's parameters. If you find this behaviour distracting tick the advanced option "Disable main window alpha shading..."
When xplorer² is really busy working on your commands, especially if the job is big and hard, then you need to wait a while (a wait cursor will show). Most lengthy operations show a progress dialog that lets you see how much is left to be done, as well as buttons to pause or cancel the job altogether, as such:

Some less intensive jobs may show a progressbar on the statusbar instead, which again gives you an idea how much work is left to be done. To cancel such commands press <ESC> key (if it doesn't respond immediately, try keeping ESCape pressed down for a few seconds).
During file operations, it may happen that folder contents get changed, files added or deleted or modified. xplorer² senses such changes automatically and refreshes the active folder pane so it stays up to date. This feature is working most of the time but if you find that xplorer² didn't pick up all the changes use View > Refresh menu command to force a re-read of the contents. Working inside a constantly modified folder (e.g. Downloads folder during an active file download) may waste too many resources, so you should consider suspending the autorefresh feature using View > Hold autorefresh menu item.
| Once a command is finished, it will announce the success or failure with a little caption window, located under the xplorer² main window. Information messages are blue and errors are orange. These captions go away automatically after a short while, so you don't need to hide them manually. If you prefer less conspicuous statusbar messages, tick the advanced option "Don't use caption error messages" |

|
|
During file operations, problems are possible for a variety of reasons and causes. In case of errors, xplorer² will pause what it's doing and alert you to the problem. Some errors can be ignored or skipped, but it depends on the command being executed, the folder type and so on. Some errors are terminal, so xplorer² will abort the operation and issue a warning message on the status bar (you will hear the dreaded ding sound as well).
In general errors are caused by inadequate permissions, e.g. you are trying to copy into a folder that belongs to another user. Sometimes you can work around UAC restrictions launching an elevated xplorer² process via Window > Administrator menu command. However it is not recommended to run in administrator mode all the time. You can tell when xplorer² is running elevated by the * showing after the program name in the window titlebar. Window > Administrator command is then disabled. See the troubleshooting section for some common problems and workarounds. |

|
xplorer² is well tested and stable, so it shouldn't crash or hang very often. There are thousands of active users so real problems get reported and fixed quickly. However you cannot expect taxes and program death <g> so crashes are possible, especially if you use buggy shell extensions. If you find a reproducible bug please report it using Help > Crash information menu command. See the appendix for the kind of information required to troubleshoot crashes and hangs.
Under normal circumstances, xplorer² automatically saves its settings on exit, which means next time you run it, it should look exactly like last time you used it (window size and position, folder tabs, the lot). If you want to start xplorer² at fixed locations, use command line arguments to specify fixed folder paths for the left and right panes.
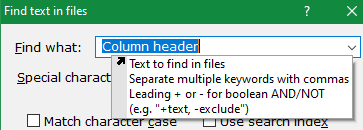
To access this history, either click on the drop-down arrow button of the combo-box, or start typing and xplorer² will find all the matching items from the history and present them to you as such:

Notice that the partial string you type is matched both at the beginning or the middle of history strings. Once you see the item you need to repeat, press <Down> arrow a few times to select it, then <ENTER> key to close the autocompletion popup. Press <ESC> key to close the popup without selecting anything.

|
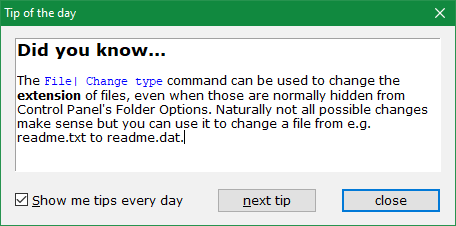
Use Help > Tip of the day to see bitesize, helpful tips and tricks every time you start xplorer². The tips window is modeless, meaning you can read the tip and try it out at the same time. When you had enough of these tips, untick "Show me tips every day" checkbox — but leave them on for a while, you will be surprised by what there's to learn!
All the tips are available in a single file called X2TIPS.RTF in xplorer² installation folder, if you prefer to search in them, print them out etc.
Further reading
◪ The most useful xplorer² tips and tricks for better everyday file management |
|
From our experience with customer support, some commands tend to confuse users. In such cases xplorer² shows a 1-off clarifying message. If you don't want to see that message again, tick Don't show this message again and you won't be bothered with it again.

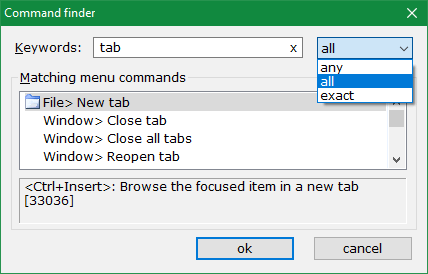
The command search algorithm uses menu text and the brief explanation messages that appear on the statusbar describing each command — so you don't need to remember the menu name, you can search for what the command does, too. Use the Keywords input box for your search keywords; any matching menu commands will be listed in the results box. Note searches are case insensitive, so you can use capitals or lowercase keywords. If your query returned too many results or no results, try changing your search keywords.
If you are using a translation of xplorer² GUI, you must use the same language for search keywords. You search for commands as they appear in the menu bar — but you don't need to worry about accented letters: rôle is the same as role.
The search results box lists all commands that match your query, one command per line. The full "menu path" is presented e.g. File > New tab means open File from the menu bar and use New tab command from File menu. Some commands may have 3 or more segments if they are in submenus (the > character separates submenus). However you don't need to remember the whereabouts of the menu, just double click on a command in the results pane and you immediately execute the command — just as if you used the menu! If you prefer the keyboard, select the command row and press <ENTER> key to execute it.

You can create folders at will, move them around, copy and delete them. Likewise you can create, move, rename and delete files within any folder. There is only one rule: each item in a folder must have a unique name — but you can have identical names in different folders.
In the old days of DOS consoles (DIR command anyone?) folders had to be reached by typing their names. To browse a folder a few levels deep, you had to type the names of all intervening folders, the path you had to travel to reach your target folder. The full path is the address of each folder starting from the top (root) folder. As at each level names are guaranteed to be unique, the path can identify any folder unambiguously.
|
Paths use the backslash \ special character to separate folder names. The backslash is a reserved symbol that isn't allowed to be used in folder or file names. For example to address the subfolder in the pic to the right, we compose its path using all higher (parent) folder names, starting from root as such:
root\folder\sub1 Files also have path names, you just append the file name to its parent folder path name, using a backslash as a separator as usual. Thanks to GUI programs like xplorer² you no longer need to type folder paths manually, but you come across them all the time so it's good to know what they are. |

|
With xplorer² you seldom need to type folder path names manually. A large proportion of the program's infrastructure is there to help you get from A to B quickly and effortlessly with a variety of folder access mechanisms:
Normally you browse folders in the active pane but there are other possibilities, depending on keyboard modifiers:

You can also type file names (with or without a folder path), which is a quick way to browse a certain folder and select the named file item in one stroke. It also accepts simple wildcards that constrain item visibility. To save you typing it supports path autocompletion. If you tick "Path autocompletion" option it helps you complete path segments using a popup completion list.
![]()
The addressbar can be set to crumbs mode as in windows explorer, where individual path segments are clickable. Clicking a crumb takes you to its respective folder. The little arrows next to each crumb button open a menu with local subfolders available for browsing. If you are browsing a deep folder, only the last few path gegments that fit are shown; for accessing higher levels use the leftmost arrow button, which will show hidden segments all the way up to the root drive. Click on the leftmost folder icon to edit the path.
These crumbs are handy but take up too much space. Tick "Don't use fancy path crumbs..." advanced option to see the traditional addressbar with simple text paths. This plain addressbar isn't clickable; for this functionality use the pane's titlebar (see figure 6. Remember xplorer² introduced crumb browsing years before windows explorer copied the original feature.
The combo box drop-down portion includes a recent history of your browsed folders, saved bookmarks and your most frequently used paths. You don't need to click on the rightmost arrow extend the drop-down history, just type part of the path you are after and hit <Up-Arrow> key to fetch the first matching path; if that isn't the one you are after, press <Up-Arrow> again a few times, to see all completions. For example, typing fresh would match a history folder named C:\TEMP\FRESHMAN. You can also type saved bookmark names.
You can also start external programs and pass files in the active pane as command line arguments. Type a > prompt character followed by a program name to run it. For example type:
> NOTEPAD $N
and press <ENTER> to start notepad and edit the currently focused file in the active pane!
$N represents the selected filename and is one of the available tokens that let you build a reusable command palette.
Another class of filesystem folders are remote or network folders, which give you access to hard disks of other computers via LAN or other connection. Instead of a drive letter, network roots are identified by a PC name and a root share folder, with two leading backslashes:
\\PCname\share\subfolder
Network folders are much slower and xplorer² takes special precautions when dealing with them. Other remote access folders are cloud drives like OneDrive, DropBox etc, but they also behave like regular folders most of the time — except for cloud-only files that are available on demand. xplorer² is careful not to cause unnecessary downloads for such cloud content.
Despite these local/remote differences, all these folders are regular filesystem, and you manage them in a similar fashion. All xplorer² menu commands work in filesystem folders.
Another folder class are in reality files, compressed archives like ZIP and RAR. They contain a local filesystem of files and subfolders, that's why windows shell treats them as "folders". Only a subset of commands apply to zipfolders. They are also slower than normal folders, as their contents need to decompress for many operations. As they contain files, xplorer² tries to offer a near-filesystem experience in terms of browsing and previewing.
xplorer² can also browse mobile phones (cells) and cameras and extract your photos, videos and other files. When you connect your phone via USB cable, it will appear as a special folder in ThisPC and you can browse into it. Such devices aren't read as normal filesystem folders, they are based on MTP protocol, and are quite slow to access. You are better off removing the SD card from your phone and using a card reader to get your photos faster.
Finally there are virtual folders, shell constructs that merely organize real folders, like ThisPC that contains all local and connected hard disks, Recycle Bin that manages files deleted and a few more special folders. You don't do much file management inside such folders, and each has its own peculiarities. Menu commands that are not relevant in special folders are disabled.

|
File type is also associated to an icon, the user friendly way to tell file types apart. All text .TXT files have the same icon as in the pic to the right. These icons are the only way to tell the kind of files if you disabled extensions (ticked "Hide extensions for known file types" system folder option).
Whereas you are free to rename the base name portion of a filename to help you identify it, it is unwise to change its extension. This poor attempt at file type conversion will probably make the file unreadable. Only plain text files can have their extensions changed without risk. |
|
Shell also uses icon overlays, little modifiers of basic icons, to convey extra information about a specific file. For example version control systems like TSVN use overlays to indicate the modification status of files in a repository. Another common overlay is the little arrow icon that denotes a shortcut file, a special file type with .LNK extension that is a "pointer" to a real file located in another folder (like the program shortcuts
on the desktop).

|
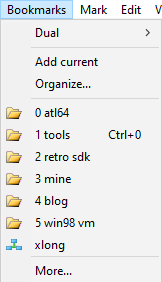
One way to organize bookmarks is the Bookmarks menu that looks like the pic to the right. It is a flat list of folders with a customizable icon and an optional keyboard shortcut for keyboard enthusiasts. You add folders to the list using Add current menu, which adds the current folder in the list with a name you choose. Then choose a folder from this menu list to browse it instantly.
As you add more folder bookmarks, this list will grow and cannot be seen in its entirety in the menu. Any extra bookmarks will be available from Bookmarks > More menu, which opens a dialog that shows all the saved folders (looks similar to figure 8 below), for easy picking. By default up to 25 bookmarks will show in the menu; to see more increase the "Custom menu items" advanced option, a setting that affects other similar menu lists (under Customize menu). Up to 99 bookmarks can be saved in this fashion. Bookmarks, like any menu items with icons, can be added to the main toolbar (item [7] in figure 1) for easier access. Right click on the toolbar and pick Customize from the context menu to add one or more bookmarks. Watch this demo video for more details. Bookmark names can also be typed in the addressbar and also autocompleted by partial name and <Up-Arrow> key. A bookmark stores just one folder that is loaded in the active pane. Bookmarks > Dual submenu manages a similar list of paired bookmarks. If you are in dual pane mode, Bookmarks > Dual > Add current will store both left and right folders as a pair; when you reinstate such a pair it will bring up two folders instead of just one. Another menu list caters for sets of tabs: Customize > Folder groups submenu will save all the tabs in the active pane as a single item. If you pick a saved folder group from the menu, all the folder tabs will be recreated in one stroke. All these menu lists are managed in the same way.
You can combine dual bookmarks with folder groups. When you add a new dual bookmark, you get to choose whether you want to save a pair of folders, or entire tab sets shown left and right. These super dual bookmarks will restore the entire workspace of browsed folders. You may find this handier than defining Layouts just for browsing certain folder sets in dual pane mode.
As you traverse the menu items of any customized list, you get to see the "description" of each item on the statusbar, so you can e.g. see the path that each bookmark menu item represents:
|
|
Bookmarks > Organize menu command lets you manage the menu list. Organize dialog shows all the stored bookmarks, including any that are not seen in the menu (if there are too many). This dialog allows you to reorder items (put frequently used bookmarks further up in the list), change properties and delete bookmarks that are no longer necessary.

The organize list shows bookmark details [1]: the name, "description" (this is the actual folder path), and any shortcut key associated to the bookmark for easy invocation by keyboard. To operate on the list use the little toolbar [2] (use the button popup tooltips to see what each one does) or equivalently right click on an item to modify it using the context menu [3]. Use the search box [4] to find a bookmark by name. This box matches strings in both name and description columns. Click Find next to find the bookmark; if that wasn't the one you wanted, click Find next again for the next match.
Double click on an item to modify its properties; a secondary dialog will open that lets you change the Name, Path, select a custom icon and assign accelerator keys (they must be a combination of <CTRL> and <SHIFT> with a number 0-9. Don't use <ALT> because it will make the bookmark load the folder in the inactive pane.
The default bookmark icon is that of the bookmarked folder — that most of the time looks the same. Use Custom from the drop-down list to choose a completely different icon, that helps you find the bookmark easier (especially if you add it to a toolbar). The Plain icon option assigns a plain but fast folder icon, which is advisable for slow network folders. When you are done changing properties, click OK to confirm or cancel to discard any changes.
Managing and using bookmarks from a menu is not the most efficient way to go around browsing favorite folders. You can also use the tree's quick access list and the mini scrap pane to drag-drop folders, then click on them to browse them.
There is also the legacy quick bookmark in Go to menu, intended for temporary bookmarking. You set it on the current folder browsed using Set quick-mark menu, then you can quickly return to the same folder using Quick bookmark menu or by <CTRL+F1> keys. There are tons of alternative ways to browse a favorite folder in xplorer² — add this extra one in the bargain :)

Usually when you browse into a subfolder, the current tab switches entirely to it. Say you were browsing C:\path\DESKRULE and then you entered the subfolder C:\path\DESKRULE\INSTALLER, you'd expect to see the contents of INSTALLER folder replacing the old pane contents. If you turn on Miller browsing (File > Column mode menu) then both the original and the subfolder contents will show side by side. If you enter a new sub-sub folder e.g. C:\path\DESKRULE\INSTALLER\APPX then a third side panel will open, and so on. As you browse deeper, panes to the left shrink in width. If you have too many folders simultaneously open, a scroll bar will appear to help you manage the panes, since only a few of them will show at a time.
Miller browsing will strike Windows users as odd, but it is popular with Mac computers and their Finder file manager. Its advantage is that you can see neighboring folders simultaneously and transfer files from one to the other. Like dual pane browsing, only increased to multiple panes!
You move from one miller pane to the next either with left/right arrow keys, or clicking with the mouse. Only one folder is active in a miller column set, which will show in white background; all the other folders show with a darker background. The active folder is dominant: its path shows as the tab's current path, and all menu commands will operate in files selected in the active pane, just as if it was the only folder showing. After you create miller panels, each one could be set independently (e.g. one in thumbnails, the other in details, and a 3rd in list mode. But usually they all share the same view mode.
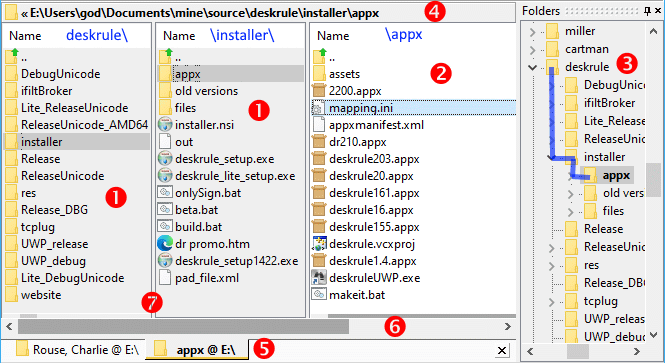
Let's go through the elements of a tab showing side-by-side folders, showing this mini-hierarchy:
DESKRULE
INSTALLER
APPX
When you open a new miller pane, the old pane shrinks down in width. By how much? If the pane is in detailed view mode, then it will be shrunk to the width of the NAME column. If it is in list or thumbnail mode, then it will shrink to the size of the currently selected folder item. You can set a maximum width limit to miller columns from program options setting a value for "Max list width". There are more tweaks available using Tools > Advanced options editor, e.g. the maximum number of side panels (default is up to 6 parallel folders).
If you use the folder tree or any other UI element outside the miller container to browse into a folder "far away" (e.g. typing a path in the addressbar), then the current miller pane is reset to the new folder. But miller mode remains active, so if you browse subfolders of this new master folder, sideway panels will pop up. To turn off miller mode completely, use File > Column mode menu or click on the equivalent toolbar/ribbon button. Also note that miller panes will not survive a program restart, only the last active folder will be re-loaded when you start xplorer² next time.
Another class of plugins that xplorer² understands are those of the popular Total Commander, another windows file manager. There are plugins for extended folder browsing (packer WCX), preview and thumbnails (WLX) and file attribute & text content (WDX) for file search. There are tons of such plugins available to download for free, so if you cannot find a windows standard shell extension for some exotic file type, you might be lucky with a total commander plugin. TC plugins must be installed with a plugin manager to be integrated with xplorer² — whereas standard shell extensions are discoverable immediately once you install them.
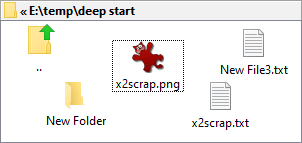
The low level NTFS filesystem does support long paths, up to 32767 characters long, and that should be enough even if you go crazy with long folder names — individual folders and file names are still limited to 260 letters. Super deep paths have a leading path descriptor that marks them as such (\\?\E:\temp\deep start\...). Unfortunately at windows shell level things are still retrograde. xplorer² is deep path aware, and can happily copy and manage files beyond the 260 letter limit, but most other windows programs cannot, and this goes for most programs that open your files. Put a word document in a deep path and you will find that MS Word cannot open it — so what's the point using deep paths? The best xplorer² can do is to copy the deep file into a temporary location so you can at least read it (but you cannot edit it!)
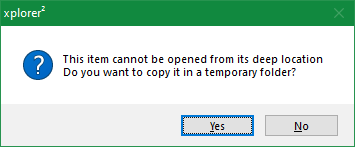
Under the circumstances you must avoid long folder names so you keep your documents at levels above (less than) the 260 character limit. If you insist on using deep paths, you can provide shell access using folder junctions, where you create a shortcut to a deep folder and place it high up in the hierarchy so that it looks "shallow" to deep path unaware programs.
There are familiar properties like file Name, Size and date modified, and more exotic ones like Owner and Comment. Common properties apply to all file types, but there are some that apply only to particular types, as dimensions for photos, duration for music etc. Properties that aren't applicable for a file type remain empty.
File properties are divided in 3 main categories that determine how they are compared:
Most people don't need millisecond time information for files and folders, and xplorer² can show user friendly dates instead of bland numbers. Sorting by date uses the precise file dates, but for display purposes something more palatable is shown, like yesterday or last month.

The figure above contrasts precise dates [1] with 2 different friendly date options available. Method [2] uses big chunks of time durations (the same date categories used in grouping), whereas extra-friendly file age [3] has better resolution, which is at least one-day accurate even for very old files.
If you prefer friendly dates, tick "Friendly dates" option; if you want file ages [3], you must also tick "Extra-friendly file dates..." advanced option — otherwise method [2] is used.
NOTE: the details pane always shows precise dates, even when friendly dates are enabled

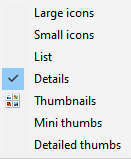
To see more files in a folder set the pane style to List. You can see common file details for the selected file on the statusbar — or turn on the details pane. This is more space efficient than seeing details for all files. If on the other hand you want to see less files with improved readability, consider increasing the "Line spacing" advanced option.
![]()
Click on the column header to arrange by the corresponding file detail, e.g. Name, Size, Comment or whatever else happens to show up as a file detail. Click on the same column again to reverse the sort direction from bigger to smaller and vice-versa. A little triangle shows the active sort mode (Name in the example above) and its ascending/descending direction. When you click on a date column, it defaults showing the most recent file first (descending), whereas text and numeric properties default to ascending order.
A folder usually contains both files and (sub)folders. By default xplorer² groups the folders separately, but you are free to choose another bundling scheme, using "Folders sorted" program option. You can have them separately at the top or bottom of the list, or mixed with files — using whatever sort method is in force.
Text properties like Name are compared strictly alphabetically, which means that 10 comes before 2. If you want your files sorted numerically (e.g. file1, file2, ... file10), tick "Natural number sort" option in program options.
|
In smallish folders set in large icon or thumbnail mode, items can be arranged as icons on your desktop. Use View > Arrange by > Manually menu command to move items with the mouse and leave them where you like. One possible use is to create "piles" of items to denote their mutual relationship, or "put aside" some files for further processing (but color tags may be more appropriate for this task).
The item positions can be saved as part of other custom folder settings , so when you come back to this folder you'll find the items where you left them. Note you can sort (e.g. by Name or Date) a manually positioned folder if you need, temporarily destroying your custom positions, but once you switch back to manual arrangement, the positions will be restored. |
|

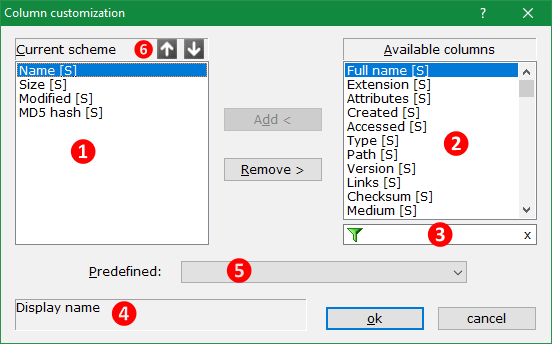
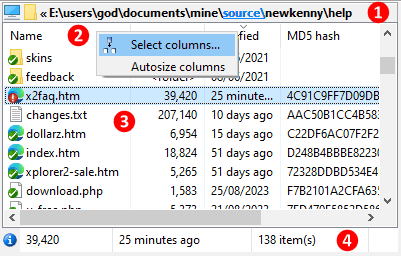
Current scheme box [1] lists the columns you have already chosen and show in the header. Click Remove button to remove the selected column from the current set. Columns available for selection box [2] lists all available properties, included e[X]tended properties provided by shell extensions. Select a property from the available box and double click on it (or click Add button) to add it in the current column set.
As there are hundreds of available properties, use the filter box [3] to search for a column by name, e.g. type date to see all date-related properties that can be used. [S]tock properties have a description as well, showing extra information on what they do in box [4].
Use the arrow buttons [6] to rearrange column order in the header. You can also rearrange columns by drag-drop (when the column selection dialog doesn't show). Grab a column with the mouse and drop it where you want it in the header row.
You can save a group of columns as a set using Customize > Column sets submenu. Define a set of columns then use Add submenu to save the set with a descriptive name. The list of column sets is managed in a way similar to bookmarks list. You can have one column set for (say) photos, one for music and so on, and quickly switch among them using Customize > Column sets list. The Predefined drop-down list [5] in the dialog above gives access to such saved column sets for use in the dialog.
Note: The same column customization dialog is used to select columns for infobars.

|
Grouped view mode is an accented sort method where items are bunched up into categories, based on the major sort property. Many file properties support arrangement in groups, but not all do. A property must divide files into chunks of similarity — depending on the property type: text, number or date. For example Names can be grouped by starting letter, file sizes as small/medium/large, and dates as today, this week and long ago. Properties like MD5 hash on the other hand, which are unique for each file, cannot be used as categorizers — each file would be in its own distinct category. Any files that don't support the categorizing property end up in Unspecified group.
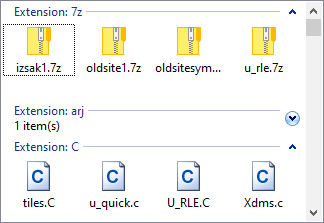
To see a folder categorized in groups, sort by a group-compatible property, then use View > Arrange by > Show in groups menu. The groups will appear as in the pic to the right, where we are sorting by Type (file extension). Each category is defined by a particular extension, and all matching files are grouped together. Each group has a title e.g. Extension: 7z, followed by a divider line. At the right end of this line there's a little arrow you can use to collapse a group, hiding its items (as the Extension: Arj group in the example). Click on the arrow again to re-expand a collapsed group. While showing groups, changing sort modes e.g. from Type to Date modified, will result in a different grouping appropriate for the new sort property. Normally items within each group are arranged alphabetically by name; to apply a different sort mode hold down <SHIFT> and click on the desired secondary sort property using the header row. To turn off groups altogether select View > Arrange by > Show in groups menu once more.
List view mode does not support grouping. The closest you can use that supports groups is small icons mode, but unfortunately this has many bugs and visual glitches for everyday use.
|
|
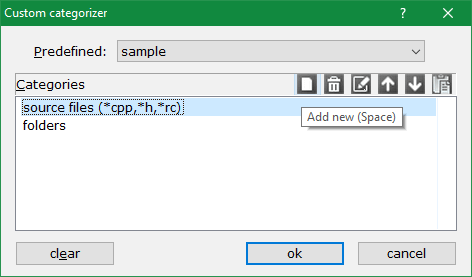
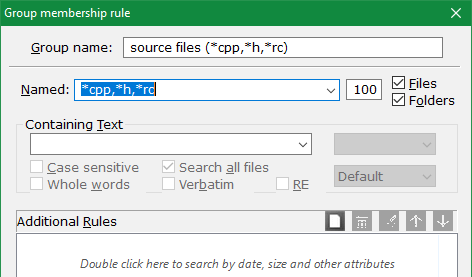
Using the small toolbar at the top-right corner (or the context menu) you can define, edit, reorder and delete custom categories using standard hyperfilters as they are used for file search. These may be as simple as a name wildcard, or a boolean combination of file properties. Each filter determines the group membership. Items are placed in the first matching category (in the order they appear in the dialog). Any items that cannot be categorized end up in the "unspecified" group.
The example in figure 12 will create (up to) 3 categories in each browsed folder, one will have files with CPP, H and RC extensions (it is wildcard based), the second will gather all folders, and all the remaining files will be in unspecified category.
Once you define a custom grouping you can save and reuse it using Customize > Custom groups menu. The group submenu list is managed in a similar fashion as bookmarks menu. Such saved groups are also available through the Predefined drop-down list in the above dialog.
If you want to stop arranging in groups (either simple or custom) uncheck the menu command View > Arrange by > Show in groups or click on the equivalent toolbar button.
xplorer² offers a sense of continuity as you browse your filesystem folders, maintaining your settings including view modes, sort orders, column widths, etc; it even remembers the item that was focused the last time you browsed a folder and brings it into view when (and if) you return.
In other words, xplorer² uses the current view settings for any pane as default. If for example you change from detailed view mode (View > Pane style menu) to list mode, then list mode will be default from then onwards for all folders browsed in that pane or tab.
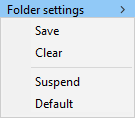
A different way to manage folder view settings is to setup a pane like you want it using various commands from View menu (e.g. pane style, number of columns, grouping, sort order) then declare this view mode as default using Actions > Folder settings > Default menu command. This way you tell xplorer² which default view mode to use for all folders. If you change any view parameters in some folder they will only last temporarily until you browse another folder, where the default settings will again return.
Note that folder settings can be different for each pane (left/right or up/down in dual pane mode), and even for each folder tab in a pane. You can have one pane in detailed view mode and the other in list mode. When you quit xplorer², only the active tabs save their settings; next time you start xplorer² all tabs will look like the two last active tabs. You can take advantage of this "trick" to make all tabs look the same by quitting and restarting the program. The menu command Go to > Same style makes the inactive (dual) pane identical to the active pane, including pane mode, file details (columns), sort order and any custom groups.
xplorer² does not change its view mode automatically to suit folder contents. You can force particular folders in a fixed view mode using Actions > Folder settings menu. So for instance you can have "My pictures" folder to appear always in thumbnails, even when you are browsing in a pane that is normally in detailed mode. When you get out of such customized folders the pane returns to its previous view mode. When you enter a folder with custom settings a status bar pane icon will appear as an indicator.
|
Under this concept, you setup a default pane style for most of your folders, e.g. details, and for the few exceptional folders you want to browse differently, save a custom view mode. When you first use Save menu to turn on a custom folder view, xplorer² asks you whether to apply the same mode to its subfolders — that may make sense if all subfolders have similar special content. Here is an easy way to do it:
|
|

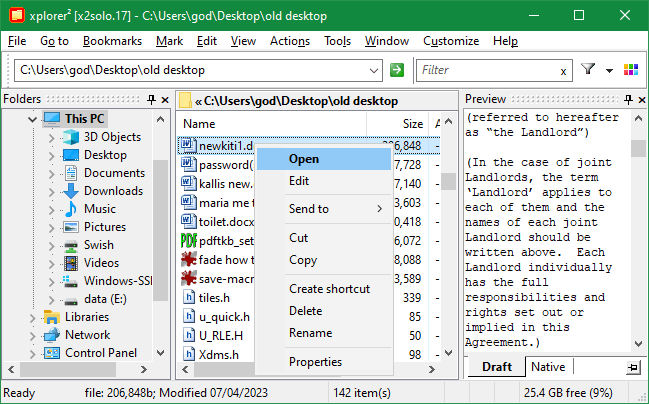
Use the tree to locate folders, and select file items with the mouse. The preview pane will show a draft preview of the focused item. Double click to open the selected document in its registered application, or use the right click context menu to perform file operations as copy, delete, rename and so on (these commands are also available from File menu). To transfer copied files, switch to the destination folder and use Edit > Paste menu command, or use drag-drop. These are all elementary actions and will not be elaborated further.
If you hold down <SHIFT> key as you right click, you get an extended menu with more commands. For example, the context menu of executable files will include a Run As command that allows you to run a program impersonating a different user.
|
An underused hidden gem is Send to submenu. You can create a compressed folder out of the selection, attach files to emails (mail recipient command) and more — you can even customize this menu for special targets.
Right click on some empty spot to open the active pane's background menu. In there you will find commands to create new files and folders, change the pane style etc. Thus, just using the mouse and context menus, ignoring the entire menu system in xplorer², you can do all the basic file operations! |

|
| All these basic file operations like drag/drop, copy/paste, rename and delete can be undone, albeit not by xplorer², but from windows explorer! If you find you have made a mistake, minimize xplorer² and any other window that obscures the desktop, then right click on the background and you will find the undo menu command. As xplorer² uses windows explorer for its basic file operations, it is possible to undo them in this roundabout way. In later versions pressing <CTRL+Z> in xplorer² will offer you access to this desktop menu. |

|
When you create a new file or folder using Actions (or a pane's background menu), the item is created in the active folder and immediately you get in rename mode, to change the default New File.txt. We saw that changing extensions is potentially dangerous that's why xplorer² selects only the base name when you rename 
| For plain text files, changing extensions is legitimate, e.g. changing a newly created file from New File.TXT to Stdafx.CPP. If you change the extension with inplace rename, you will be pestered by warnings against it. For fewer warnings of this kind use File > Change type menu command. This is also useful when extensions for known file types are hidden from system folder options. |

|
Only local filesystem files and those in USB-connected hard disks are moved to the recycle bin; other locations are deleted directly. Files that cannot be recycled include:
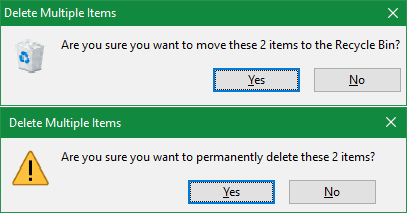
You must be extra careful when you delete files in any of the above folder types. It is recommended that you have delete confirmations enabled (using recycle bin properties) as an insurance policy. Delete confirmations that go into the recycle bin look slightly different than permanent deletions. Please study the following confirmations; the second one (permanent) requires special care because it is very hard to undo. |
|
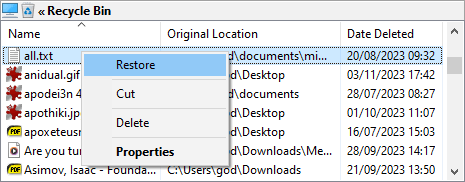
You can browse recycle bin in xplorer², just like any other special folder in the shell namespace. Note that instead of the regular filesystem columns, you see details like Original location and Date deleted, which is information related to this special folder. Sort by Date deleted column to see the most recently deleted items first. Then select one or more deleted items and use Restore context menu command to undo their deletion:
Don't forget to empty your recycle bin from time to time, using the context menu on the recycle bin desktop icon. If you accumulate too many recycled items, deletion will become sluggish.

|
|
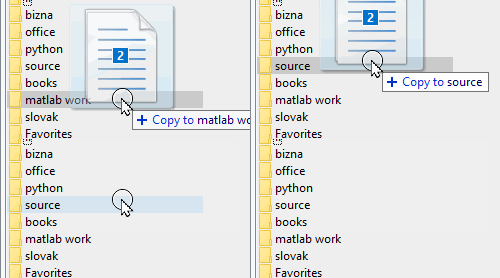
When you drag, you must find the desired drop destination. Most UI elements in xplorer² window accept drops, like the active and inactive folder pane, the folder tree and so on. If a pane contains too many items and you cannot see your target, you can scroll the window (while dragging) if you place your mouse pointer near the window edge where you want to move towards. You can drop to a different folder tab if you leave your mouse a second or two over a hidden tab — it will then activate to accept your drop. This spring-loaded folder feature also works in the tree, where you can open tree branches by hovering over them.
Drop targets are usually folders but you can also drop on program icons (EXE files, they will receive the dragged files as arguments to open them) — this method also works for user commands you place on a toolbar. Naturally you can drag-drop to other windows programs, not just inside xplorer². Use <ALT+TAB> or the windows taskbar to select a different window to drop into.
The default file operation when dropping is Move if you are working within the same drive (e.g. reorganizing files under C:\) or Copy when you drop to a different drive (e.g. from C:\ to E:\). You can override these defaults using keyboard modifiers:
|

|

Except for regular information like file sizes and dates, xplorer² offers access to the contents of files, as long as they are in normal or near-normal (e.g. zip) folders.
The most convenient option is to turn the quick viewer pane on from View menu. Then as you move the cursor around in a folder pane you can see the preview of the focused item. The quick viewer can show text (including RTF, Unicode and UTF-8), graphics, HTML, office documents, even audio and video files. There are 2 modes selectable by tabs at the base of the previewer panel. The figure below shows draft and native previews of the same document. The left one is plain text, the right one shows also formatting.

The Draft tab shows fast previews of most file types.
For photos and graphics of all sorts you see a large thumbnail, which can be zoomed in/out and rotated through a toolbar  or touch gestures. xplorer² uses windows system thumbnail cache to offer quick image previews. It embeds Windows Media Player to offer previews of music and movies. or touch gestures. xplorer² uses windows system thumbnail cache to offer quick image previews. It embeds Windows Media Player to offer previews of music and movies.
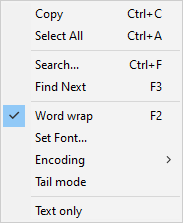
For plain text files like TXT or CPP, it loads and displays the first few KB (the limit is adjustable). Using the context menu (see right pic) you can change the preview font (Set Font command), select and copy text, Search for text in the preview etc. Normally xplorer² can figure out the encoding automatically; for the rare cases it won't, use Encoding submenu to pick a code page or indicate the text format (UTF-8, unicode etc). If you turn Tail mode menu command on, xplorer² loads the last few lines of the text file instead of the beginning. This makes sense for log files. Finally if you turn on Text only menu, xplorer² will show all file types as text — e.g. images will show a hex dump (47 49 46 38 GIF8 00000) instead of the thumbnail. Select this menu item again to turn on regular image previews. Advanced office document types like PDF, DOC and XLS are also previewed as unformatted text using text filters meant for desktop search. When a document was scanned for text (e.g. a file search result), any matching keywords are highlighted so you can quickly see the surrounding text context. Use Find next menu to find the next search keyword match.
The internal text viewer called editor² is also aware of search hits. If you open a plain text file (a search result) in editor² using File > View menu, then <F3> key will find the keyword you searched for in xplorer²!
|
|
The little pin at the right end of the previewer's tab strip is the equivalent of View > Lock viewer menu command. When you lock the preview panel, it will stop following the focused file and remain fixed to the present file. A possible application is to listen to music while you browse. Unpin the previewer to resume normal previewing as you click around the panes.
Click on Native tab to switch to more accurate, slower previews. This mode is identical to the preview panel in windows explorer. To see accurate previews for your file types, you need to install preview handlers. Luckily when you install an office suite, it automatically adds preview handlers and text filters for its associated file types. If you have problem with certain document types, you can search for preview plugins.
As you can see in figure 14 above, native preview looks nicer, and you can preview the entire document, not just the first few lines. However it feels cramped in the narrow space available, so opening the document in its native program may be the better option. Draft mode is quicker and adequate for most preview needs.

The previewer is one of the adjustable panes so you can resize and dock it to various locations. To see bigger previews you can use the splitter bar to resize the pane. But this larger preview comes at the expense of other panels, that end up shrunk.
Instead of a permanently docked preview pane, an alternative method is View > Peek preview menu, which pops a large window previewing the selected item. Hit any key (except PageUp/Down) and the preview goes away! The preview is similar to the Draft quick preview tab, so it will show images and plain text (including text extracted from DOC/PDF/XLS documents) only. For music/video or accurate Native preview you must still use the regular quick preview panel.
Likewise you can press both left and right mouse buttons together simultaneously to preview the file under the mouse cursor. Just enable "Mouse peek preview" from options. Then let go of the mouse keys and the preview will go away!
A variation of this command can show popup previews for two files simultaneously. Select 2 items that have thumbnail previews (e.g. photos) and press <Alt+Shift+Q> keys and a popup window will show their large previews side by side for easy comparison. This is especially useful when considering similar photos before you decide which one to keep. Press any key or click the mouse to hide the preview window.
NOTE: if just one item is selected and you are in dual pane mode, this command compares the focused items in the left and right folders.
You can also compare 2 text documents for differences with the same shortcut key (or using Compare items menu in xplorer² context submenu when 2 files are selected). xplorer² includes a simple text difference tool called WINDIFF that is used for this comparison. This works even for "complex" documents like PDF and DOC files; xplorer² will extract sample text and compare it without formatting.
Edit > Copy columns menu likewise copies all details, but only for selected files. The information is placed in the clipboard as text, which you can paste wherever you like.
This command also works in the folder tree where it copies all expanded branches under the selected one.
If you are interested in filenames only, there are 2 options in Edit menu:
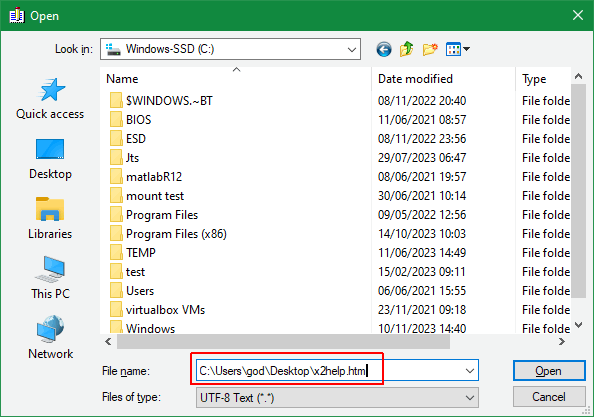
You don't have to find the exact folder to open, pasting the full path will do the job nicely! Here is a demo video 
On a different note, Edit > Extract text menu command is meant for formatted text documents like DOCX and PDF, where it will extract pure (unformatted) text and save it in a separate file, using text filter modules available for desktop search. For example text from ESTATEMENTS.PDF will be saved in ESTATEMENTS.PDF.TXT.
One possible use is to compare PDF documents for modifications, using a text comparison tool like WinDiff.
If there's no text to extract you will see an error message on the statusbar:

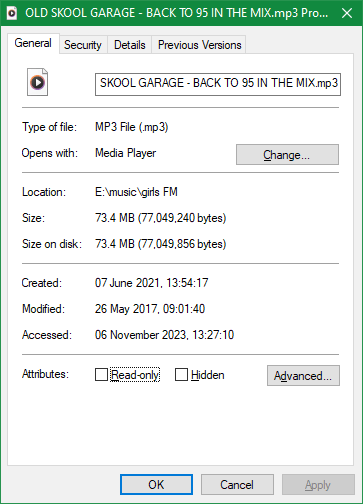
The filesystem shell supports many file properties, simple stuff like size and file attributes, as well as more advanced ID3 tags, document information like subject and author and so on. Some of these properties are innate and cannot be changed directly (like file size in bytes), whereas others are adjustable like various file dates. You can browse file details in a number of ways:
|
|
The most intuitive way to change properties is straight into the detailed view mode. Like in-place file rename, you can slow double-click (click twice but not too fast) on any property that is changeable, and you can edit its contents as such:

You can think of the active folder pane as a little MS Excel spreadsheet, where you can change cells of various properties, like date modified as above. All properties are edited as text, so you must make sure you stick to the expected format — or an error will result. In the above pic, Name, Modified and Keywords can all be modified in-place, but Size cannot (it is innate.)

In figure 15 a PNG (image) file happens to be selected. We can see a little thumbnail preview on the left, followed by standard information as Name, size and date modified, but as this is an image we also see its dimensions in pixels. The most important type-specific information is shown e.g.:
Properties that appear as links (like name and comment in figure 15) can be modified. If you click on such a property link, it's like you used the menu command that changes said property. Innate properties like Size just show a bold title, since they cannot be changed directly.
In large folders, most files are hidden from view, especially if you are showing full details (one file per line). A standard horizontal or vertical scroll bar will appear, giving you an idea how many items are hidden and about your current location within the folder. You can operate your scroller with the mouse to see hidden items, but for more precise control use the keyboard to roam the active folder pane:
As you move around, the focused item is changed and usually cancels all previous selections too. To move the focus without affecting the existing selection hold down <Ctrl> or turn Mark > Sticky selection on. This will help you to hand-pick items scattered in the folder listing (similar to explorer's checkbox selection mode).

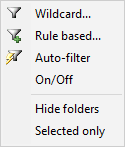
There are several types of visual filters, activated from View > Visual filter submenu:
|
|
Whenever any filter is hiding items from view, you will see a green funnel icon on the statusbar. Double click on this icon (or use View > Show all menu) to cancel the filtering and see all the items in the folder.
xplorer² can filter on regular expressions too, which are a more complex kind of text wildcard. Regular expressions are supported in rule-based filters.
|
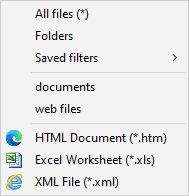
View > Visual filter > Auto-filter menu command is like wildcard filtering for file type (extension), which you don't need to type manually. When you choose this command (or click on its toolbar button) xplorer² examines what kind of files exist in the current folder (active pane) and pops a menu with them — and some more commands as you can see to the right. In this example, the folder contained a few HTML, some XLS and some XML files, which are listed alphabetically. Selecting one of these menu items will show only a particular file type, just as if you typed the equivalent wildcard (e.g. *.HTM) for visual filtering.
Auto-filter menu also lets you show only Folders and cancel the visual filter (show All files). Saved filters is a submenu that lists all rule-based hyperfilters that you have saved; select one of these saved complex filters to apply it on the current folder (it doesn't have to be wildcard based). Finally you can filter for broad document categories (search for "File types" in Global tab) defined in the registry as comma separated lists of file extensions. The default definition for "web files" for instance would show both HTM and XML files (but not XLS). |
|
When the program option "Show hidden files and folders" is not enabled, then any files or folders that are marked as hidden (have the H file attribute) are not shown at all. This is like an implicit filter on the file attribute property. The little eye icon will appear on the statusbar when hidden files are obscured in this way.
One way to block a particular file or folder from showing in xplorer² is to change its attributes to include H (assuming it doesn't already have the attribute). Then it will not be visible if you turn off show hidden files option.
xplorer² supports a global exclusion filter for both folder views and tree, hiding matching files and folders. The advanced setting "Global exclusion filter" is defined as a comma separated list of wildcards to exclude from view (alternatively it can be a saved hyperfilter name defined earlier). For example *.DLL,*.SYS would define a global filter that hides any DLL or SYS files permanently.
When you define a global exclusion filter, the hidden files statusbar icon will show as a reminder. You cannot turn off a global filter, it is always enforced. As it is pervasive, only relatively fast file properties are allowed. If you attempt to use a slow hyperfilter here, it will be ignored.

These simple selection and unselection methods work with one item at a time. You build a large selection adding more items one by one. This manual effort can get tedious and unpractical if you require many items selected — not to mention that one accidental unprotected click can unselect everything you worked so hard to select in the first place! To protect against such mishaps use Mark > Sticky selection menu; when this mode is on, all mouse clicks work as if you had <CTRL> key pressed. To resume normal selection mode, select Sticky selection again to turn it off. Alternatively turn on checkboxes which are even more robust and user friendly.
There are several commands in Mark menu that help you select and unselect multiple items in one go. Let's start with the simple additive commands, that select items on top of those already selected: (to start a fresh selection cycle, just hit <Alt+A> to unselect everything beforehand)
|
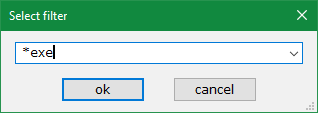
The above commands take a number or text input as a parameter. A simple text input dialog is shown for this purpose that hardly requires any explanation. You type your wildcard then click ok button to execute or cancel.
Using these elementary marking and unmarking mechanisms, either individually or combined, you can build collections of items whose complexity is only limited by the user's ingenuity! |
|
Now let's discuss the non-additive marking mechanisms. These will destroy any previous selection, so they must be done first:
All these criteria-based selection commands affect all files and will reset any previous selection leaving only items that unambiguously pass the criterion in question. Typically such commands are performed first, possibly followed by elementary (un)marking commands to refine the selection. However when such criteria are used to unselect files (e.g. see Unselect button in figure 16) they only affect matching items.
Mark menu also contains a number of commands that affect the selection which are explained in other parts of this guide. Broadly speaking they consider all the files with a variety of criteria, and select files that match them. For example in dual pane mode you can mark items that need to be copied to synchronize two folders, or source files that must be built to make a compiled language project.
|
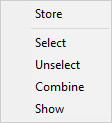
You can save the current selection (filenames) using Mark > Selection > Store submenu. This can be used as a safe repository as you build complex selections step by step, especially with commands that erase the previous selection.
Once you have a selection stored, you can either restore it (Select command) or use the stored filenames to Unselect. You can reuse a previously saved selection in the active pane as a mask via Combine menu. This advanced mode combines the existing and saved selection so that only items that are in both lists end up selected (boolean AND operation). So an item must be both already selected and part of the list stored with <Ctrl+F11> to remain selected; otherwise it is cleared. This command is handy for refining selection patterns. |
|

![]()
When you issue any command like copy or delete that acts on many items, mere selection won't matter, only items that are ticked will be operated upon. If there's a discrepancy between selection and checkboxes, xplorer² will automatically align the selection with checkboxes just before it executes your command. This can get a little confusing. If there are no items ticked, commands will use the selected items as usual. The selection information pane on the statusbar (and infobars) will report on ticked items instead of those merely selected, e.g. 2:1MB means that there are 2 items ticked totalling 1MB in size.
The nice thing about checkboxes is that you cannot accidentally wipe them out, so you can build large "selections" with peace of mind. Unlike the old sticky selection mode, checkboxes survive filtering: if a visual filter hides a checked item, the checkbox will be remembered when you bring it back into view. xplorer² checkboxes are designed to be robust, so they are not as easily wiped as in windows explorer. To untick all boxes use Mark > Unselect all menu or refresh the pane with <Ctrl+R> keys.
Use <SPACE> bar to flip the check state of selected items on/off with the keyboard. For example if you use lasso mouse selection and want your marked items ticked, press <SPACE> key.
Exceptionally some simple operations as drag-drop and shell context menu will use the (merely) selected items instead of those ticked. Also note that preview pane still uses the single focused item to preview, regardless whether it's ticked or not.
To remove checkboxes before items and restore traditional selection mechanisms, turn them off via Mark > Use checkboxes menu (toggle).
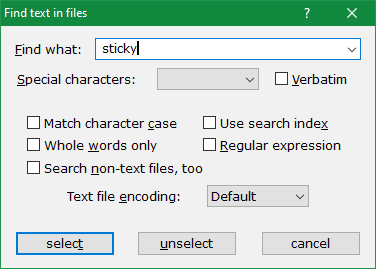
The simplest use of this dialog is to type one word or phrase to search for in Find what input box, and click select button to start looking for text inside files that are shown in the active pane. Matching files are selected and any prior selection is cleared. If you hold <SHIFT> as you click on select button, any existing selection is preserved and matching files are added on top. It is also possible to unselect matching files using the respective button.
This command finds text exactly as you type it, and internal spaces are significant (it's not like google search). For example searching for "this that" is different than "that this" (reversed order), and even "this that" (notice the extra space separating the words). Don't use quotes " unless you want to find a quote character. Think of it that you search for phrases instead of individual keywords. The advantage is that you can search for symbols as well as numbers and letters.
Several checkboxes in the dialog control how text is searched as below:
The command automatically detects the encoding of plain text files (UTF8, unicode etc), if a Byte-Order-Mark (BOM) is present at the beginning of files. If BOMs are missing or you want to search within OEM files, you can force the encoding using the combo box supplied (see figure 16). To disable content interpretation altogether, including encoding and text filters, pick Raw encoding; this will allow e.g. searching for BOMs or other binary content.
|
For further information and regexp samples you can see this reference
These complex filters are pervasive in xplorer² user interface, and a common dialog structure is used to define them, regardless if they are used for visual filtering, rule-based selecting or file search. Once you get the hang of them, you can use them everywhere to match files with precision. Here is an example dialog for visual filtering (View > Visual filter > Rule based menu command); if you compare it with find files dialog, you will see that are very similar.
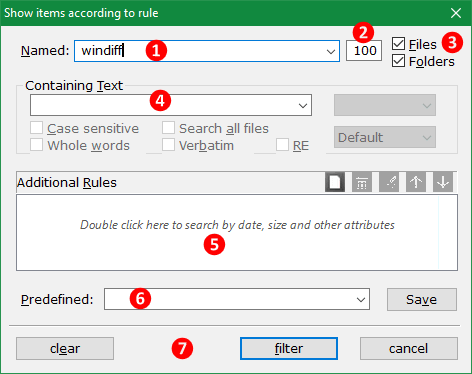
Hyper filter dialogs have 3 sections that define the filter (name [1-3], contained text [4] and additional rules [5]). At least one section needs to be filled in with your file matching parameters. Empty sections appear disabled (ghosted) to minimize visual clutter in this admittedly complicated dialog. If you don't need all these fine tuned parameters, click simple version [9] and you will switch to simple mode. Let's have a quick look at the input fields:
You can define hyper-filters with as few or many criteria as you want. You can go from a nearly empty filter (e.g. all fields clear except for Folders box that will find all folders) all the way to any arbitrarily complex filter with tens of rules combined in boolean contexts. Only items that match all aspects of the filter are considered hits.
When a filter dialog shows up, its fields are loaded with the filter you used last time. If you want to define a new filter, click clear button to empty all fields. Note the button controls in section [7] depend on the command, it's filter for visual filtering, select when you are going to use the filter for selection and so on — they act like the typical OK button, that closes the dialog and executes the filtering command.
To store a filter, type a descriptive name for it in the Predefined [6] combo box and click on the Save button (see figure 17), and the current definition will be added in the drop down list. From then on you only need to select the saved filter from the Predefined list and its rules will be automatically restored for you.
To modify a previously saved filter, make your property rule changes and save it again with the same name — thus overwrite the old definition.
To delete a saved filter that's no longer needed, first select it, press Clear button to delete all its rules and finally click on Save button to confirm the deletion. Arguably this isn't very intuitive; the dialog UI is streamlined for saving and using complex filters, which is what you do most often anyway.

You can add, edit, reorder and delete rules using the little toolbar on the top right of the Additional rules list box (similar to how we manage bookmark lists). If you right click in the rules box, a context menu pops up with the same commands as on the toolbar. All the usual keyboard and mouse clicks are also recognized within the list, e.g. <DEL> key will delete the selected rule, double-click will edit a property and so on. Each rule has a descriptive text and an icon reflecting its boolean context (+ for AND, - for NOT and | for OR).
Searchable file properties belong to three broad categories: dates, numbers and text. This determines how the properties are interpreted & searched: number and date rules are matched as ranges between a Low and High limit, and text properties are searched for contained text (e.g. we are searching whether the comment property includes a keyword).
Click on Add new toolbar button to add a new rule. A dialog opens to select a property and set the rule parameters as such:
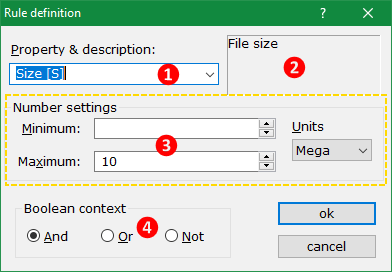
|
Figure 18 shows the parameters for a numeric property (File size), which comprise a minimum and maximum limit. A file size x will match the numeric rule if it falls within the limits you supply (min < x < max). Either limit may be missing if you want an open-ended rule; in the above example the minimum size is empty, so that makes the rule Size less than 10MB (x < 10MB for the mathematically inclined). If you are after an exact number, make both minimum and maximum limits identical.
Numeric properties support units of measurement using the Units drop down list. File sizes in bytes will be big numbers, so it is convenient to pick Mega as a unit — that implicitly multiplies your typed limit by a million (10MB ~= 10,000,000 bytes). Properties with small values (e.g. picture width) don't need units, set them to 1. Minutes unit is for matching audio and video Length (duration) property, measured in minutes |

|
Let's have an example. Say you want to find a file whose size is either smaller than 1K or above 2K but not inbetween. The simple solution would be to use two Or rules, one searching for files up to 1K and another one above 2K. Or you can use your boolean skills and define a single rule that says: Not "size between 1024 and 2048". Your boolean expertise saved you a couple of seconds there <g>

If you select a date property, the middle part ③ of the rule definition dialog will change as above, to accept your desired date range. Date properties can be defined as periods from the present time (During the previous) or as ranges (Between). Leaving any end of the range empty (untick the checkbox) removes the respective date boundary. For example if the low end of Between range is unticked, the rule will match any files that are up to the date specified in the upper limit box. You don't specify time (hour) limits directly. The low range is assumed from the beginning (00:00 midnight) and the high end includes the entire day (up to 23:59)
With During the previous mode you must select the time unit (years, months, seconds etc) and the quantity (number), so you can create rules like modified during the previous 3 months. This can also be expressed in Between mode with a low date limit 3 months from today, and the upper set to now — but it wouldn't be as clear to grasp.

Finally, if you select a text property (like Comments or Owner) ), the middle part ③ of the rule definition dialog will change as above. You search text properties like you search for text in files: just type part of what you are after in Find box. All searches are case (and word boundary) insensitive for the broadest possible match. In this example if a file's Comment property contains any references of test, it will be a match, else no cigar. Wildcards (* and ?) are also supported, unless you tick the verbatim option. Advanced string matching is possible ticking the Regular expression option.
After this long explanation, you managed to define a single rule; click ok button (see figure 18) to add it to the current hyperfilter — the new rule will show in Additional rules box. In the same fashion you can Edit an existing rule; double-click on it and the rule definition dialog will let you change the match conditions.
The up/down toolbar buttons in additional rules box are meant to reorganize the rules. When xplorer² is testing files against a hyperfilter, it processes the rules in the order they are shown in the rules box, so it makes sense to put fast rules first and slow rules towards the end of the list, to accelerate file matching. However xplorer² does this reordering automatically even if you won't!
|
Most of the time we need to filter on filename and text contained in files; a fully fledged hyperfilter is extravagant at best and downright confusing at worst. All hyper-filter dialogs can be turned to basic form clicking on simple version [9] link, where you get rid of all rarely used file properties and concentrate on what you search the most, i.e. name and contained text. The simple filter version looks just right and focused for the job.
All the filtering options missing compared to figure 17 assume their most generic values for broader match. For example, the name applies to both files and folders, and the contained text will be searched in all files without case sensitivity. You can search for name or for contents, or both — whatever you don't need leave its search box empty. Multiple comma separated strings are supported for both name and text, e.g. *.DOC,*.PDF At any time you need more precise search parameters, click more properties link and you will see the full hyperfilter version of the dialog. |

|

Most of the work you do in xplorer² involves finding, filtering and selecting items, before doing something with them. The edit box next to the addressbar is a convenient way to do all these things from a single tool. Arguably it is one of the best productivity features in xplorer²!
By default the quick filter box is set to (visual) filtering mode. Instead of fumbling with wildcards and complex rules and dialog boxes to pass parameters, start typing what you want to find in the active pane and after the 4th letter the quick filter will automatically activate and show only files with matching names — you don't even have to press <ENTER> to start filtering, it is done live and as you type. If you type enough letters, the active pane list will shrink to a couple of items only, hopefully including the one you are after. To reveal all hidden files, click on x to the right of the box to clear the filter — View > Show all menu command does the same.
|
Normally the quick filter tries to match your input with filenames only; your partial filter string can appear even in the middle of filenames and it will be considered a match (e.g. type hel and you will match help.txt, shell.dll and any other file that contains hel. If you want to match text against all details shown in the pane (e.g. size, date modified and anything else that is visible), use the drop-down menu and tick All properties option. This type of filtering is slower therefore in large folders filter-as-you-type won't work — you need to press <ENTER> key to filter out files that don't match. You can even search for text inside documents ticking Text contents menu item, but that will make things even slower.
xplorer² ultimate can search much faster in all properties and text contents if you tick Windows search menu. You can find whole words or stems (beginnings) quite nicely this way, if you browse folders that are in the search index. In professional edition this command is disabled.
Use the drop-down menu to switch to Select mode. The action button will change into |
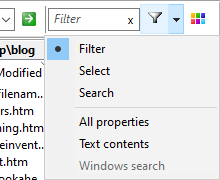
|
Quick filter and selection mode work with the items in the active pane (it works even in the mini-scrap) — usually that means items in the current folder browsed. If you switch the box to Search mode from the drop-down menu, then it can search the current folder and its subfolders, like a regular find files command.

If you do a simple search for filenames only, matching filenames appear immediately in a popup window, and automatically update as you change the search keyword (live search as-you-type). You can preview and open files directly using the context menu on search results, or browse the containing folder for more file management actions. To jump into the search results pane press <TAB> key. As the popup is space limited, the search stops after 25 results are found; if you cannot see your target file, click the footer for robust search, which will do a regular full scale file search. The live minisearch feature does not work if you tick any slow match options like All properties. In such a case a regular search is performed, in a separate window. |
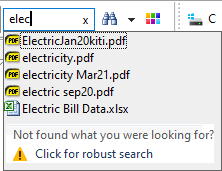
|
The colorful button to the right of the filter box, is another way to quickly filter files based on their color tag. Please see the following section for more details.
Despite their expressive power, fumbling with hyperfilters and text rules can be too time consuming. Mark > Quick search menu is a convenient shortcut that selects files that contain a phrase, either in their content or in some text column, including filename. It is a local search mode (scans items already in the pane) equivalent to a hyperfilter with one rule per text column, each matching your phrase in a boolean OR fashion (i.e. any one match will be enough); if no column matches the phrase, the command searches the text within the file. This latter slow stage can be skipped if not required, hitting <Esc>.
Quick search will only scan columns that are visible in the active pane. To make the most of this command you may have to activate a few interesting columns, e.g. Comments, Version information etc, depending on your context.
Quick search uses the addressbar for text input. Instead of using Mark menu you can press <SHIFT+TAB> to jump to the addressbar and type your phrase, beginning with a colon, e.g. :your phrase, then press <Return> key to apply; any matching items in the active pane will be selected. If instead of marking you want to filter the matching items (hide everything that doesn't match), type your text and press <Shift+Return>. Stored hyperfilter names are also understood if enclosed with curly braces, e.g. :{saved_filter_name} is a valid input.

Sometimes you need to mark a file for later processing. One way is to place the item in the mini scrap pane. Another possibility is to color tag it, so whenever you browse its container folder it will stand out with a color border drawn around its name. Likewise you can color tag a folder in the tree pane, making it easier to locate — then its tab's icon will also be painted with the same color.
Color tags are set through the shell context menu (xplorer² adds a couple of its own commands at the top).
Alternatively add the Color tag
|
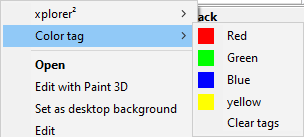
|
Adding a color tag won't change the actual files in any way (xplorer² uses a private database for color tagging information). You can use many colors for different kind of markings — the meaning of colors is entirely up to you. The color borders drawn around the names can be combined with rule-based color coding — but color tagging is much simpler and quicker.
|
Tagged items are hard to miss, their color borders are very conspicuous among normal unmarked items (you can make the borders even thicker using advanced option "Color tag border"). There are commands that filter a pane for its colored files; you can also search to find tagged files in subfolders.
You can quickly filter the active pane (except the folder tree) to show only items tagged with particular color, using the color filter button next to the quickfilter box. This color button opens a submenu with all the filtering options. You can show only one particular color or all tagged items regardless of color (Any tag command). You can hide all color tagged items and only show those Untagged. In the end Show everything command will cancel any color filtering (you can also double-click on the statusbar visual filter icon). This menu includes a Find tagged command that can show you color tagged files in other folders. In the tag search dialog first specify which colors you are after using the checkboxes, then state your search scope: do you want to search only below the current folder or everywhere? |
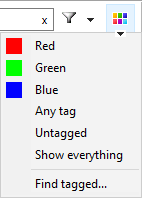
|
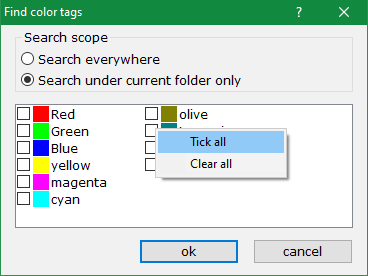
Click ok button to start the search. If there are any tagged files with the colors you ticked, they will be presented in a standard search results window. If nothing can be found you'll get an error message instead — consider enlarging the search scope e.g. ticking Search everywhere option in the find tags dialog, or tick more color boxes (there is a tick all command in the right click menu).
The tag search dialog is very fast but will only search for colors. If you want to combine colors with regular file attributes like names etc, use find files dialog and add a rule on the color tag stock property. In this context tags are plain numbers in the order they appear in the color list (1=red, 2=green etc). This kind of combined search will be much slower though.

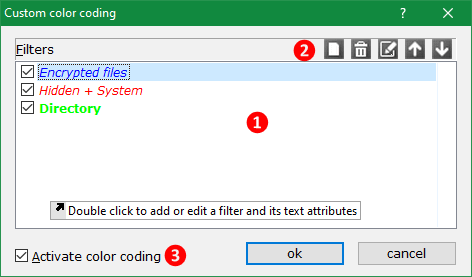
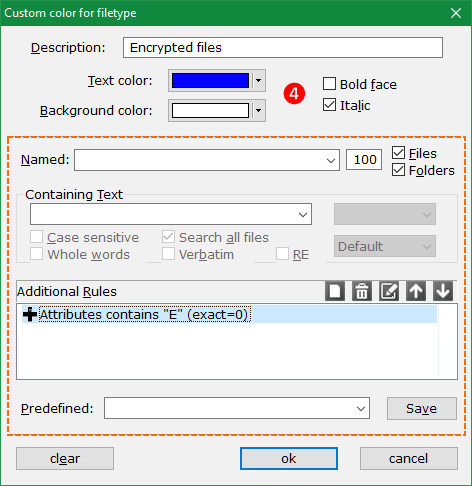
The custom color coding dialog (left) shows all the color rules you have defined in a list [1]. You can manipulate individual items (add/delete/edit) using the toolbar [2] and the equivalent context menu commands, as we saw earlier. The list shows the exact effect (color and font) that each rule will have on matching items.
"Color coding filetypes" is rather a misnomer for what this system offers. Not only can you change colors, but also fonts (apply bold and italic effects). And we don't just filter on filetypes, you can use any file property using mighty hyper-filters to define a color category. For example the encrypted files category above is defined using the file attribute property (see dialog to the right) — of course you can also use a wildcard like *.cpp to target a file type (extension).
Double click to add or change a color rule. The top section [4] is where you define the text attributes: foreground and background colors, and bold/italic style. The Description field isn't very important in terms of function, only as a reminder for your records — typically a summary of the filter. The biggest portion of the dialog is for defining the membership rule (compare with figure 17) — don't be put off by the apparent complexity. For simple wildcard color coding you would only use the Named edit control.
To turn on color highlighting tick Activate color coding [3]; clear the checkbox to return to normal colors. You can also turn individual color rules on/off using the checkboxes in front of each rule, if necessary. Note that coloring is a view-related property, so you can have e.g. the left pane highlighted and the right normal. You must turn color coding on/off for each dual pane (or tab) separately.
Use Window > Scrap container menu (from the main window) to open a scrap window. Many commands that deal with subfolders (e.g. file search) also create scrap windows automatically to present their results, files that reside in different folders. As you can see, scrap windows look similar to the main window (see figure 1) and they work more or less the same way. The figure below demonstrates all the possible window features, most of which are optional and can be turned off using View menu.
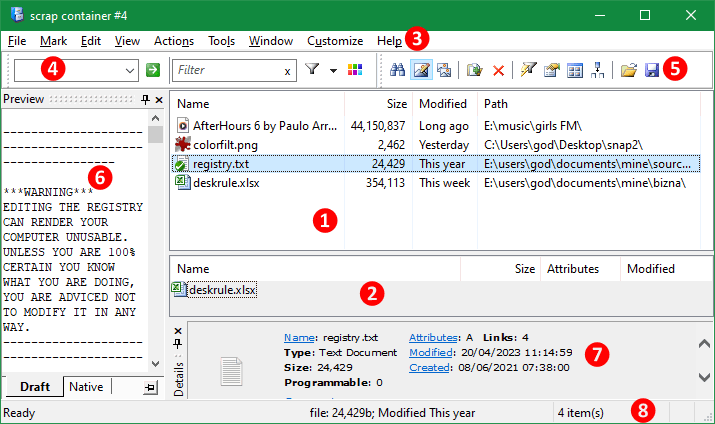
Here is a brief description of scrap window elements, by their reference number in the red circle:
|
As long as you have "Save program state on exit" option enabled, scrap containers remember the window size, layout and file details you used last time, and they will look exactly the same next time you open a scrap window. You will probably want to define a few custom column sets and switch details according to the type of files you work with. You can easily switch column sets if you right click on the view header row (see side picture)
Details from filter is an interesting menu command you can use if you do a file search that includes some unusual property like Author — or something that's missing from the current details. It checks the hyperfilter last used and makes sure all its properties appear in the active pane, so you can understand the search results. |
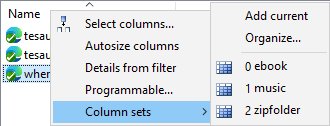
|
You can build collections in one go or step by step. Each new batch of items is added to the existing collection. To remove one or more selected items use File > Remove menu, or right click someplace empty and use Clear from the pane's background menu — that will clear all contents and you can start a new collection.
Scrap containers accept items from both filesystem and "virtual" folders. If you want to see file details in mixed-bag collections, say regular files and compressed zipfolder items, prefer stock columns that work consistently in both types of folders.
|
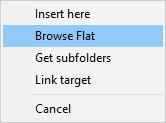
|
Such flat views are useful when you want to operate on items recursively into subfolders, instead of doing things one folder at a time. We are sure you'll discover many more uses yourselves!

|
In case you need to open the folder that contains an item in a normal xplorer² window, use <Ctrl+Enter> key or right click on the item and pick Open file location command from the menu.
If you select items from many folders (especially if multiple file types are selected) the shell context menu works, but it may include too many commands and be very sluggish. Try to use commands from the main menu bar instead, if you can find an equivalent command — most of the basic commands appear both in the main and context menus. |

|
The term "scrap" suggests something fleeting and impermanent, and indeed these containers were originally conceived as quick-and-dirty temporary holders of items, which would be discarded as soon as some simple file operation was performed on them. However, it was soon realized that there was another possible use mode: saving scrap contents for future use.
Actions > Write contents creates a file with .CIDA extension and writes location information for all the items in a scrap pane. You can reopen such saved files at a later time and restore the scrap container, just like as if it was a shell document. xplorer² registers .CIDA files for its own use so you can open them by merely double-clicking on them, even when xplorer² isn't running — or use Actions > Load contents menu.
You can take advantage of this functionality in many ways. For instance you can create cida files as "table of contents" that keep the locations of files with similar content throughout your filesystem. This would be equivalent to creating a normal folder and keeping shortcuts to the same documents, but if you go the scrap way you have direct view of the actual files. Or you can create playlists out of your music collection and save each as a CIDA file, one for each genre. The sky is the limit!
| Normally you will be reusing cida files on a single computer to access a set of related files. If you want to access the same files from a different PC you must save some extra information to make the cida file location-independent; that is the purpose of "UNC pidl files" type in Save as type drop-down box, as in this snapshot: |

|

You can see a list of all windows in xplorer² process (including scraps) via Window > List menu. To help you identify which window is which, scraps that are generated automatically have a descriptive titlebar, like the one below created by Browse flat command:

Loading CIDA and search results also have good titlebars; for the scrap windows you open manually, use Window > Set title menu command to set a titlebar that reflects the contents — that should help you remember what each scrap window is all about.

It can be argued that in some situations it will be more convenient to have a scrap pane (virtual folder, drop box, "playlist", multi-folder view or however you want to call it) within the main xplorer² window, rather than opening a separate scrap container. This functionality is furnished by View > Mini scrap menu command.
There is only one such pane available per window, but it is quite versatile. It is resizable and dockable on any window side. It is almost identical in functionality to a stand-alone scrap container: you can put in it files and folders from many locations, you can select view modes, sort orders, even arrange the content in groups. Most of the menu commands are available too, including load/save through the background context menu. When you click on the miniscrap, it becomes the active view (instead of the folder panes), and you can preview items as you select them in the miniscrap!
The miniscrap is rather small for managing lots of items, but here are a few possible uses:
|
If there is no stand-alone scrap container open, <CTRL+S> sends selected items to the miniscrap. By default the contents of the miniscrap are automatically saved and re-loaded when you restart xplorer²; this makes its use as a bookmark pane very attractive and convenient. You can access a number of recently used "playlists" too through the context menu. An alternative is to right-drag a stored CIDA file and drop it onto the mini-scrap, picking Browse flat from the context menu.
To stop the mini scrap reloading the last CIDA document on startup, empty its content before you close it, e.g. select all and then hit <Del> — or use Clear from its background menu. Or untick the advanced option "Load last contents file...". For more tweaks see the miniscrap section of the advanced options editor. The default contents file name is %APPDATA%\zabkat\x2_mvtmp_.cida
|
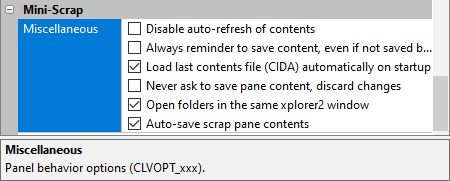
|
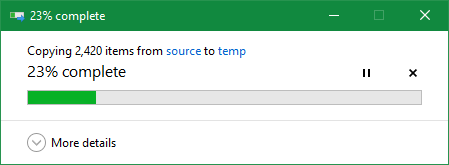
A common operation is creating a duplicate of a file in the same folder. This can be done with two keystrokes, <CTRL+C> followed by <CTRL+V> will paste a "Copy of" item. xplorer² offers Edit > Duplicate menu command as an alternative.
Instead of pasting the whole file, you can create a windows shortcut (LNK) file using Paste link menu (or while dropping). These are small files that point to the real file (think of all the shortcut program icons on your desktop). When you double click on a shortcut, the target file is opened.
Other special kinds of targets can be created using Edit > Paste special submenu as below:
|
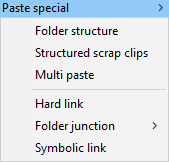
|
So which kind of link is best? There is no clear cut winner. See the table below for advantages and disadvantages of each type:
|
As you can see for most uses a symbolic link is the best option (if you don't mind the elevation to create one), except for when you rename the linked file. The humble LNK shortcut can survive if you rename or move its target, because of the link tracking windows service!

When it comes to transferring large amount of files and folders, the windows copy dialog comes rather short. xplorer² in exchange for the fancy animations, offers a robust alternative when copying from and to regular filesystem folders. The main features are:
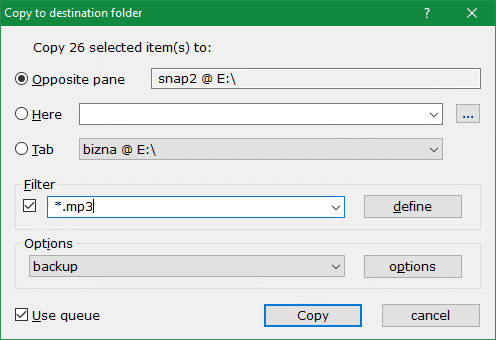
The dialog has 3 main areas: where you want the files copied, whether to apply a filter and various options.
Most of the time you don't need to tweak any copy options. You just press <F5> key to show the dialog and immediately press <ENTER> to start the robust copy using whatever options you used last time. In fact to copy to the inactive pane with the last used options press <CTRL+F5> key combination, and it will be done without showing the dialog!
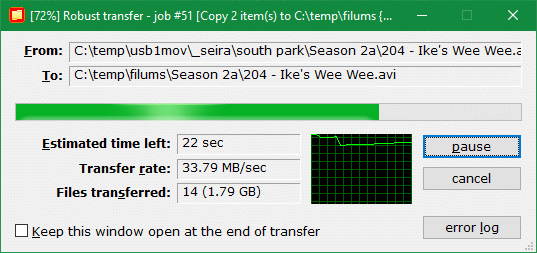
The progress dialog is horizontally-resizable. You can see information about the file being copied (From and To fields), a progressbar indicating how much work is done, a rough Estimated time left, and some statistics associated with the transfer; there's even a graph of the transfer speed over time, to keep you mildly amused :) — you don't really need any of this information. You can casually inspect the progress also on the (windows) taskbar icon:

A pause button exists to temporarily halt the file copy (for whatever reason); then click on resume button to continue, or cancel to abort the copy altogether. If you abort, the files transferred up to that point are not deleted. Whatever's done, is done. If you want to restart a failed or abandoned copy, use "Overwrite if newer else skip" option (see below) so that you don't waste time with files that were successfully copied in the first attempt.
If the source and destination folders contain items with same names, they will be overwritten. The old version will be replaced with the new file being copied. As this is a radical and irreversible step, by default xplorer² requests your approval with this messagebox:
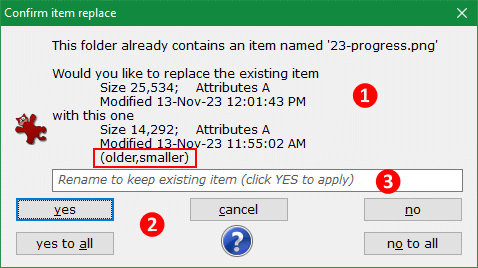
To help you decide which file to keep, xplorer² shows brief information (size and date attributes [1]) about the existing item in the destination folder, and the new one that is about to overwrite the old version. You should focus on the last line that highlights the differences of the new item older,smaller and then decide: to overwrite the old file click Yes button, or No to keep the old (existing) file. The action buttons [2] include yes/no to all buttons, that reply yes or no to any subsequent overwrite confirmation automatically. You see the pattern in the first few confirmations and you decide whether the remaining can be dismissed in the same fashion. If you click cancel at this point you abort the entire file copy.
Another option is to keep both files, saving the new one with a different name you specify in input box [3]. Doing this file by file manually can get tiresome, but you can select the Overwrite method option "Rename target" which will create such unique name copies automatically (it adds _1 to the base name). However keeping all these extra files isn't sustainable in the long term, sooner or later you must decide if they are all worth keeping or are just duplicates.
When it comes to replacing folders, i.e. when the destination contains a folder with the same name as the source, by default the target isn't overwritten — just extra files are added in it. If you want to use the same overwrite semantics for both files and folders, enable "Overwrite folders" option; then if a folder collision is detected, the entire old folder (cum subfolders) is first deleted, then replaced with the new contents. This is liable to destroy a lot of old content, so please be careful.
For most people, the smarter overwrite option is "Overwrite if newer else skip" (available as backup from the drop-down list, see figure 22). It is an automatic way to resolve conflicts; it compares file modification dates and keeps the most recent file (assuming it contains later changes you made). If the source file is older or identical (in terms of date modified) to the existing, it is skipped. This mode is perfect for backups, where you keep an up-to-date copy of your working documents in a safe external location (e.g. USB disk). If you do this daily, you don't need to copy your entire documents folder, only new and changed items. Thus you save time and effort — no time wasted confirming file replace operations.
|
There are a number of situations where a file copy fails, as for example if the target file is open in an application. xplorer² will pop a message describing the issue, and depending on the situation will offer alternative courses of action, e.g. Abort-Retry-Ignore questions, where you click the button with your choice action. Usually the only feasible options you have are to ignore the problem if it looks like a 1-off, or abort the copy operation if more files are expected to fail in the same manner — say if you ran out of space in the destination drive.
A soft error you may encounter copying to FAT32 devices is about "Secondary streams" that couldn't be copied. ADS are used for storing comments or to mark downloaded files as risque. If you are certain you don't need this warning message (if you are not using file comments) tick the advanced option "Disable stream loss warning..." — one less thing to worry about. |
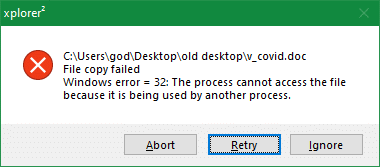
|
|
The progress dialog has a log that records each file operation individually. You can browse this using error log button (see figure 23) — a misnomer really because it shows more than errors. You can search the log pressing <CTRL+F> keys, or if you just need the error lines, right click in the log window and pick Show errors menu command. For subtle problems search for the special @@@ marker.
When you copy in backup mode, only files that were copied are logged (newer and modified) — there are usually fewer of them in large backups. To make sure you get a chance to see the log after the end of the transfers, tick the option "Retain window" so that the progress window won't close automatically. |
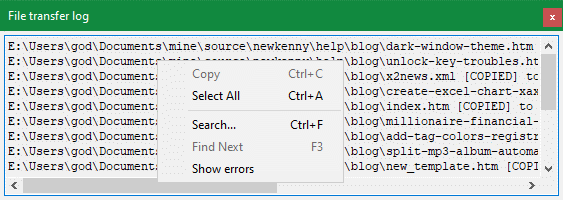
|
During silent operation, any events encountered that would normally require user intervention are dismissed automatically. More specifically:
The robust transfer configuration dialog has a button for Options. Many important options have been discussed already; here's a brief explanation of all copy options:
|
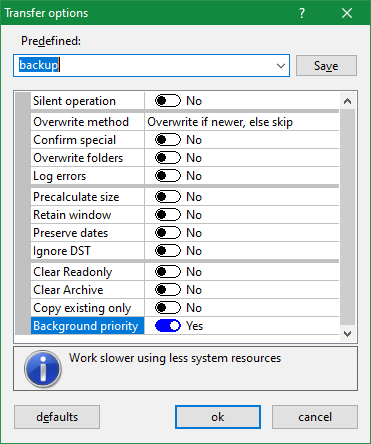
|
This dialog uses the property control also used by program options. It shows all options in a list, which you can scroll up and down. The left column shows the property name, and the right its value. You can flip the "checkboxes" on/off (Yes/No) using the mouse or <SPACE> key. The selected option shows a brief explanation about what it is for in the text box below the options.
Set of options can be saved and reused. First tick all the options you need, then give them a descriptive name in Predefined box, and click Save button. Then you can quickly select saved option sets straight from the main transfer dialog (from the options drop-down list). To modify a previously saved option set, change the tickboxes and click Save again (using the same descriptive name) to overwrite the old definition.
If xplorer² is in in the middle of a large copy, any extra jobs will be added to the queue. You don't have to wait, just use Edit > Copy to command normally, and once one job is finished the next one will begin, until the queue is empty.
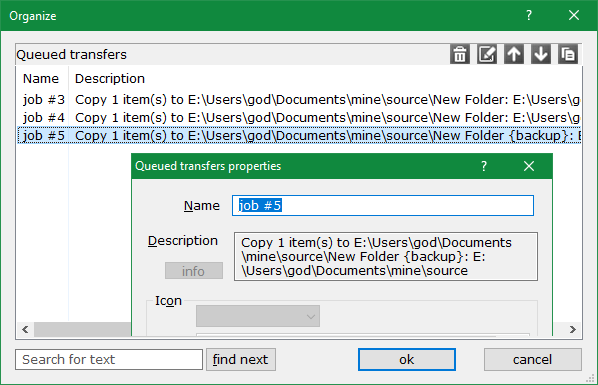
You don't normally worry about queued copies, but if you want to see what is waiting use Edit > Queue status menu command, which will show you queued jobs in a dialog similar to bookmark organization. You cannot change properties of any waiting jobs, but you can delete or move them up/down the order using the dialog toolbar buttons. Double click to see details on the source/target folders and any special options used.
Another recommended option is to set the task priority to background, which won't overwhelm your PC resources, thus you can continue working during big copy tasks.
If you opt for silent operation, then no errors will be shown till all queued jobs are finished. In the very end, and only if there were any problems, you will be notified about it.
When xplorer² is copying from or to special folders you will see the regular windows explorer progress and overwrite confirmations windows, that look different — compare with the snapshots in this section.
| Copy watchdog. When you copy to or from slow network locations, xplorer² is monitoring the transfer speed. If nothing happens for 20 seconds or so it will alert you to the problem with the message This file is too slow to copy.... You can either skip the slow file or persevere with the slow copy (in silent mode the file is skipped automatically). If you get too many of these interruptions, and your network is known to be slow to respond, you can increase the "Network folder ping" timeout to match your network (e.g. set it to 30000 milliseconds if half minute gaps are normal). Alternatively you can disable the watchdog altogether ticking "Don't check for slow copy..." advanced option. |
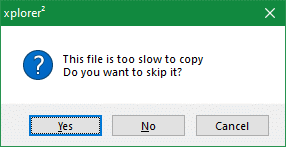
|

Whenever you start a delete operation that cannot go in the recycle bin (e.g. you press <Shift+Del> or delete in an external flash drive) the robust delete dialog kicks in:
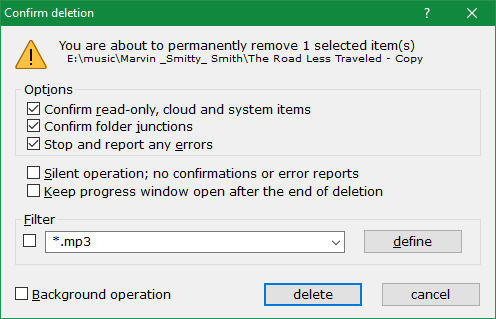
The first row of the dialog shows how many items are going to be deleted (beware of selected items hidden out of view you didn't mean to delete), and the full paths of the first few of them.
Deleting is much simpler than copying, but the robust delete dialog offers some similar options, as confirmation controls (checkboxes) that are self-explanatory. There is also a "Silent operation" option when you do unattended deletions and don't want to be delayed with confirmations or error reports. Errors are ignored but then probably the deletion will be partial.
When deleting folders, all their contents are removed recursively down to the deepest subfolder. This includes any hidden or system files that may reside within. If you don't have permission to delete them, an error will result.
|
You can even specify a filter (either a simple wildcard or a complex hyperfilter) so that only files that match it will be deleted. This makes sense when you are deleting into subfolders and you only want to remove a certain kind of file.
Click on Delete button to start the deletion. You get to see a progress report dialog like the one to the right. It is possible to pause and resume deletions, but they are usually too quick and you won't have time to do it! The dialog has a tab control you can switch among displaying progress or the Log. The latter text information is searchable, right click to see the search menu (like the one in robust copy log) The little Actions menu has commands to change the log's font and clear it. There's also a delete queue but usually it is empty unless you do a lot of successive deletions.
Robust deletion is permanent, deleted files won't go in the recycle bin hence you cannot undelete them easily. Use this command with care — that's why there's no option to skip the robust delete confirmation, it's your safety blanket.
|
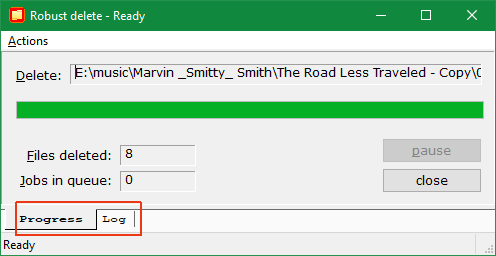
|

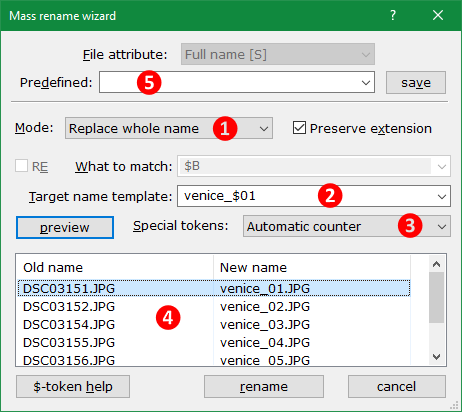
The most important setting is the Mode. Using this drop-down list [1] you set various modes that determine what kind of renaming is performed:
|
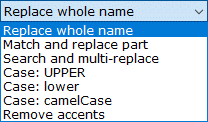
|
The list [4] shows you a preview of the transformation that is going to happen if you go ahead with the rename. The column old name lists a sample of the currently selected filenames in the active pane, and new name shows how each name is going to change. xplorer² automatically generates a preview from time to time, or you can click on Preview button to see the pending name changes. If your names are long you can resize the dialog window horizontally or/and vertically. Any filenames that won't change under the current rename settings are shown with a yellow background, alerting you to the fact — however this isn't necessarily an error to worry about.
If you remember the name of the variable token, you can type it straight in Target name box [2] or use Special tokens [3] list to help you find the token you are after. You can use multiple $-tokens in a template. The tokens useful for renaming are a subset of the available $-tokens used for command scripts. Here are some examples:
Tick the RE box (to the left of What to match field) to enable changing filenames with complex regular expressions. This is an advanced renaming mode that can help with certain kinds of rearranging parts of the filename using backreferences. This box is only available when Mode [1] is set to search and replace, and disabled in all other modes.
Here is an example. Let's say we have a filename LOG.17112006.TXT that contains a date in DD-MM-YYYY format, and we want to convert it into a more standard YMD (year first) format. We use a regular expression to match the 8 digits separated in 3 groups (day, month and year), then use backreferences to rearrange the 3 groups.
To match the original date format, we use (\d\d)(\d\d)(\d\d\d\d) in the What to match dialog box. There are 3 groups defined in brackets that match the date in the filename:
(\d\d)(\d\d)(\d\d\d\d)
LOG.17112006.TXT
To invert the location of the 3 groups and add separating dashes between the year, month and day, we use $3-$2-$1 in the Target name template (replace) box. $3 is a special backreference that stands for the 3rd group (year), so the resulting filename will be
LOG.2006-11-17.TXT
Note that parts of the original filename that were not matched by the regular expression remain unchanged. You can use any kind of search and replace trickery for other tasks too, e.g. to eliminate parts of the filename (leave the replace string empty). Sadly you cannot combine $-tokens within regular expressions.
Once you setup the rename parameters and previewed the results, click rename button to start renaming. Selected files are renamed in the order they are listed in the active pane. A progress bar on the statusbar shows you how much work is left to be done. If everything goes according to plan, you will see the new names at the end of the operation. If there are any problems, you will be informed and asked what to do; if the error is important just abort the rest of the files.
The mass rename dialog has many options. You can save your favorite rename operations, including all options, search and replace strings and so on with a name, and repeat them again later. Use the Predefined drop-down box (item [5] in figure 27) to supply a name for the current options, then click Save button to store them. In subsequent runs, use the drop-down portion to access your predefined settings and repeat rename operations easily. To remove a previously saved set of rename options, hold down <CTRL> key as you click on Save button.
Note the File attribute drop-down box is permanently disabled in mass rename mode. This field is used for changing other text attributes (comments etc) in bulk
Depending on your sort order, the selected files may be rearranged after each rename step, e.g. if you sort by name. If you want to preserve the original order as well (e.g. if you plan to add numbers to them), tick off "automatically re-sort" option.
This procedure could be automated using macros, especially if each rename step is saved and available from Predefined drop-down list
xplorer² makes extra effort to keep the original set of files selected and in order, which unfortunately leads to slower renames. If you are not using multiple rename steps you can set a small number to "Stepwise rename limit" advanced tweak
For files, date modified tells the last time you edited the file, made some changes in its content; whereas creation date is record of when the file was originally created. File dates and times are accurate to the millisecond although you can choose to see less detail.
File attributes are status flags and are mostly interesting for anorak types :) — see the expert section below. The shell property sheet allows changing some filesystem attributes like Archive or Read-only, but not all of them. xplorer² offers access to all attributes as well as to timestamps of files. Using Actions > Change attributes menu command on a selection of items you get this dialog which allows you to change 4 basic attributes and touch dates/times.
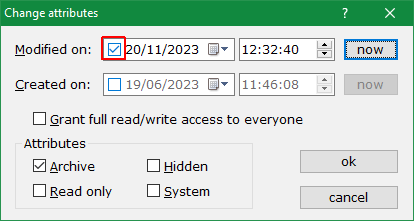
When the dialog first appears, it shows the current dates and attribute flags of the selected item. If more than one items are selected, then it shows dates of the first one and common attributes are ticked. If only some files have an attribute (and some don't) then the relevant box shows in indetermined state instead of ticked.
Only things that you actually change are affected; so if you don't check any date boxes, these won't be updated. In this way you can change only attributes or just dates, or both at the same time.
To change a date, first tick its checkbox to enable the date and time change controls (observe how the modified row is enabled but date created is disabled in the above dialog snapshot). You can then set a specific date and time, or click on Now button to reset the date to current time (this is called touching a date).
When you are all set click ok button to go ahead with the changes, or cancel to abort the operation. If multiple items are selected, they will all be changed in the same fashion — they will be identical in terms of whatever changes you made. Otherwise each item keeps its original dates or/and attributes. The active folder pane will autorefresh to show you the new attributes you just set for the selection.
Except for fixing dates (set the same date for all selected items), you can swap various date properties, and shift a file modification date forward or backward. Use Actions > Change dates menu command (or the equivalent ribbon UI command found on Workbench tab, under Attributes button) to modify the selected items' dates.
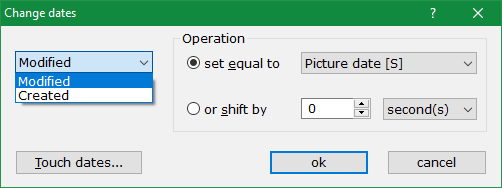
First choose which date to change (Modified or Created) using the leftmost dialog drop-down box, then choose the operation to apply. You either set the date equal to some other date property of the same file (e.g. set the modification date to the date a picture was taken or the video media creation date), or you can shift the existing date relatively by some amount forward or backward. Use negative numbers in Shift by box to set the date in the past.
It is also possible to set a date from the filename too, if the name contains the standard date format YYYYMMDD HHMMSS (e.g. some cameras set names like PIC_20181026_192237.JPG). For this operation select Name [S] from the property drop-down box. Naturally trying to set non-existent or invalid dates will generate an error message (e.g. text files don't have a Picture date property).
A possible application of Shift by operation is to adjust modification dates that were adversely affected by summer/winter time changes (DST) that may seem like fake file modifications to backup and comparison programs. Sliding dates up or down by one hour exactly will cancel the problem (prevalent mostly on FAT32 filesystems). You can shift dates by seconds or years, depending on the unit you select from the drop-down box.
Another way to remedy such phantom DST "modifications" is Actions > Sync-touch menu command, that will match filenames in the active folder pane with namesakes in the inactive pane, and will transfer date modified information from active to inactive panes. For this to work you should have the "original" and "backup" folders in the active and inactive pane respectively, and make sure that all differences are down to DST — or you may forgo real modifications in content!
Here is a sync-touch demo video 
Click on Touch dates button if you want to set all selected file dates to the same date and time — this actually uses the previous dialog for changing attributes.

Sometimes you may want to transfer large files between two PCs and find that a single file is way too big to fit on e.g. a floppy disk or even CD. The Split and Merge commands from Actions menu will come handy in such a situation.
Actions > Split menu expects a single big file selected (the command is disabled when you select more than one file). First you break down the large file in as many portions as necessary, declaring your preferred split size (in kB) in the dialog, The standards drop-down lists a few typical media you may choose to provide an automatic split size — e.g. portions that will fit in a single CDROM. Split pieces will give you an idea how many chunks you will get for the selected file, for each selected split size.
Then you choose the target folder that will receive the fragments and click ok button to start splitting. For example if you have a file called bigone.dat that is 10MB and you break it down in chunks of 1MB, you will end up with 10 files named bigone.dat.01, bigone.dat.02, ... bigone.dat.10.
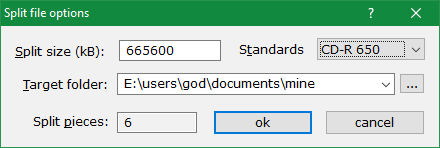
This will allow you to place the file segments on floppy disks and do the transfer to another computer. There you just need to make sure to place all fragments in a single folder, select them all after sorting by name (so that they'll be in order), and use Actions > Merge menu to put them back together; the file will be restored keeping its original modification date. You can now delete the split fragments!
Comments are small pieces of text associated with files and folders, 100% controlled by the user and ignored by the filesystem. There are many possible uses for comments:
| You can examine file comments adding the stock Comment [S] column in detailed view mode. Comments also appear in details pane for the focused item in the active pane. They even show in Details property page (File > Properties menu) along with other properties — but they aren't easy to browse there. Most important of all, xplorer² allows you to use comments as search rules, so you can easily check and retrieve files that have one or more keywords. |

|
You set and modify comments for one or more selected files using Actions > Set comment menu command, which displays this dialog:
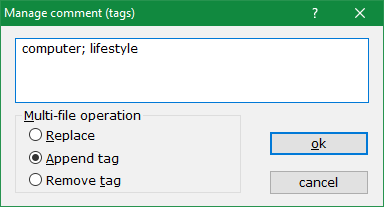
Comments can be as long as you like (up to 4096 characters to be exact), that's why you get a big box to type your comments. The dialog shows any prior comments if any exist; if multiple files with comments are selected, you see the comment of the first one selected.
When changing the comment of a single file Multi-file operation group is disabled because its modes aren't needed: you just see the entire comment and you get to change or delete it as necessary. When many files are involved you have 3 options:
When you are happy with the comments and the operation, click ok button to set, modify or clear the comments of the selected files. When the operation is over you will see a message on the statusbar "Operated successfully on xxx items", which should be equal to the number of selected files — unless there was some problem.
File comments rely on an advanced NTFS feature called alternate data streams (ADS). One way to view ADS is like separate chapters within a file. What you usually regard as file is the main stream where your data is held, e.g. your text. With NTFS you can associate other streams with a file or folder. So FILE.TXT can carry a stream called OTHER and it will be addressed as FILE.TXT:OTHER using a ":" to separate the stream name. When you move the file around, all these alternate streams are silently carried along.
|
The standard stream for comments is called SummaryInformation, but unfortunately the property system makes a mess of it for most file types, so xplorer² uses its own stream called x2_AFSComment. This makes things consistent within xplorer² but obviously other programs like windows explorer will not be able to read such special comments.
|

|
Another use of ADS is the Zone.Identifier information your browser attaches to files you download from internet, which cause various "unsafe" warnings. If you trust the downloaded file, press <ALT+ENTER> to see its properties and tick Unblock box in general property page.
|
There's another way to change comments or any other text (or numeric) file property, in bulk for all selected files.
Actions > File properties menu lets you change editable text file properties like Author, Title, even tags (keywords) and comments. The dialog is identical to that used for mass renaming, only you select the file property to change using the File attribute selector box near the top of the dialog. Using a GUI similar to mass renaming you can either set, clear or modify through search and replace the existing file properties. This command is mainly for text properties, but it can also be applied to numeric ones, like track number # — just make sure your templates translate to numbers, e.g. using automatic counters $01. The procedure was explained in detail so it won't be repeated here. Just select the property you want to change using the drop-down list, and choose the mode, set your property manipulation template, preview the changes, and off you go! Some dialog controls that are only valid for renaming like Preserve extensions will be disabled in this function. |
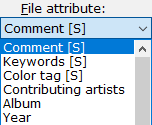
|

Many times you have two or more folders that have the same contents and you want to keep them synchronized, i.e. make sure all "versions" stay updated whenever you make changes to one of them. The typical scenario is a daily backup of your current work documents, from your PC onto a safe removable drive, so if a mishap strikes your PC you can retrieve your work with minimum losses from the backup location.
Folder synchronization needs to track all changes between 2 folders, either on a single level or deeply including all the subfolders. Possible changes include:
That's when xplorer² and its dual pane layout comes in handy. It is ideal for comparing the contents of any two folders, and finding items that are missing from either one, or have been changed in any way. Once you identify the differences, you can decide how to deal with them — e.g. copy the new and modified files manually to equalize the folder contents.
xplorer² doesn't have a real synchronization function, it merely compares folders and marks the differences. The misnamed menu command Mark > Synchronize panes compares the contents of 2 folders, and tries to find file names missing left and right. When the same file exists both sides, it checks the modification date to find which version is "newer" and marks it as such. Here is an example comparison:
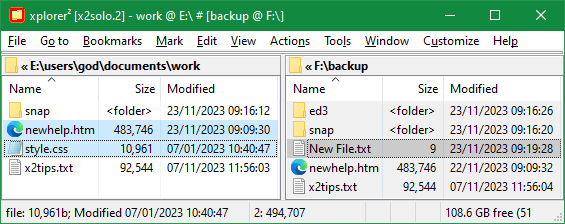
When you press <F9> key xplorer² compares the folder contents and marks (selects) unique files like STYLE.CSS that exists only in the left folder, and newer versions of files that exist both sides (compare the modification dates of NEWHELP.HTM, the newer version on the left is selected and the one on the right isn't). File X2TIPS.TXT has identical dates left and right so it isn't selected at all. To really synchronize the 2 folder contents, one must copy only selected files from one pane to the other (this must be done twice, once in each direction — observe the unique file NEW FILE.TXT on the backup folder to the right).
Notice how the plain <F9> "synchronize" command didn't mark any folder differences. Folder modification dates aren't very reliable to track changes in deeper levels. We will return on this important matter later.
For more control on what gets marked (selected) after the comparison, use Mark > Sync wizard command. The dialog indicates that comparison has two facets; first you determine how you want to compare items and then which items to mark. The large number of combinations allows you to do all sorts of checks to suit your synchronization needs.
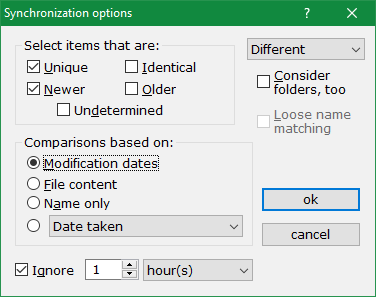
The comparison logic first tries to match items left and right using the filename as a guide. If a file in one folder doesn't have a matching namesake in the other folder, it is immediately considered unique (cf. the checkboxes in figure 33). If a file exists in both folders, the two copies are compared for differences, using the mechanism you specify:
Given the wealth of xplorer² browsing options and comparison parameters, there are many ways comparisons can become "abnormal". Here are a few things to keep in mind:
The relationship between files is fixed by their properties and the comparison scheme you select. The second phase is to decide which files you want to mark, ear-tag them for further processing. There are checkboxes for all item states and you can check as many of them as you wish - although not all combinations make sense, e.g. selecting both "older" and "newer" files. The drop-down menu on the top-right lists some common scenarios for your convenience (modes for marking different or identical items).
The plain synchronize command <F9> is equivalent to ticking Unique, Newer and Modification dates options
Ticking Undetermined option will mark all those items that were not successfully compared (those with the question marks mentioned above). Tick Consider folders option to include folder items in whatever comparison method the files go through — but only in terms of name and date properties, their subfolders aren't considered. For this and loose name matching option see the deep sync section.
When all dialog settings are set to your liking, click ok button to start the comparison. Usually this is done very quickly unless you are checking custom slow properties or file contents. A progress bar on the status bar will keep you informed of the comparison progress. If it takes too long you can hold down <ESC> key to abort the operation.
When xplorer² finishes comparing you get the verdict either that "The contents of the two folders seem identical" or if any differences are spotted items are selected for further action. For example if you were scanning for differences, you can proceed by copying the marked files to the "passive" folder, ensuring that the files in both folders are the same, both in number and most recent content. Note that there may be unique and newer items in both folders — obviously not the same items — that need to be carried across.

| Sometimes you may need to synchronize folders including their subfolders, as in the situation to the right. If the hierarchy is shallow (few folders) you can turn on mirror browsing (Go to menu) and let xplorer² keep the inactive pane in the matching folder, as you browse folders in the active pane. As an example, starting from folders A:\ and c:\documents\kenny in the active and inactive panes respectively, if you browse into A:\help the inactive pane will automatically follow to read c:\documents\kenny\help. This mirroring will continue in both down and up direction, as long as folders with matching names exist. |

|
When many subfolders are involved, mirror browsing and comparing folders one by one is cumbersome. An easier way to compare two folder hierarchies is to browse the required root folders in a normal dual-pane window and pick Tools > Compare subfolders. This command will open a dual scrap window, flatten each hierarchy in a separate pane and will also launch the synchronization command. If grouping is supported, items will be grouped by folder helping you to inspect the comparison results. This way you will reveal all the changes that need to be made acting on all subfolders simultaneously.
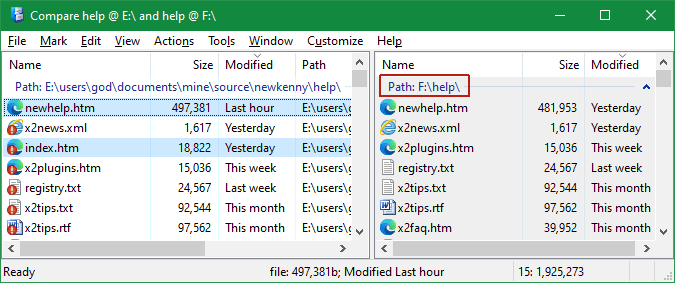
Arguably, inspecting the results of a deep folder comparison isn't the easiest thing to do. xplorer² turns on Mirror scrolling mode to help you examine files left and right, but there may be just too many results to juggle. To protect the marked files, you should turn on Sticky selection from Mark menu. Another handy feature is pressing <ALT+DOWN> keys to jump to the next selected item, in case they are far apart. Or to focus just on the marked items use View > Visual filter > Selected only menu and concentrate on the differences.
Once files are marked, use the special Edit > Sync-o-paste command available in scrap containers to copy all the files in their matching folders. So items selected in A:\ will end up in c:\documents\kenny, those in A:\help will end up in c:\documents\kenny\help and so on. Note that Sync-o-paste acts on the selected items and doesn't require a prior Edit > Copy command.
Another drawback is that when a folder sub-structure is entirely missing from one hierarchy, all contained items are left in an undetermined state, since their matching folder isn't available.

If you find this form of deep synchronization with scrap containers a bit of a headache, you can try an alternative that is based on robust copy <F5> command. Selecting Overwrite if newer else skip transfer option will result in copying only files that are new or changed, just as if you did a synchronization based on modification dates — and it doesn't need scrap containers or any prior synchronization commands! This will work best if you have all the changes in one folder hierarchy and you want to mirror them to some other "backup" location like a removable drive.
Here is a summary of a backup operation:
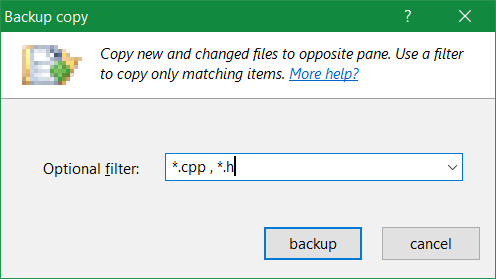
Usually you leave the filter box empty, to copy everything that's changed — or type a few comma-separated wildcards to copy only matching files. More complex filters are available from the drop-down list, as previously defined in the robust copy dialog. Copy options are fixed to "Overwrite if newer else skip" and "Ignore DST". Click on backup button to start the copy operation. Only new and modified files will be copied with no questions asked.
You can manage your documents so that they all fall under a single root folder like MyDocuments — organized in various subfolders of course. This kind of hierarchy makes backups very easy as you only do a single backup for all your documents. If on the other hand your work folders happen to be scattered in different places, say some in C: drive and some in E:, you can use folder junctions to create a single root "master" folder somewhere, and drop in there junctions to all the various work subfolders. Thus you have reorganized your important storage without actually moving anything, and backups can be done in a single step. For this trick to work you must enable the advanced option "Treat folder junctions as normal folders..." and all xplorer² recursive commands will follow junctions automatically.

The folder synchronization command just described checks for modifications of different versions of the same file. A variation on this theme is checking the state of file transformations, when the compared filenames are slightly different.
If you are involved in programming, then you will recognise this situation as compilation of source code to object files. So starting from a C++ file xplorer2.cpp the compiler churns out the machine translation in a new file called xplorer2.obj - notice the change of extension from .cpp to .obj. Mark > Check build command checks the states of source files comparing them to their "transformed" versions.
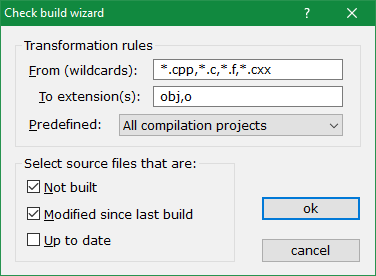
The dialog shown in the above figure accepts as input the transformation rule, which observes the source and target filename extensions. It can be seen that multiple comma-separated extensions can be used to check for all compilation projects in one stroke. Also note that a generic wildcard is accepted for the From field whereas the To field must be just the target extension(s), without the "." (e.g. type obj instead of .obj).
The idea with this command is to browse the "source" items in the active pane, and the "transformed" equivalents in the inactive (both could be in the same folder), then tick the boxes to locate items that either need transformation or they are Up to date. Click ok button and Check build command will then examine names and their filetimes and select source items in the active pane according to the checkboxes you ticked.
Once source and target files are matched their modification dates are examined to figure out which is newer. If the source is newer, it must have been modified since last build (cf. figure 35 checkboxes) and it requires re-compilation. If the target is newer then it is up to date, whereas if it doesn't exist at all the source is not built. You can check as many boxes as you want to tell xplorer² which source files to select. Let's take an example.
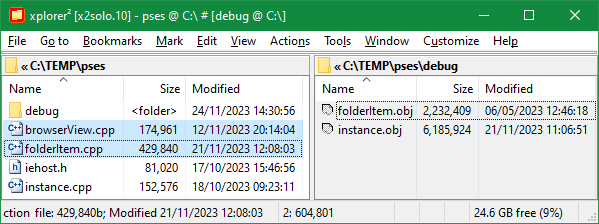
Using the options in figure 35 on a pair of hypothetical source and target folders, xplorer² marks all source files that require compilation. The file folderItem.cpp was modified after it was last built (check the date of its target folderItem.obj) so it is marked. browserView.cpp hasn't been compiled at all (no browserView.obj exists in the inactive pane), so it is "not built" and hence marked. instance.cpp on the other hand is up to date, and finally IEHost.h is completely irrelevant for this transformation rule so it is left unselected. Note that nothing is selected in the inactive pane to the right; this command is checking one way only.
Like the folder synchronization command, Mark > Check build merely ear-marks files that require building without actually taking any further action. It is up to the user to decide what to do with the selection afterwards, e.g. generate a script file that executes the compiler for each source file.

According to the second law of computers, no matter how big your hard disk, eventually it will fill up with movies, videos, pictures and what have you. Do you need all that stuff? Is space wasted in temporary and duplicate files? xplorer² has some tools to let you focus your disk cleanup effort at the biggest offenders, files and folders that take up the most space.
Tools > Folder statistics menu command creates a detailed analysis of the active folder and its subfolders. If you want to examine your entire hard disk, first browse the root C:\ folder then invoke the statistics command — naturally the bigger the hierarchy, the longer it will take to analyze. It will calculate details for each subfolder like number of files and size used, and will do so recursively for all the contained folders, and present the results as a tree:
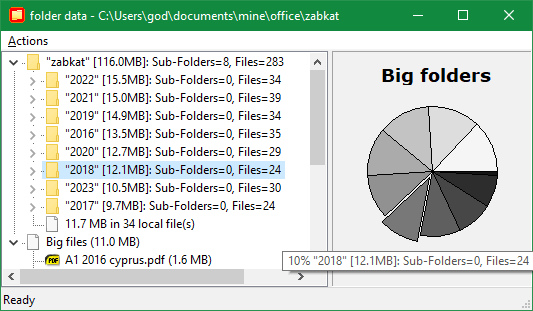
The largest folders appear first. To aid visualization of space usage, a little pie chart is shown too, popping out a pizza slice for each folder you select in the tree. Drag the splitter bar with the mouse to make the pie bigger or smaller. You can also use the tooltips over the pie pieces to discover the folder names.
The second main tree branch shows the 10 biggest files in the hierarchy examined, arranged by size. Examine the big files branch to see whether you don't need some of them and you can delete them to save space. Select a file and press <ENTER> key to browse its containing folder.
|
The tree is for information only. You can examine and open branches, but you cannot do much file management. If you want e.g. to delete a large unwanted folder, use Actions > Browse menu (or double-click on the folder) to open it in a regular xplorer² window. The tree won't autorefresh either, so if you delete a folder branch, use Refresh command to update the tree information.
The single menu bar item called Actions holds a few commands, the most useful of which perhaps is Copy, which copies the entire selected tree branch as text, that can be subsequently pasted in a text editor for printing or whatnot. Use Find and Find next to search for folder names (this will open tree branches automatically). You can also switch the sort mode from size to sort by Name — although the former arrangement is more useful in this context.
Another useful menu command is Empty folders which detects folders that are empty (they have no file contents), and puts them in a scrap container for further action (e.g. select all of them and delete them). Empty folders won't take up much space but some people want to get rid of them regardless.
This command is smart enough to discover the topmost empty folder in a local hierarchy, and ignore its empty subfolders (if any) — that will be deleted with their parent folder anyway.
|
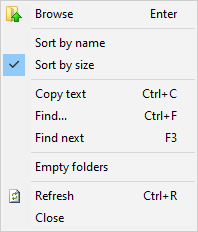
|
|
While browsing a folder with subfolders, Tools > Subfolder size command will show you the size of each individual subfolder, so you can tell which one takes most space. The size shown is recursive, including space occupied by all deeper level subfolders. This command also works in special folders like phones and zipfolders.
Recursively adding up subfolder sizes takes a lot of time and effort. As an optimization, Subfolder size command will only calculate sizes for selected folders. If there is no folder selected then all sizes will be calculated.
|

|
Enable the stock Contents column to see the number of items (subfolders and files) contained in a folder. This information is not recursive, it won't tell you about files deep inside sub-subfolders, only direct folder contents.
If you want to see subfolder sizes all the time, without pressing <CTRL+D> for manual subfolder sizes, activate the option "Subfolder size". This is a major resource hog, so if you are browsing a top level root folder like C:\ it won't work automatically. Sometimes calculating these sizes takes so long that you may browse a different folder before the recursive addition is complete — definitely not recommended!
xplorer² doesn't cache folder sizes, so each time you visit a folder the sizes are calculated again and again. This is totally wasteful, so if you like to see folder sizes and have pity on your system resources, please download a plugin called folder size, that works well with xplorer².

Duplicates come in many guises. In the simplest case a file will exist in many carbon copies using the same name. A little bit trickier is when a file exists with many different names but the same data content (renamed). Check duplicates command will help you detect all these kinds of extra files.
Duplicate files could reside anywhere, in your PC's hard drive or in external storage. The first step is therefore to load all the folders you want checked in a scrap container. If you want to check on external hard disks you must have them all connected. Here are some possibilities:
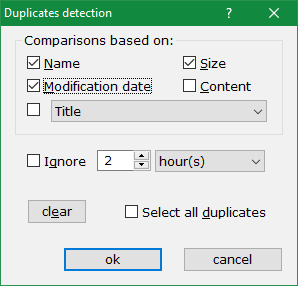
Next you specify the comparison criteria with the above dialog box. The options set in the dialog determine how the investigation is to proceed. You can have any combination of boxes checked (use clear button to reset all checkboxes before a fresh search) but the fastest would be to assume that duplicates would be 100% exact copies, that is they will have the same name, modification date and size.
If you are comparing modification dates, there could be phantom differences introduced e.g. by FAT32 partitions, that are only 2-second accurate for stored files. For such cases use Ignore XXX seconds box in the dialog. You get to choose how many seconds (or hours!) to ignore when comparing modification dates. Any 2 files that fall within the date tolerance limit are considered to have the same date.
Custom file properties can also be used as criteria for "sameness". Select the property you want using the drop-down box and you can extend the duplicates tester in creative ways (e.g. find all music files by the same artist or owner).
If you suspect you have identical files with different names or/and timestamps, then you can clear all boxes except for content (same size is then also implied whether you tick the box or not). This is the most robust detection mechanism but at the same time very time consuming, since each file is compared to each and every other same-sized file in the container, regardless of their name.
To speed-up content comparisons xplorer² uses the same statistical content trick as in synchronize command, where only a portion of huge files is examined instead of each and every byte. Also small files are excluded because there may be too many of them and you wouldn't save much space by their elimination. The advanced option called "Ignore small duplicate files" defines the limit of what is considered "small file" (default 1KB and under)
If you intend to delete duplicate files, please make sure you check Select all duplicates box in the dialog before you go ahead with the command. xplorer² will assume that the first item in each group is the "original" and select the remaining items for deletion.
When you are all set, click ok button to start the duplicate discovery process. Depending on how many items are in the scrap window and your scan options, the comparison may take long time. A progress bar will give you an idea of how much work is left to be done.
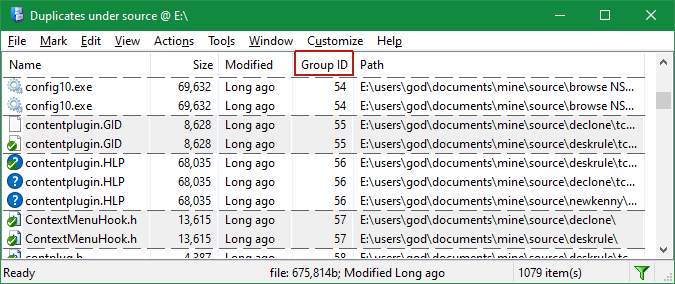
After the command finishes its work, all files that match the user criteria are bunched together in groups with different background color as in the above figure. All unique items are hidden. Note that some groups are made of 3 or more duplicate items.
Notice the Group ID column, which counts the duplicate group numbers. This is a pseudo-property as it doesn't corresponds to the files, only their relationship — but it is very useful regardless. If you change the sort order examining e.g. file dates or whatever, click on Group ID column header to restore the duplicate groups.
Such listings provide preliminary evidence of duplicate files. Depending on your dialog parameters you may need further proof before actually deleting the redundant copies. A good guide is the checksum column that you can activate using View > Select columns menu. It shows a numeric "summary" of a file's contents. When checksums are different files are 100% different; equal checksums on the other hand do not guarantee identity — although they imply a strong possibility that the files are identical.
To build up your confidence use the previewer pane to examine file contents. If you are working with images switch on Detailed thumbs pane style to see little thumbnails for each item. If you are working with plain text files you can use your trusty Diff tool to check pairs of files: select the 2 files then Tools > Run command menu to launch WINDIFF $A to compare them line by line ($A token represents the 2 selected items).
If you want to keep a file group entirely, select its items and press <DEL> key — in scrap windows this merely does a File > Remove command, the files aren't deleted. Otherwise to really delete duplicate files you must first select them. This is easier said than done when you are dealing with thousands of duplicates.
One easy method is ticking Select all duplicates in figure 38 before you even start checking. This command can't tell which is the "original" out of the identical files, but it uses the initial sort order of the items, leaving the first one in each group unselected and marking all the others. If you want to keep the older copy then make sure you sort by Modification date — ascending from older to newer — before starting the duplicates checker. Thus in each group all items but one will end up selected and ready for deletion.
If this automatic selection doesn't suit you, then you need to examine each group individually and select duplicates manually. As you finish with a group, delete the selected items immediately using File > Delete menu — or pressing <Ctrl+Delete> keys. This slow step-wise deletion will spare you any selection mishaps.
Technically speaking, when duplicate files are shown, the pane is both filtered since unique files are hidden from view (notice the green filter icon on the statusbar of figure 39), and unsorted since files are displayed in groups regardless of the original sort order. You can cancel this mode using Tools > Reveal unique or View > Show all menu command.

Another source of clutter in your hard disk is your photo collection. It is very easy to snap lots of photos with your mobile phone or camera, but not all of them are worth keeping:
xplorer² has commands that let you quickly discover bad and similar pictures, offering you the option to delete them and clean up your disk space. First you can choose the Blur file detail (use <ALT+K> keys to choose columns in detailed view mode). For JPG pictures it shows a number, which is big for pictures that are suspect; values greater than 100 indicate bad quality, whereas smaller values indicate smaller defects. Sort your picture collection by this column to bunch the bad pictures together, then inspect and delete what is not worth keeping.
To get rid of similar pictures, flatten a picture folder or use any other means to fill up a scrap container window with JPG photos to examine. Use Tools > Find similar photos menu command (or if using the Ribbon UI see under Duplicates button on the Home tab) to group them by similarity. Whereas checking for duplicates will only find files (pictures) that are exactly identical, this command finds pictures that are slightly changed.
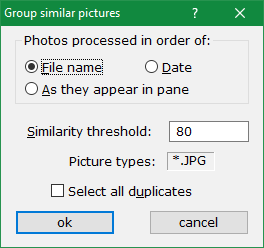
The dialog controls how similar pictures are found. To achieve reasonable detection speeds, it examines pictures either by filename or by modification dates, so that it only considers pictures that are likely to resemble each other (shot one after the other). Alternatively you can choose As they appear in pane radio button if you want to be in charge of the order photos are examined (e.g. in whatever sort order is in effect). At present only JPG photos are compared, any other file types you add in the scrap container are ignored.
You can tweak the similarity threshold up or down, to match pictures that are more closely (or loosely) related. A value around 80% is a good compromise discovering similarities without too many false duplicates — mistakes cannot be ruled out however. Even ChatGPT isn't flawless, never mind lowly SVM detectors. If you find many mistakes, increase the threshold to 90% or above.
Click ok to start the comparisons. Any similar photos found will be placed in groups, as per the duplicate checker function (i.e. in bands organized by Group ID column) and thumbnail view mode will be automatically enabled to let you compare the similarities discovered. Then just select and delete those you don't need, leaving 1-2 best pictures per group. Select two photos and press <ALT+SHIFT+Q> to preview them side by side in a large popup window (similar to peek preview but for a pair of photos).
Tick Select all duplicates in advance to mark photos for deletion automatically. However this will usually keep the first photo (in terms of date taken) as "best" which may not be the case. Always examine the groups yourself. Optionally turn on the Blur column to see which photos are technically of poorer quality.
The workflow is similar to duplicate results, you must somehow select what gets deleted and be careful to preserve the existing selection. Some groups may be totally rubbish so you can select for deletion all photos in such groups. In the end use File > Delete menu command to remove the unwanted photos.
Fuzzy grouping is an interesting (albeit oddball) feature that could be put in various uses. It uses fuzzy matching to group together items that are similar but not identical. For example, we can put all our music album folders in a scrap container (use right drag then Get subfolders from the drop menu), then use Tools > Fuzzy groups menu command to group the folders by name similarity. Just watch the groups in the following picture, which shows the dialog and the resulting groups simultaneously:
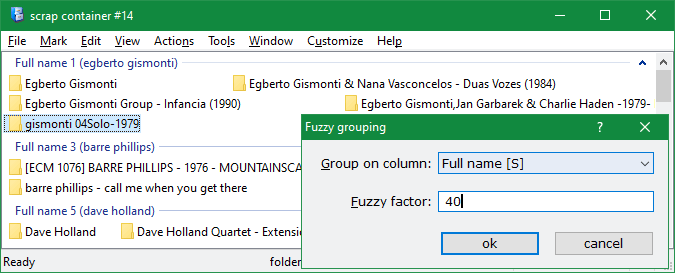
As you can see, using a 40% fuzzy factor, the first group contains all folders that contain "Gismonti" in the title, the third group has works by Dave Holland and so on. If you make the factor bigger (say 60), the fuzziness decreases, so items have to be more alike to be grouped together. For best results try a few different values until you hit on the desired groupings. You can use any text column for fuzzy grouping, it doesn't have to be by Name only. Just pick what you need from Group on column drop-down list. If you pick a number or date property it will be considered as text too — as it appears in the window.
Fuzzy grouping is a special case of custom grouping, only here the command defines the categories automatically using the property and fuzzy factor you supply.
If you use a regular expression (instead of a number) as the fuzzy factor, you can identify common substrings in filenames or other properties, and group on them. Let's use an example, consider these files:
alpha (2002).mp4
beta (2002) action.mp4
New File 2123
old (2001).mov
alien (2001).mp3
Four of these have a year, or 4 digit number, in brackets. If we use the regular expression \(\d{4}\) that matches this pattern for a fuzzy factor, we will generate these automatic groups:

See how the file that doesn't have a year in brackets ends up in the unspecified (non-matching) group.
Here's another use of this command. If you browse shell:recent folder of recently accessed documents, you cannot arrange by file type because all files in there are shortcuts; the .LNK extension is masking out the real file type. You can work around this problem putting all items in a scrap window and do a fuzzy group on NAME [S] property (not full name) and this regular expression (that matches the extension past the dot):
\..*
You will see that files are grouped by their original extension!
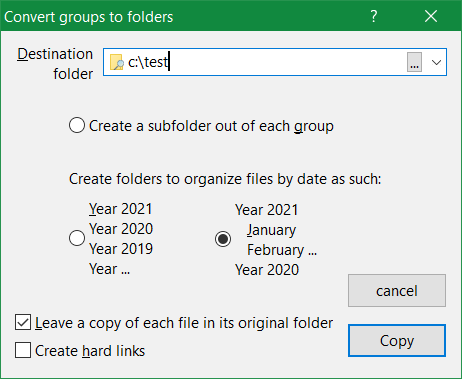
The dialog has 2 modes, or two ways to generate folders, one for real groups (tick Create a subfolder out of each group), and one for implied groups by date — the latter has 2 sub-modes, see below.
|
Say you used View > Arrange by > Show in groups menu to show items alphabetically grouped using their first letter, you can then use extract groups command to create folders that contain the items of each group. You choose a top destination folder and xplorer² creates subfolders under it, one per group (the folder names match the group titles you see). You can either copy or move the original files into these subfolders, depending on the checked state of Leave a copy... box. Tick create hard links box to create a space-efficient shortcut instead of full file copies. Make sure that the destination folder you specify is on the same NTFS partition as the source files, otherwise hard links won't work. Click Copy (or Move) button to start organizing files into group folders. Simple explorer copy routines are used for the transfer. To see the newly created folders you must browse the destination folder you specified (e.g. C:\TEST in the above example). For example if we had a scrap window showing groups by date (see the picture to the right) and used this dialog to split the groups, it would create one folder for each of the date categories — folder name matching group name — and place all the files of said group in their respective folder. Unlike other xplorer² commands, all the visible items are sent to group subfolders, not only those selected. A few other irregularities to note with this command:
|
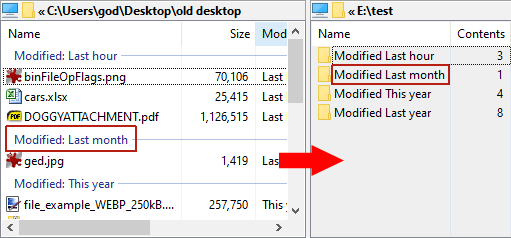
|
This command can also organize items by date, whether you have groups or not. This is useful e.g. if you have a truckload of photos in a scrap and you want to automatically move them in subfolders according to their modification date. Use the two date radio buttons to choose how to have them organized, either one folder per year, or you can have items organized by year and month (i.e. each year subfolder has 12 subfolders corresponding to months). Folders are only created for items that need them; there may be gaps in the sequence if files for a yearly period (or month) are missing.
You can apply additional order to your photos using the export groups command in stages. For example, if you want to organize your photos by camera model as well as by date, so that you have one folder per camera model, and inside that you organize by year/month, you can do it as such:
This procedure could be automated using macros

xplorer² unleashes the full potential of file searches since you can use any and all pieces of file information as parameters. You can thus home in to the files you are after with unparalleled precision avoiding irrelevant hits. You can search a few hand-picked folders — even within zip archives, or whole networks, and even refine search results.
You initiate a search using Tools > Find files command. The ensuing dialog (figure 43 below) is relatively simple considering the amount of information it conveys. Broadly speaking it is divided in two sections, the search context [1] that specifies where to search, and the hyper-filter [2] that controls what to search for, the parameters of the files that will be considered positive hits.
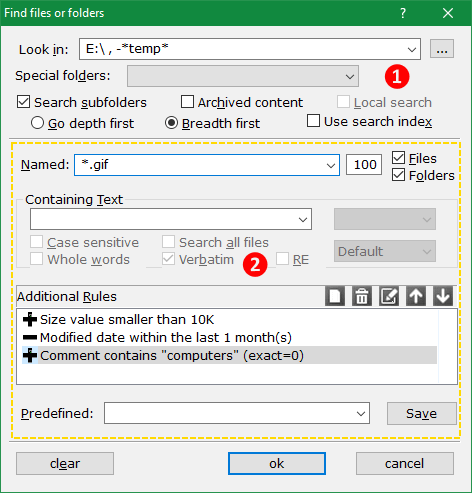
First we concentrate on the top portion [1] where we define which folders and how to search in them. By default the search context to Look in is the folder you were browsing when you issued the <Ctrl+F> find command. This is the root search folder and everything under it will be searched, all the way to the deepest subfolder. You can also specify broader contexts using the Special folders drop down box. This includes popular search locations like Documents, local hard drives, This PC that includes anything attached to your PC and any mapped network drives etc. Selecting a special folder as root for the search overrides Look in field.
Usually you will want to search all the subfolders below those specified in the Look in field, as long as Search subfolders is checked. You can also control the traversal method: Depth first will favor files in deep subfolders whereas Breadth first will scan the folder tree in layers. Both methods will scan the entire searched folder hierarchy eventually.
If Archived content is checked, xplorer² will step into zipfolders, FTP sites and pretty much any other unusual folder that comes in its way. You can use all stock file properties and even search for contained text just like in regular folders. The down side is that searches become much slower, so only tick this box if you know your target file is within an archive.
By checking Local search, you instruct xplorer² to search within the files already contained in the scrap window, possibly inserted by an earlier find command. This essentially refines the search. A similar result can be achieved using Mark > Matching a rule command in a scrap container window.
When it comes to defining the search parameters, you are really spoilt for choice. The search hyper-filters defined in the dialog comprise:
You can define hyper-filters with as few or many criteria as you want. You can go from a nearly empty filter (e.g. all fields clear except for Folders box that will find all folders) all the way to any arbitrarily complex filter with tens of rules combined in boolean contexts. Only items that match all aspects of the filter are considered hits.
If you want to do a new kind of search, first click Clear button to erase any traces of the last hyper-filter. Then manually add the new filter parameters or repeat a filter you saved earlier using the Predefined drop-down list. When you are all set, click ok button to start searching.
Searches can take a lot of time to complete. As soon as you initiate a search, a scrap window opens and shows matching files and folders as they are discovered. An active message pump allows you to start working with the first matches immediately, while the search is ongoing. You can abort a search by pressing the <Esc> key — or close the scrap window.
You can check the progress of a search either by noticing the folder being scanned on the statusbar, or use Tools > Search status menu for a more detailed report, including all the folders that have already been examined, information about errors or exclusions, etc. This information is available even after the conclusion of the search. The search log is itself searchable using the context menu.
The scrap container with search results is a fully operational file management pane, so you can preview, open or manage all the files and folders found immediately — but wait till the search is finished if you plan to do any operation en masse. If you want to see a search result in a regular xplorer² window, right click on it and pick Open file location from the context menu.
If you searched for contained text, the draft preview tab will show you the keywords found highlighted . If you click in the preview pane and press <F3> key you will see the next keyword match, if any exists. If you used any fancy file properties in your hyperfilter, right click on the scrap pane list header row and use Details from filter menu command. This will make sure all properties you searched for appear, helping you understand the search results.

|
Many search parameters are valid in archive search, so you can search by name, size, dates and so on. Most of the stock properties are valid too. These special folder types support their own custom properties, and they can be used as search criteria as well! See for example a zipfolder which has columns for CRC-32 and compression ratio (pic to the right).
You can also search for contained text in compressed files. xplorer² temporarily extracts (decompresses) the searched files and searches them like "normal" documents. Obviously this will be a slow operation. |

|
You can also search inside connected phones (which appear under ThisPC umbrella folder) using basic properties and even contained text. Searching in cloud folders is also possible, only xplorer² won't check for contained text in cloud-only (offline) items unless the advanced option "Allow downloading on-demand cloud files..." is ticked.
If you repeat a certain search often it makes sense to keep it for later. Once you search using <Ctrl+F> use Tools > Save search menu command in the scrap window to save the last search scope. This includes all the properties of the search dialog (figure 43): the starting folder, the search context (e.g. search subfolders and other flags) and the search filter.
Give a good descriptive name to each saved search so you can recognize it later. To repeat a search saved earlier, open a scrap window and use Tools > Recent search menu. Note xplorer² does not cache old search results, the search is repeated from scratch. If you want to save the results only, create a CIDA file using Actions > Write contents menu.
xplorer² installer registers the .X2FND extension for saved search files. So another way to start a saved search is to double click on a saved search file. xplorer² by default puts them in AppData folder but you can move them anywhere you like.
Desktop search is a windows system component that accelerates file searches creating a search index, a database of file properties and contained text. When you create a new document, its properties and text contents are added to the database, making subsequent searches very fast indeed. Instead of searching folders one by one, hits are retrieved looking up this index.
xplorer² ultimate edition can tap in the fast searches available in windows explorer, querying the indexing server directly. You will notice a substantial speed increase especially if you search for text in the file contents.
| You don't need to do anything special to take advantage of this integration; when you press <Ctrl+F> to start a search, in many situations xplorer² will automatically retrieve results quickly from the system index in phase 1 of the search. It will then pause and allow you to review the results. If you think the file you wanted wasn't found just click on robust search button (you will find it at the very end of the results) to continue with xplorer² robust (albeit slower) search, folder by folder. |

|
|
To take advantage of fast searches you must make sure your work documents are indexed. This is easier if you store your stuff under the system Documents folder, which is automatically indexed. If you keep your documents in other locations, right click on the top level folder and use Add to search index command from xplorer² submenu. This need be done just once, then any new document you create in that folder (or its subfolders) will be indexed automatically.
You can add any local folder to the search index. You can even add removable USB drives — but these need to be connected if you want to fast-search in them. Adding network folders in the index on the other hand is next to impossible. Network searches are condemned to be slow.
|

|
There are a few limitations to keep in mind. Searching for text in files will only find whole words and not partial keywords — at best you will find stems at the beginning of words. So if you search for long you will find files containing the words Long and Longer, but not those containing prolong. You can't search for special characters like brackets, math symbols or quotation marks (they are ignored). Search index is good for word searches only.
xplorer² will not use the indexing server in the following occasions:
A simpler way to access the system index is Tools > Fast search menu command. Instead of defining detailed search rules, you just type a keyword. xplorer² then starts a search under the current folder for any file or folder that contains this keyword in its name, text contents or any other searchable property (e.g. tags or author).
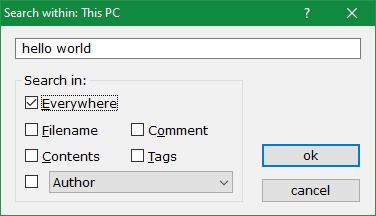
Tick Everywhere box if you want to find keywords in any searchable property. That is the simplest search mode. If you want to target something in particular like Filename or text Content use any of the other checkboxes. You can tick as many as you like. You can use custom indexed properties as well using the drop-down list (see Author in the above example).
Once you type your search keywords and tick the property options, click ok button to start the search. Like regular search a scrap window will open for the results. However here there is no backup robust search phase, files will only be found if they are indexed. If you see an error message on the status bar, make sure the folder you are searching within is in the search index.
In spite of the drag-drop and click-happy era of file management we're living in, for some tasks you can't beat the efficiency offered by traditional command line execution of programs. In the old days, instead of clicking on icons to start a program, one had to type its path/name in a command processor window (DOS console). This may seem quaint and antiquated but it is very powerful since you can specify extra arguments that modify the behaviour of the program in question, specify which files to operate upon etc.
xplorer² brings the command line into the third millennium, easing its use while maintaining all its power and flexibility. If you are familiar with the DOS console, you can regard the active pane cum addressbar combination as a graphical console that shows the folder contents of the "current directory" at all times. As you browse folders the "current directory" is updated automatically, and the commands you type can access the folder contents directly.
You can start composing text commands using Tools > DOS command menu, or just get into the addressbar with <Shift+Tab> and type the special prompt $ character that instructs xplorer² to interpret the input as a DOS command — otherwise it could be mistaken for a folder path. For instance typing $ dir and pressing <Return> will execute the DOS dir command, producing the listing of the current folder's contents - arguably not the most useful command within xplorer²'s context!
DOS commands create usually text output that goes into a DOS console window. xplorer² uses its own user friendly console window, but you can also use the traditional MSDOS console.
Except for DOS commands ($-prompted) you can also execute generic windows programs using the special character >, e.g. typing > winword will launch MS Word. In this sense you have all the functionality of the standard Start > Run menu straight from the addressbar. This execution mode is mostly for programs that have their own user interface and don't need a console window for their output.
Except for launching both DOS and windows commands, the addressbar assists you during the typing process in a number of ways:
Commands launched from the addressbar normally apply only to the single focused item in the active folder view. If you want to apply the command to all selected items use a double prompt character, e.g. >> or $$. Then instead of running the command once, it will be repeated for each selected item. This construct is a simple road to scripts without a dialog window.
Instead of typing specific filenames as parts of a command, you can use special characters that get automatically substituted with the name of the item(s) that happen to be selected when a command is executed. For example the commands $type file1 and $type $N are equivalent if file1 is the focused item in the active folder pane. Using special tokens like $N saves keystrokes and allows for reusable commands. So whereas $type file1 can only be used to type (show the contents of) file1, the version with $N can be used to type any file, as long as it is selected in the active view.
There is a variety of $-tokens, each representing a different part of the active item or even the all selected items taken as a whole. Let's use a hypothetical situation to clarify the meaning of each $-token. Suppose we have a dual-pane arrangement where the right view is active and the contents are:
The following table lists all the available tokens. The third column shows what each token would have been substituted for, given the above scenario. Unless stated otherwise all tokens act on the single focused (or active) item in each pane.
|
Many of these tokens are intended for renaming large numbers of files, as they are used in File > Mass rename command. But you can use them for any other purpose too; just type as many tokens as necessary in a single command and they will all be substituted according to the above rules.
Now we are in a position to explain the celebrated windiff command used to compare the focused item in the active pane to its namesake in the inactive pane:
>WINDIFF "$N" "$I"
Consulting table 3 above, $N corresponds to the focused item, its full name without path, and $I is the path of the inactive pane (without explicit filename). Note we enclosed tokens in quotation marks to guard against spaces in paths and filenames. This generic command template can be used to compare whichever file is active — and regardless which pane is active (left or right).
You may have noticed that all tokens in table 3 were listed in uppercase. If you type a token in lowercase then it is interpreted in a slightly different fashion, using the short 8.3 version of whatever name the normal uppercase token would have produced. To clarify, had $N corresponded to undocumented.h the lowercase $n would have resulted in UNDOCU~1.H, which is the equivalent old DOS filename.
Another kind of token can be used to extract the text of a particular file column. The generic format is ${column_name}, e.g. ${size} will fill in the file size as it appears in detailed view mode. You can use any of the available columns, which comes handy for mass renaming as e.g. you can use MP3 tags as part of the filename.
For date property tokens you can supply your own format specifier, overriding the way dates appear in columns. This is most useful when friendly dates are in force. You can supply a custom date format as ${Modified:yyMMdd HH:mm} where date and time format pictures come after the property name, separated by a colon :
The colon modifier has an application for counter tokens too, signifying a step size. So whereas plain $01 generates the sequence 01,02... the modified version $01:3 would generate the sequence 01,04,07... (numbers increasing by 3).

Most DOS commands don't have a GUI of their own and rely on the console window for their output. This is the traditional black & white system DOS box, which is rather awkward to use. xplorer² comes with a substitute console that is nearly equivalent in functionality and much easier to work with, e.g. it can mark and copy text like a normal editor window, search for text, etc.

This modern version of the DOS console automatically follows the browser window, changing its current directory as you browse folders with xplorer². The working path is shown on its title bar. It receives the output of all $-prompted commands issued from the addressbar and from command scripts, too.
The top row toolbar lets you easily copy/paste and even search for text in the console output. You can also select the font to use.
You can also type commands directly in the console window - that's the purpose of the input field ("addressbar") shown in figure 45, as well as deliver input to running programs (e.g. Y/N responses). This input area supports path autocompletion with <F1> key and maintains a history of past commands too.
If despite all the extra functionality you prefer the traditional DOS console, you can disable it unticking "DOS console" program option. Note that in such a case you'll get a separate console for each DOS command you execute.
Commands launched from the addressbar operate only on the single focused item within the folder being browsed (unless a double prompt as >> is typed as discussed above). In some occasions you may need to apply the same command to a number of files as for instance for batch conversions of MP3 files. For this task it is more convenient to use Tools > Command script menu to treat all selected files in one stroke.
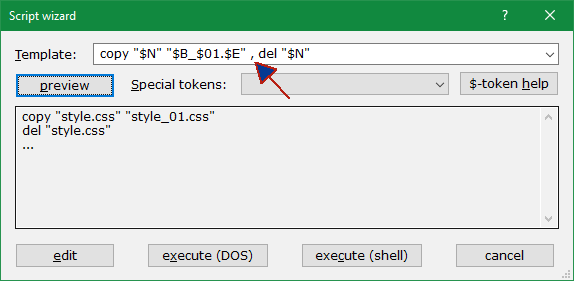
In this dialog you specify a command Template that will be applied to each and every selected file name. The syntax is identical to the addressbar commands, using the familiar $-tokens instead of actual file names. Command templates may contain multiple comma-separated commands as the above snapshot illustrates. If you want to add a comma verbatim in a command escape it with two ,, commas.
If you don't remember the token names to use, you will find most of them under Special tokens drop down list. For extended information click $-token help button. As you compose your command template use the preview button to double check the command looks like what you intend it to! It will apply the template on the first selected filename and show the command(s) in the preview window. The example above inserts a counter at the end of the filename by a laborious route (copy then delete instead of a simple REN) — it was selected for demonstration rather than for its usefulness :)
The script generator replicates the command template for each selected file in succession. Plain text parts are reproduced verbatim and $-tokens are replaced on a per-file basis. If you have 100 files selected then 100 sets of commands will be generated, effortlessly. Let's have an example using the template ren "$N" "$B_$01$$.$E" on a selection that comprises 2 files, x2help.htm, x2help.ccs.
This template has four special $-tokens, N for the whole name, B for the base, E for the extension and an automatic counter starting from 1 with a leading zero ($01). The double dollar is an escape for a single $. For each file the generator copies the constant parts of the template including spaces and quotation marks, and substitutes the variable parts using the file in question. For our two files this translates to (notice the counter in the second line):
ren "x2help.htm" "x2help_01$.htm"
ren "x2help.ccs" "x2help_02$.css"
The commands are executed on each item in the order they appear in the active pane. Most of the time this isn't important unless you use automatic counter tokens; in this case make sure your selected items are sorted in the appropriate sequence before executing the script.
Once the script is generated, there are a number of alternative modes of execution, each activated by a dialog button:
You should note that the wizard is merely manipulating strings and is oblivious about their meaning or command syntax. If you make any mistakes you will notice during execution! Always preview the template before executing the commands.
powershell -command "& {(get-item '$F').LastWriteTime = get-date '${Picture date}'}"
This uses $-tokens to change the modified time of selected JPGs to the date the photo was taken!
For more customization use Customize > User commands > Organize menu, which will open a dialog like we have seen for organizing bookmarks. Edit the user command you just added to change the icon, add a keyboard shortcut for quick access and so on:
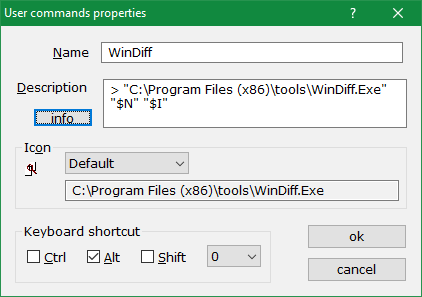
The Name is just a mnemonic for your own use, as it appears on the user command list. The important part is the Description which is the command line, including the program and the arguments. Notice you must start the command with the correct prompt character ($ for DOS and > for windows GUI tools). Click on Info button to see a reminder of available $-tokens.
Once you define a command, you can access it from Customize > User commands list. For easier access assign a keyboard shortcut to it, or add it on a toolbar through customization. User commands in toolbars are drop targets, meaning you can drag drop a file on a command button and it will open in the respective user command.
The order of command items determines their position in the respective submenu. Items in the top of the pile are easier to access so you should keep the most frequently used ones near the beginning (use organize command to reorder them). Each submenu shows up to 20 user commands; however you can define up to 100 items for each category and access them using the More... menu command.
Here are some examples of really useful external commands. The first uses the $A token to join multiple selected PDFs in a single file called OUT.PDF. The second can convert any video file to the MP4 format. Obviously you need to download the tools first and change the paths to match your installation.
|

When executed from the command line xplorer² accepts a number of optional arguments that control some aspects of the program. The complete command line is:
xplorer2.exe /F:n /P /R:rootFolder /S:registryKey /L:searchFromFolder /I:settings.REG /M /1 /2 leftFolder rightFolder
All arguments are optional and are described in the following table. The last two arguments — without the / switch character — specify starting left & right pane folders for the main window. These can also be the names of folder groups saved in Customize menu if you want to reinstate a particular set of tabs upon startup.
If you start with a scrap container (/F:1 switch) leftFolder can be a cida file or a name of a folder to flatten.
|
|
You can take advantage of these options by creating a desktop shortcut for xplorer² (or use the one added by the installer). Right click on the shortcut icon and pick Properties from the context menu. Switch to Shortcut property page, and add the required command line arguments in the Target field, past the executable name. You must leave a space between the executable and each option you add. The snapshot to the right illustrates a shortcut that launches the program using the options /1 C:\, which means start with a single pane and browse folder c:\ Likewise you can create multiple desktop shortcuts, each for a different starting folder or starting layout (passing the layout name with /S: switch). Rename these desktop shortcuts to recognize what each one does.
if the folder path you want to pass as an argument contains spaces, enclose it in "quotes". Likewise, if a layout name contains spaces, enclose the entire switch in quotes, as such:
xplorer2_64.exe "c:\some path\with spaces" "/s:layout name" |
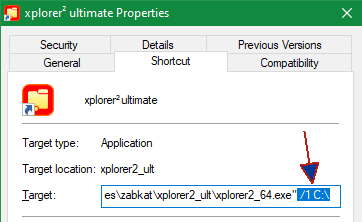
|
 Advanced programming and scripting
All in all you can do whatever any user could do using the keyboard and the mouse to operate the program, only do it in a tightly controlled fashion. You can string commands together that operate on a series of dialogs to achieve complex results. Many times you can get a head start using the macro recorder, where you just use the program for what you intend to capture with the macro, and get a skeleton implementation for free. However first let's do it the hard way, writing everything from scratch. Here is an example script:
# copy selected files with filter
COMMAND "copy to"
WAITWND
FINDWND filter
FINDCLASS combobox
SETTEXT *.pdf
OK
As you can tell from the command names, this macro is equivalent to clicking on the Copy To toolbar button, waiting for the dialog to appear, then finding the Filter box and setting its value to "*.pdf" ; and finally "clicking" the OK button to start copying the files with the selected options (only PDF files will be copied).
Use Customize > Macros > Edit macro menu and copy/paste the above script in the editor area as such:
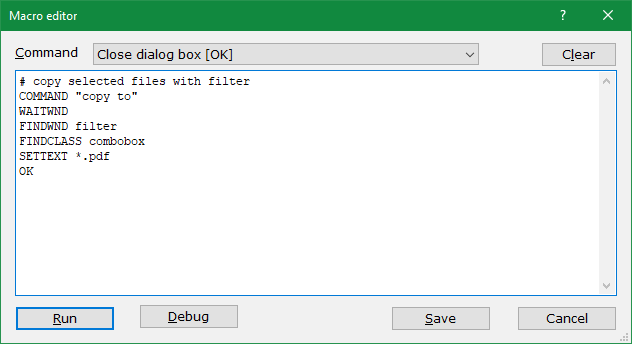
Going quickly through the macro editor dialog, we see a Command drop-down that lists the most popular commands, which you can insert with guidance on the expected arguments. Clear button erases any previous macro so you can start fresh. When you are ready, click Run to execute the macro, or Debug button to troubleshoot problems. Save will add the current macro in Customize menu so you can use it again in the future.
|
Click Run to run the above macro. If you had any PDF files selected, it will copy them to the inactive pane, otherwise it will do nothing. When a macro is running you cannot work with the main program window. You will see dialog boxes opening and closing in auto-pilot mode, following the macro commands. A macro control window appears on top of other windows that shows the progress of the execution. To abort a macro mid-way through its execution click on the Cancel button.
While a macro is running you should not switch to another window or application, otherwise the macro will probably fail. Nor should you interfere with random clicks or keypresses. Just hang in there till the macro is finished!
|
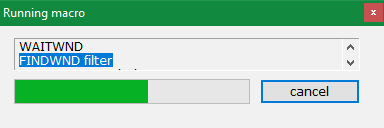
|
COMMAND "copy to" # start the copy to dialogCOMMAND is the reserved command name that tells the macro what to do, "copy to" is the argument (which program command to execute), and the rest is the comment. Comments are ignored by the script but help you to make sense what each command is doing. Inline comments begin with the hash # symbol.
The macro language instructions and searched command and window labels are all case insensitive. You can use any case you prefer, e.g. command "COPY TO" is just as valid as the above example.
Arguments are necessary for many commands. They are usually constant text strings as the name of the toolbar button you are trying to click. Use "quotes" whenever you have spaces in arguments (many words). Arguments can also be numbers e.g. 32793 is the equivalent identifier for "Copy to" toolbar button (use Help > Command finder menu to find numeric equivalents to commands). Most of the time it will be easier to use the text label, but sometimes there will be no alternative than to use the number, e.g. for hidden commands. Arguments can also be variables, which will be discussed below.
Many commands return a value, e.g. FINDWND returns the handle to the window found. You don't see this result immediately but it is stored in the last result register ($0). Subsequent macro commands may rely on the previous result to function properly, e.g. CLICK needs a window handle found earlier. The last result is piped from one command to its successor automatically.
9 elementary variables are supported to be used as arguments, called $1 to $9. Most of the time you will use $0 if you want to visualize the result of the last command (MESSAGE $0).
If you are familiar with windows programming, you will know that each menu command and toolbar button appearing in a program's user interface correspond to a message number. Likewise, controls that appear in dialogs have an identifier number. For instance 32793 is the message number corresponding to "Copy to" toolbar button; and the OK button in most dialogs translates to number 1. Unless you are a big time geek <g> that can use Resource hacker or Spy++ you cannot be expected to know these numbers!
Laymen needn't worry. Instead of fumbling with cryptic numbers, you can use the text that appears on a menu, toolbar or dialog button to tell the macro which command you are after. Take note which text appears on the menu command you want to issue, and use it as the argument to COMMAND. For toolbars use the tooltip if the button you are after has no text showing. It is best to use the full command text as it appears in the GUI, which will ensure that the intended command will be issued. Partial names can be used too, but keep in mind that the first matching name will be used, which may be some other command or window! All
Finding buttons on dialogs is easy, just use the name of the button with FINDWND. Other controls have some descriptive text label before them, which may be used to locate the control. Sometimes a control has no useful text or label; in these cases locate the control nearest to the unlabelled one, then move forward or backward with NEXTWND or PREVWND instructions till you hit the desired dialog control. The directions "forward" and "backward" correspond to the tab order in the dialog — or in plain english, what happens when you press <TAB> key to move around in a dialog window.
When you get an unexplained error 3 (not found), it could be that the dialog didn't have time to appear. If you use COMMAND and expect to operate the dialog controls, use WAITWND to make sure that the dialog is visible before you start manipulating its controls. FINDWND instruction is searching the dialog that is currently active (excluding the macro dialog itself).
Finally you may realize that a running macro is doing crazy things that were not intended. In that case click on Cancel button to abort the macro execution.
When you run a macro and it errors out, you are offered to run it again in debug mode. Or click Debug button in the macro editor to enter the debugger.
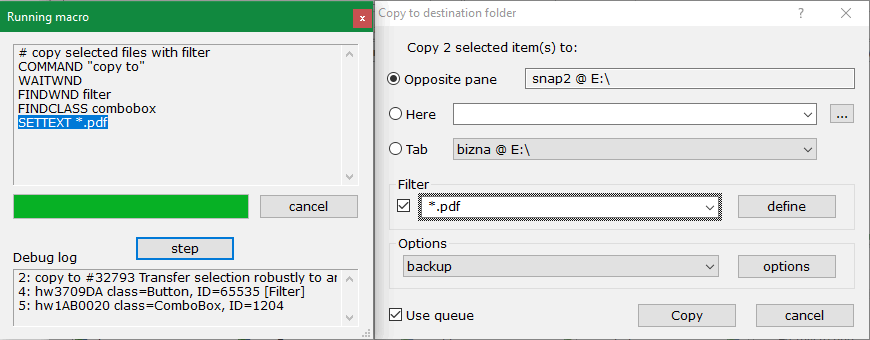
In debug mode, the running macro (modeless) dialog is taller — you can resize it to taste. Instead of running the macro wholesale, it runs one line at a time. The current instruction is highlighted. Click on step button to proceed with the next instruction. Each command shows a little information in the Debug log area which you can examine to see if it does what you meant to do.
A cool feature is that it will highlight the last dialog control found — notice the thick border around the Filter combobox in the above picture.
It isn't quite in the same class as WINDBG, but with all the information shown, you should understand what the problem is, and go back to the macro editor to correct it.
Once you turn off the automatic error handling, the last result $0 variable will reflect the execution status of the last instruction. You can test for success using the JUMPOK instruction, which will jump to a label (i.e. move the point of execution) only if everything goes well — otherwise the instruction immediately below it will execute. Here's an example that looks for a window called test and stops execution manually if not found:
ERRORSTOP 0
FINDWND test
JUMPOK found
MESSAGE "window not found"
EXIT
LABEL found
CLICK
Using conditional jumps and GOTO instructions you can modify the order that script lines execute. Instead of linearly executing all lines in sequence, you can jump to earlier or later lines depending on your logic. Jump destination points (LABEL) can be any text you like to make sense of your script. If you have multiple jump points, make sure each label gets a unique name.
Simple loops are also possible using a control variable as a countdown counter, as such:
POP 5 # repeat 5 times
STORE $1
LABEL repeat
MESSAGE $1
DECR $1
JUMPOK repeat
# end of loop
The trick is that DECR instruction updates (decreases by 1) the counter variable $1 and the last result, so when it reaches zero, you break the loop (JUMPOK fails). Also note the roundabout way to initialize the counter variable using POP then STORE.
The macro composition dialog has a listbox with the most common commands so you don't need to remember the names. Below you will find the full list of supported macro instructions and their expected arguments.
A typical instruction accepts a single argument, but there are some that apparently work on thin air without arguments. This is because they use the result of the previous command as their argument — this is called pipe argument. For example CLICK operates on the result of an earlier FINDWND command. If a command fails the result is zero (void).
Arguments can be either constants (strings or numbers) or variables ($0 to $9). Variables represent strings, numbers or window handles, depending on what is stored in them. The last result is kept in variable $0. Unless otherwise stated, the following table uses name for either a string or number, furnished either as a constant or variable.
| ||||
Harnessing macros will take some practice. Please consult some of the sample macros in the appendix

| If you don't need the full power (and learning hassle) of the scripting language, you can record simple macros pressing <F12> key to start the macro recorder (or use Customize > Macros > Record macro menu command). Use the mouse and the keyboard to do what you like (issue commands, tweak dialog controls and buttons, etc), then click on finish button to stop recording. The equivalent script representing your actions will be generated automatically and presented to you, just as if you had typed in the instructions. Then you can do slight modifications with the macro editor. |

|
The recorder will only generate plain macros (without loops), and the resulting code looks spaghetti, but it should be adequate for the average macro requirements — and you don't need to do any "programming". If you start the recorder and click Finish immediately, without any actions, you will be presented with the last macro used.
GETFOCUS # get the active list view
SELECT test.txt
|
You can save useful macros for later in Customize > Macros list. The saving procedure is a bit unorthodox, but straightforward. First finalize the macro commands and test it well with the editor. When you are done, bring up the editor again (use Edit macro menu command to edit the last macro), click Save [1] button, give it a descriptive name [2] for the list, then Run [3] the macro. If you don't run it, it won't be saved. If you don't want to run it fully, you can "cheat" clicking the Debug button, then cancel the debugging without running anything. This way you will save the macro without running it.
The macro list menu works like bookmarks, use its Organize menu command to add icons for toolbar and keyboard shortcuts for easy access. You can also edit an existing macro from organize dialog, adding or removing instructions, but it will feel a bit crumped. Another way to modify a saved macro is to first run it, then edit it (as the last macro used with Edit macro menu), and finally save it with the same name — which will overwrite the previous definition. |
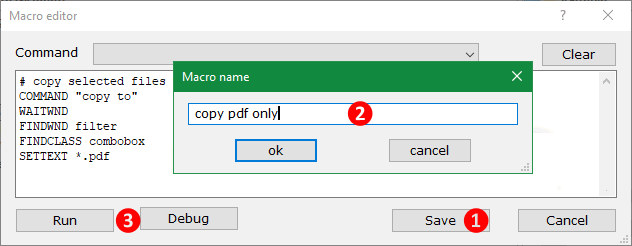
|

You may be familiar with DeskRule's desktop detective panel that enables searching with combinations of file properties and attributes. xplorer² (ultimate edition only) programmable column is an extension to this concept: it allows you to combine file properties, boolean and arithmetic operators and a few functions into expressions, whose result is the value of the Programmable [S] stock column. This result can be then used as any other column, for display, sorting, filtering and searching for matching files. It is really versatile and the possible uses are too many to enumerate — just use your imagination!
To use the programmable column, switch to detailed view mode, right click on the column header row and pick Programmable from the menu. This will allow you to change the expression and will show the programmable column too:
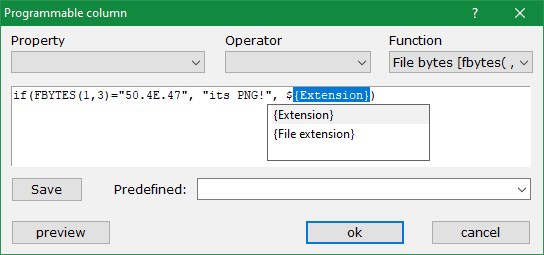
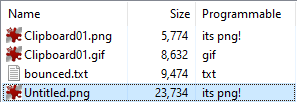
The programmable column definition dialog has controls that guide you to create expressions, with drop-down lists for file properties, boolean and arithmetic operators and some simple functions. Or just type your expression in the edit box provided. As you type, it will autocomplete file property names for the more experienced users. Say you type $EXT (the dollar is very important) a popup will find all the matching properties that have ext in their name and you can insert them easily — press the <Down> arrow key to select from the completion list.
All elements of programmable expressions are case insensitive
Click preview button to see the results of your expression on the selected file in the active folder pane. If something goes wrong, it will pop a syntax error with the likely error location.
All file properties (columns) can be used in the calculations. The rules can also search in files (GREP function) and extract specific file bytes (FBYTES function). The result of the expression can be either text or number or even a date, depending on the properties and operators used. If you use conjunctions of boolean operators, the result will be 1 or 0, for true or false respectively.
For instance the above example expression if(FBYTES(1,3)="50.4E.47", "its PNG!", ${Extension}) will check each file's contents to detect whether it is PNG format, in which case it will show "its PNG!"; for other file types it will show the extension. See how it works for the few files in figure 50 above.
If programmable column is enabled, it applies the last expression you defined on each and every file, and shows the end result. You can save expressions you use frequently by supplying a name in the Predefined box in the above dialog and clicking Save button. This is similar to storing hyperfilters for search commands. Then expressions become available for future use from the history drop-down dialog control — pick one from the list and the programmable column display will be updated.
Except for this "draft" you can have 3 more columns in Customize > Programmable menu. The first item listed is the draft programmable column mentioned above; use Add new submenu to define more composite file properties. Supply a title in Predefined box (you don't need to click Save button). This title is the column header in detailed view mode. You can turn on individual programmable columns either from Customize menu or using the column selection dialog. All these columns are also available as hyper-filter conditions (e.g. to select or search for files).
This custom list has an Organize command where you can rename, assign shortcut keys and custom icons for toolbars in the usual fashion. It is limited to 3+1 items so you will need to delete definitions you don't use often — you can have them saved in the old Predefined box.
This dialog allows you to do amazing feats which would normally require you to write a program or advanced shell script. You can combine any file property with arithmetic (add/subtract/multiply etc), relational (equal, greater than etc) and boolean operators (and/or etc) to create arbitrary expressions that can be evaluated for each file. For example take the expression:
(${Modified} > ${Created} + 2) & ${Size} + 5KB < ${Size on disk}
It will match files whose modification date is later than the creation date + 2 days, and (&) their reported size plus 5 kilobytes is less than its total size on disk. As this uses the & (AND) boolean operator, the result will be 0 (false) or 1 (true). This value will show in the programmable column, and can be used as a search rule to identify files with custom qualities.
When you become familiar with the "official" property names and operators, you can type such expressions manually (press <Ctrl+DownArrow> key to autocomplete properties), or you can use the dialog drop-down lists to help you compose a complex rule with properties, operators and functions. A few clarifications are in order:
|
If there is some problem with the complex expression like a misspelled file property or an operation between incompatible arguments, xplorer² will report a syntax error, highlighting the trouble spot. Correct the typo and you are ready to search.
Sometimes a property name on its own can be a useful rule, e.g. ${Keywords} without any other operators will match files that have some tags defined. Or combine it with a leading NOT (!) operator to match files that do not have tags! Bare property names are also convenient for yes/no properties like ${IsFolder}, otherwise you must be careful to compare them only against zero (=false or no).
The programmable column is useful for many advanced search tasks, e.g. find pictures whose width/height ratio is 4/3. It will also allow general tomfoolery like (${Modified} - ${Date taken})/2 = ${Size}, which arguably is not much use <g>. A final note is that extracting this column is rather slow; the more properties you use in an expression, the slower it gets. If you use multiple properties in a search expression, use the faster ones like filename and size first, and leave the slower ones (e.g. GREP) at the very end.
Basic program options tweak how UI elements like the active folder view and the tree behave, whether you want dark mode interface and such. Using layouts you can define different workspaces, sets of panes and their positions and sizes to suit different file management tasks.
Under Customize main menu you will find several categories of favorite lists, that are maintained in a uniform fashion (Add/Organize/Execute as we saw for bookmarks), and in particular:
Each of these lists can hold up to 100 saved items, if you need more you must first delete some of the old unused entries. The same limit applies to saved hyperfilters. If you want to see more items in Customize submenus, saving you the trouble of using More... menu commands, increase "Custom menu items" advanced option. Then you will have direct access to more favorite customizations.
If you add any of these special favorite commands on a toolbar, right click on the button and pick Properties menu command. This gives you a shortcut access to the list's Organize menu, where you can change the item's properties. For example you can edit the commands of a macro this way.

Bookmarks and other items listed under Customize menu can be assigned custom keyboard shortcuts (in the range 0-9) using dialogs similar to figure 8. To change the keyboard shortcuts of all other menu commands use Customize > Keyboard command. This way you can assign e.g. <F5> to be used for folder refresh and so on.
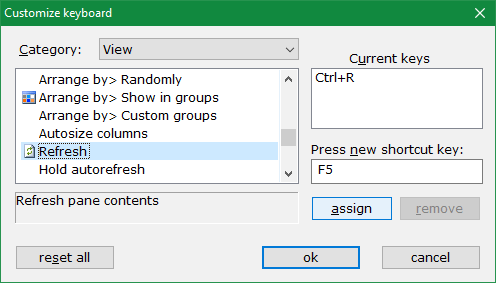
The dialog lists commands organized by the main menu bar (File, Goto, ...) . Use the Category drop down list to select the menu that holds the command you want to remap, e.g. for Refresh we need View menu. Scroll down to find the command you want and click on it. You will see its current keyboard shortcuts in Current keys box. To set a new key, click in Press new shortcut key box and type the key e.g. <F5>.
Click assign button to set the new combination, it will be then listed in Current keys box. If you want to remove the old accelerator, select it and click remove button. To reset all key mappings to "factory defaults" click reset all button.
Change as many commands as you want, and click ok to finalize the new key bindings. All menus will be updated to show the new keyboard shortcut next to the command name. You only need to change command key bindings once, and next time you restart xplorer² it will remember your favorite keys.
Customize > Keyboard use menu command lists the current key assignments for all xplorer² commands. You can copy out the text, paste it to an editor and print them out so that you remember the quickest way to reach your favorite commands.

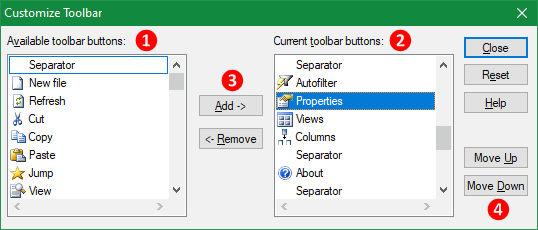
Any command from the menu system that shows an icon next to it can be placed on a toolbar. You know which commands you need to use more, so you can place them on a toolbar for easy access. Also you can remove toolbar buttons that you don't use that match and replace them with others you enjoy more.
The dialog shows all buttons that are Available [1] (all menu commands with icons), and a list of buttons Current [2] on the toolbar. Select any command from the Available list and click on Add [3] button to add it to your toolbar; likewise select a button from Current list and click Remove to get rid of it.
Finding a command to add can be a bit of an ordeal, as there is no way to search for commands, you just scroll the list till you see the icon you are after. Toolbar button names may or may not be similar to their respective menu commands, sorry about that! As for commands in Customize menu (macros, user commands, bookmarks etc), you can identify them by their list name.
The current list shows items in the order they appear on your toolbar. Select an existing command and move it up/down with the buttons [4]. When you add a new button, it gets inserted before whichever item in the current list you have selected. If the new button ends up somewhere you don't like, use move up/down to relocate it.
When you are done customizing buttons, click Close button to see your new toolbar. Or if you changed your mind, click Reset button to undo your recent changes.
Use Customize > Toolbars > Add new menu to add a new toolbar with a name, and get to customize it immediately, adding buttons for a particular task. You can have up to 10 such extra toolbars. It makes sense to organize extra toolbars in a task-oriented fashion, bunching relevant buttons together. Whenever the need arises you activate the toolbar using View > Toolbars menu (or right click on any toolbar). You don't have to keep all toolbars visible at all times. Toolbar visibility is one of the properties associated with layouts — each layout can have its own set of active toolbars.
For a quick face-lift of xplorer² appearance, you can download and install custom toolbar and menu item images that other xplorer² users have created and shared with the community. To see what's available click here.
You can also create your own skin. It's easy and no programming is required. Just grab the original button images and modify to taste with any image editor, then drop them in the installation folder. You may also consider sharing them with the rest of the world - just drop us an email.
Download skin designer pack (17 KB)
Nowadays you need two skins, for the 2 available toolbar icon sizes. One should have buttons 16-20 pixels square (x2skin.png), and the other should be any size you like up to 48x48 to match your screen's DPI (x2skin_XL.png)
You can put any of xplorer² menu commands in this submenu, whatever you need to have handy as a context menu command. Use xplorer² > Organize command to add and remove items from this special menu:
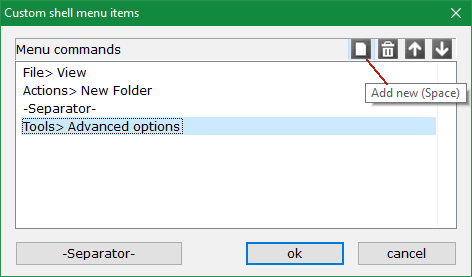

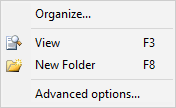
Use the little toolbar to add, remove and reorder existing menu commands. When you click Add new you get a dialog similar to keyboard customization, where you can select a menu command by category as they appear on the main menu bar. You can add separators too for grouping commands. When you are all done click ok button to finalize the menu; commands will appear nicely with icons and keyboard shortcut information, see the above picture.
This submenu is inserted in the context menu of all items, active folder, folder tree, even the background menu where you click "nowhere". If you don't want to clutter your shell context menu with extra commands, you can remove xplorer² menu using the advanced option "Don't add xplorer² commands in shell context menu".

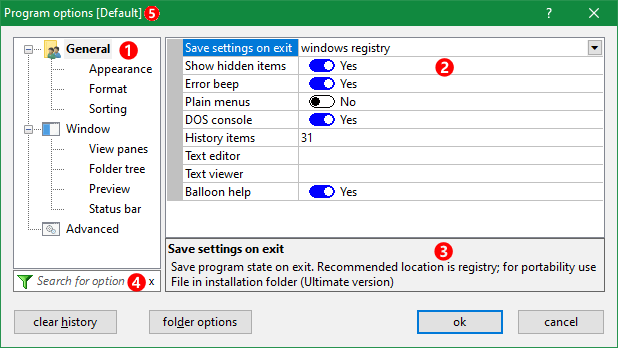
The main options dialog organizes the available settings in reasonable categories, using the property tree [1]. As you click the tree branches, the respective properties are loaded in the list [2]. The active tree category is shown in bold. The property list is a custom control that may be unfamiliar to some people, so please watch the demo video for the basics of its operation.
The list is split in 2 columns, the left shows the property name, and the right its current value setting. You can resize these columns with the vertical separator line — but this is usually not necessary. The information box [3] explains what the selected property does in brief.
Click on a property name to select it, or use the up/down arrow keys to move in the list. Most properties are simple yes/no types (similar to checkboxes) that you flip on/off using the mouse or <SPACE> key. When a property is set to Yes it is enabled:  . Other options are drop-down lists where you select one of the available options, for some you type in a number or path, and a few more complex types launch an external dialog (e.g. for font or color selection). Use the button ... on the rightmost of the property row to activate such extended properties (or press <F2> key)
The way you change the selected property depends on its type. If you are expected to type some text, you can start typing immediately, then press <ENTER> key to set it. Press <TAB> or <F2> to select from a drop-down list, or use the drop-down arrow with the mouse. To jump to the category tree press <SHIFT+TAB> keys. If the selected property doesn't expect text, typing a few letters will either find the next matching property by name, or jump to the property search box [4] automatically.
Use one or more keywords in the search box [4] to find matching properties, regardless where they reside in the category tree. As you type more keywords, you find fewer options with increased precision. Note that all keywords you type are searched for, but if nothing is found, the search automatically switches to any keyword mode, where a single keyword match is enough. Text in property description and values is also searchable. You can change properties in the search results list directly. To see all properties, clear the filter text with [X] button.
After you change one or more options click on ok button to close the options dialog and apply your preferences, or cancel to retain your old options. Some options like font changes necessitate opening a new window — this is done automatically with minimal interruption to your workflow..
Hopefully you will find most options self-explanatory by their extended information in box [3]. Let us go quickly though the available categories.
Changes you make to global properties like bookmarks and items in Customize menu are always saved on exit, regardless of this option (unless you tick the advanced option "Don't save global options either"). If you have it disabled, use Actions > Save settings now menu command whenever you want to save a snapshot of your latest settings.
|
xplorer² professional saves settings only in the windows registry. This is the recommended location even for ultimate edition, when you have it installed in your home/base computer (registry is much faster than INI files). If you want to run ultimate edition in portable mode, pick "File in installation folder" from the drop-down list as the destination for saved settings. This will create an INI file in the flash drive, next to the program.
|

|
|
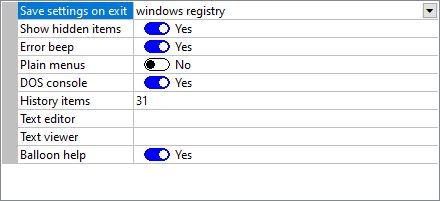
|
Click on Appearance tree category branch to tweak these options:
|
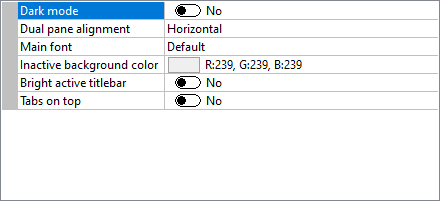
|
|
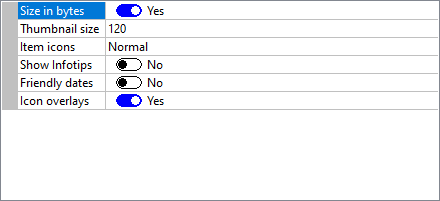
|
Click on Sorting tree category branch to tweak these options that deal with arranging items
|
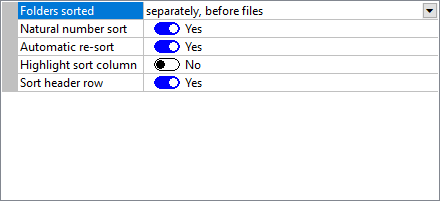
|
Click on View panes tree category branch to tweak these options for folder view panes:
|
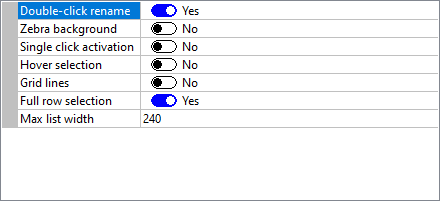
|
Click on Folder tree category branch to tweak these options for folder tree pane:
|
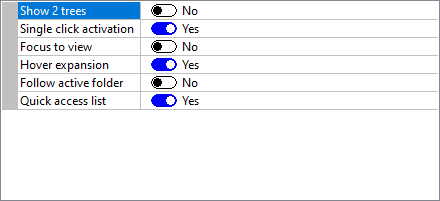
|
Click on Preview tree category branch to tweak these options for quick viewer pane:
|
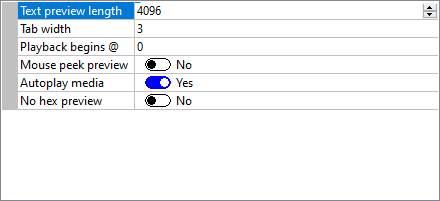
|
|
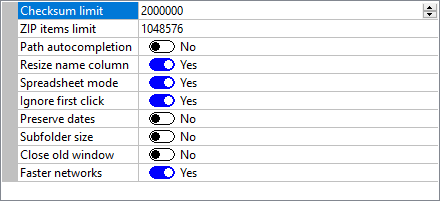
|
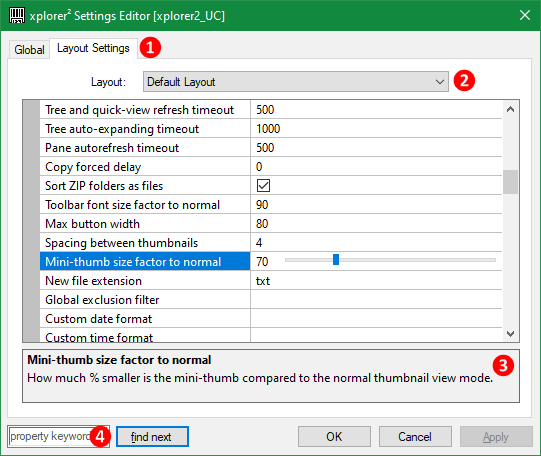
Advanced options are split in two categories, global and layout-specific, and are selectable using the tab control [1]. Global options affect all layouts, and layout options are just for a single layout. Use the layout selector drop-down list [2] to choose which layout you want to change.
The layout selector is set to the xplorer² layout that was active when you started the external settings tool
There are too many options to describe in detail, the most important ones were mentioned in the body of this document, so you can search for them by name using the search box [4]. Or use a generic keyword like thumb and click Find next button a few times to see what tweaks are available related to thumbnails.
The main body is the property control that lists all tweakable program options, and lets you change them. There are numeric, text, color and other types of properties. As you select properties, you get to read brief explanations about what each one does in box [3].
After you are done changing options, click on ok button to save them and then restart your xplorer² to see them in action.
|
You spend time and effort to tweak xplorer² settings to your liking, so you want to safeguard them against the numerous setbacks that are unavoidable with computing. Hence you should make a backup of your settings every once in a while, and keep them safe in case you need to restore them.
xplorer² saves its settings in the registry (or INI file if you run ultimate edition in portable mode). Use Actions > Export settings menu to save your current settings to a standard registry information REG file. Ultimate edition gives you an option to create an INI settings file, see the question to the right. All settings are exported, window sizes, dockable panes, fonts, tabs, layout information etc. Keep this x2settings.REG file (or however you chose to call it) somewhere safe, perhaps in your backup disk drive. If a case arises where you need to restore settings, one possibility is to fully quit xplorer² with File > Exit menu, then double click on the previously exported x2settings.REG file which will be automatically imported. When you restart xplorer² it will look like it did when you created the settings snapshot. Another way is to do Actions > Import settings inside xplorer².
You must browse the REG file you want to import and select it before using the import menu command. You are effectively using xplorer² as a giant Open dialog. For ultimate version, ensure your current settings persistence option matches what you are trying to import (must be registry for REG and file for INI import).
|

|
Another use for backed-up settings is for troubleshooting problems. After series of tweaks you may find your xplorer² is in a rut and won't work properly. An extreme attempt to bring order is to fully uninstall then reinstall xplorer² with its "factory" settings. Export your settings before such drastic measures so you can restore them — but chances are the problem will return.
HKCU\SOFTWARE\ZabaraKatranemia Plc\xplorer2_UC
HKCU\SOFTWARE\ZabaraKatranemia Plc\xplorer2_UC.global
HKCU\SOFTWARE\ZabaraKatranemia Plc\xplorer2_UC.customLayout
... (other layouts)
Finally if you want to move xplorer² to a new PC, export its settings from the old one (before uninstalling), then import them to the new PC. Not all settings are transferrable, e.g. bookmarks and user commands with full paths expect a similar folder hierarchy organization — which may be absent (even small path differences make bookmarks unreachable).

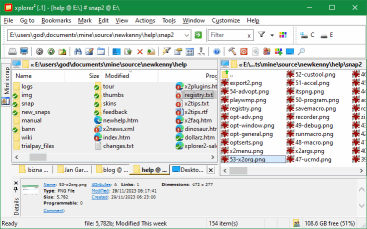
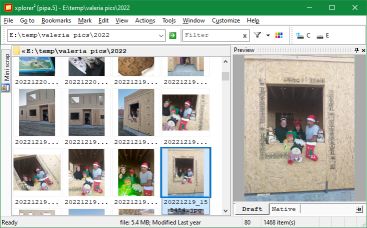
A layout keeps information about the entire xplorer² window and in particular:

The bottom half of Window menu is a list organizing saved layouts, like we have seen many times in Customize menu and bookmarks. Use Window > Organize to assign icons and shortcut keys to saved layouts — note you cannot rename or reorder them like other favorite lists but other than that the list management is similar, e.g you can delete unwanted layouts.
Some people use layouts to organize different sets of folder tabs, but that's not the recommended use case. If the only thing you need is to switch folder tabs, you can use folder groups (or super dual bookmarks for dual pane with tabs), perhaps combined with a custom desktop shortcut to launch xplorer² with these particular folder groups using arguments. At any rate each layout starts with a fixed set of folders every time (unless you ticked "Disable per-tab setting policy..." advanced option).
When you start xplorer², it comes up in whichever layout you used last time. If you want to start with a different layout, use "/S:layout name" command line argument (/S:default will force the default layout). However it is recommended you make your basic modifications to the default layout so you don't need to invoke another one as your default.
You can download the free trial from the website and evaluate it for free and full power for a period up to a month, then you must either buy or uninstall it as it will stop working. At any point you can uninstall xplorer² using Add or remove programs applet from your system settings (or control panel)

|
Designed for: Windows XP and later
Languages supported: English, French, German, Japanese, Spanish, Chinese, more Free trial period: 21 days |
xplorer² comes in 3 editions, a free lite version that has basic functionality, and the paid professional and ultimate editions. Commands missing from the free lite version are clearly marked with [P] in the menus, and will pop an advertisement for professional version if selected
|
Normally the download page detects your operating system version (usually 64 bit windows nowadays) and lets you have the correct installer for your OS. Sometimes when your important shell extensions are 32 bit, you may want to download the 32 bit xplorer² installer that integrates with 32 bit DLLs, using the version selector next to the download buttons (see pic to the right).
Click on the download button for the edition you are after (pro or ultimate) and once it is finished you can run the installer. It is digitally signed and virus free so there shouldn't be any problems running it. |

|
The installer is standard, you get to pick the installation location etc. When you reach Additional tasks page (see picture), you can choose how to install xplorer². There are some general option checkboxes [1], a selector for GUI translation [2] if English isn't your cup of tea, and an option to replace windows explorer [3]. Most options are self-evident, here are brief descriptions:
|

|
|
Every few months or so xplorer² will prompt you to check if there's a newer version available. If your license allows it, download and install the latest and greatest version. To cancel these reminders tick Don't show this message again dialog box. From then onwards you can manually use Help > Check for updates menu command to check for newer versions.
When you install an update, it's best to install it over the old version, so that your settings and license key will be preserved. If you want to do a clean install on the other hand, uninstall first and answer YES to both questions (remove settings and license file).
Use Help > What's new? menu command to read what features were added in the latest version. |

|
|
If you are using xplorer² on the move you will find that saving program settings in the windows registry is not an option. One of the main advantages of xplorer² ultimate version is its portability. Using options ("Save program state" drop-down list) you can tell xplorer² to store its settings in an INI file instead of the registry.
If your company regulations won't allow you to install programs, you can create a portable xplorer² installation on a USB stick (flash drive) and run it from there without installation — assuming you are allowed you to run stuff off USB sticks at work.
Here are the step-by-step instructions to place xplorer² ultimate in a USB stick environment. For example assuming we want to setup the portable version within F:\x2portable\ folder:
Steps 3-4 above can be done automatically with a "hidden" menu command number 33553. Use the command finder to search for this special command 33553 and double click on it to execute. It will ask for a USB drive path and then create a X2PORTABLE subfolder that includes the program, license and your settings in an INI file.
If you have problems setting this up please watch this demo video:

After you properly set up your portable edition in a removable medium like a USB stick, then you have these advantages:
To ease the way you access xplorer² from your removable media you can create an AUTORUN.INF file in your root USB drive folder, and set it to open xplorer² (whenever you plug in the USB stick), editing it as such:
[autorun]
open=x2portable\xplorer2_64.exe [optional arguments]

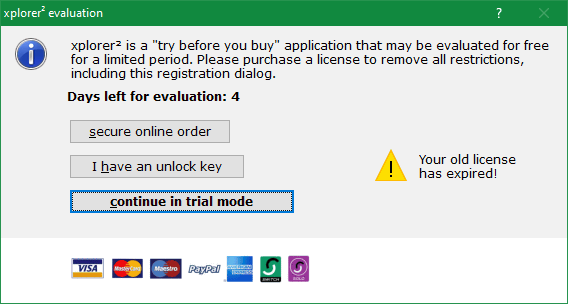
Click on Continue in trial mode to proceed without a key. Eventually after a period of evaluation at full capacity, it will ask for an unlock key to let you run it. At this point you should make up your mind, whether to purchase or uninstall. Use Secure online order to buy a license — all major credit cards and paypal are accepted for payment.
xplorer² is licensed per user. If you are the only user and have 2 computers, you only need one license key. But you must add a seat for each extra user. Your purchase will entitle you to free upgrades and support for one year (at minimum, perhaps longer). The version you buy is yours to keep and will work forever. Costs will only be incurred for updates, if you want them.
After you complete the order process, the registration key will be sent to you via email. Once you receive your key by email, click on I have an unlock key and start the external license manager in full administrator mode. If you see any UAC elevation prompt click Yes to run xplorer² elevated.
Open the email with the unlock key, and copy/paste the long funny looking key (all of it, usually 3-4 lines of text) and paste it in the license manager window, then click on Activate license button. If all goes well, you can restart xplorer² and enjoy the program in full power. If you use Help > About menu command you will see your name and email as the proud owner of a fully licensed xplorer²
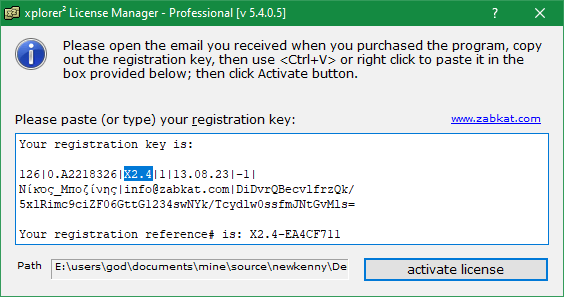
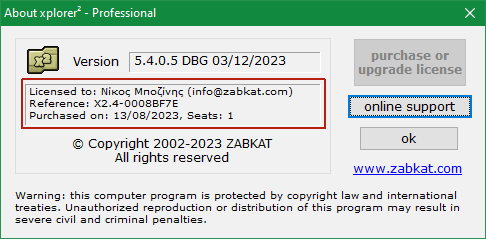
If there's something wrong with your key, xplorer² will tell you about it with an error message, which will include a brief explanation of the problem and a numeric error code (see the pic to the right). Here are the most frequent error codes and their remedies:
|
|
When xplorer² crashes for one reason or other, it usually restarts itself automatically. If you see a lot of crashes in similar circumstances, please notify program support using Help > Crash information menu command. This tries to retrieve extended information on the latest crash and attaches it to an email meant for xplorer² customer support.
Another type of problem is xplorer² getting stuck, not responding. This occurs naturally sometimes, when xplorer² is busy in a heavy computation you've asked for, but if it doesn't come back (after waiting a reasonable amount of time) it could be stuck for good. You can try pressing <ESC> key a few times; failing that, start another xplorer² instance using its desktop shortcut, and immediately use Help > Crash information menu: this should detect that there's a stuck instance and generate an email with information about the problem. Please send it forward to xplorer² support.
If safe starting folders won't solve the hang, you can try the procdump tool. A more drastic solution would be to uninstall, erase all your settings, then reinstall. However this will lose all your bookmarks etc
If you think you've discovered a bug, please ask yourself a few questions before seeking support:
Thank you and sorry for any inconvenience caused!
|
The <ALT> key modifier is used a lot in any command that is meant for browsing. So whereas pressing <ENTER> on a selected subfolder name will browse into it, <ALT+ENTER> will browse the folder in the inactive pane — the active will stay put. <ALT> works the same way with mouse-initiated folder browsing, e.g. from the tree.
| ||
These keyboard shortcuts are the default assignments, assuming you haven't changed them already!
Stock properties appear first in column selection dialog and are recognized by the [S] symbol after their name. The first few are duplicates of basic file properties like name, size and date, but you will find lots of interesting extended properties that are unique to xplorer² like digital signature information for executables.
| |

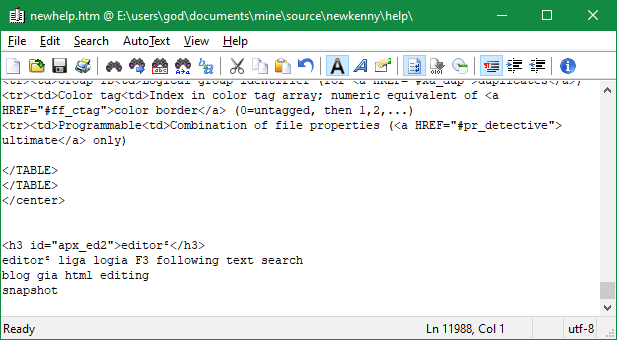
It is a simple program with a menu, toolbar, statusbar and the main editing area. It is quick but surprisingly powerful. It understands all popular text encodings (plain, UTF8, unicode, custom codepages) and adjusts file load and saving accordingly. It is customizable, setting fonts, colors, tab sizes etc with View > Options menu. Here are some handy features for simple HTML and source code editing:
editor² is closely integrated with xplorer² text searches. Whatever you search in xplorer² is communicated to editor² (and vice versa), so if you recently searched for text in files then open one of the hits in editor² pressing <F3>, another <F3> (Search > Find next menu) will locate the keyword you searched in xplorer²!
# select many items by name
# -------------------------
COMMAND 32932 # mark by rule
WAITWND
FINDWND "clear"
CLICK
FINDWND "Named"
# item names separated by COMMAS
SETTEXT "index.htm , x2news.xml"
OK

# select files modified before 2017
# ---------------------------------
COMMAND "matching a rule"
WAITWND
FINDWND clear
CLICK
COMMAND "add new"
WAITWND
FINDWND property
SELECT modified
FINDCLASS SysDateTimePick32
SETTEXT 0 # clear date
FINDCLASS SysDateTimePick32 # next one
SETTEXT "1 jan 2017"
OK
OK

# copy selected files with filter
# -------------------------------
COMMAND "copy to"
WAITWND
FINDWND filter
FINDCLASS combobox
SELECT "only source" # saved filter
FINDCLASS combobox
SELECT default
OK

# execute Diff command from TSVN context menu
# (operates on active view's selected item)
# -------------------------------------------
GETFOCUS
CMENU diff
GETFOCUS
SENDKEY down # select next item

# browse C:\ folder
# -----------------
FINDWND address
FINDCLASS combobox
SETTEXT "c:\"
SENDKEY enter

# show paths for all items in left pane
# -------------------------------------
FINDWND "left pane"
STORE $1 # listview window
GETCOUNT $2 # total items, process in reverse
LABEL loop
POP $1 # restore window
SELECT $2
COMMAND "copy path"
WAITIDLE # command finished?
INPUT 0 # import clipboard
MESSAGE $0
DECR $2
JUMPOK loop

# show the last column of the selected item
# -----------------------------------------
COMMAND "copy columns"
INPUT 0 # from clipboard -> $0
# first line is the header, skip it
CHOPSTR \n2 # \n is for newline
# columns separated by tabs
CHOPSTR \t-1
MESSAGE $0

# search in selected folders
# --------------------------
GETFOCUS
STORE $1 # browser window
# create comma separated list of selected paths
# SENDKEY alt+ctrl+C # easy way; let's do it hard!
COMMAND "selected only" # hide unselected
WAITIDLE
POP $1 # restore window
GETCOUNT $2 # total items, process in reverse
LABEL loop
POP $1
SELECT $2
COMMAND "copy path"
WAITIDLE
INPUT 0 # import clipboard
STORE $4
POP $3
ADDSTR $4
ADDSTR ","
STORE $3
DECR $2
JUMPOK loop
COMMAND "find file"
WAITWND
WAIT 1000 # 1 sec, dialog appeared?
FINDWND look
SETTEXT $3
# now add search criteria

# remove duplicate tabs (same folders)
# ------------------------------------
GETFOCUS
PARENTWND
FINDCLASS WTL_DNTabCtrl
STORE $1 # tab window
LABEL restart
GETCOUNT $2 # total tabs
DECR $2 # exclude close button
LABEL loop
POP $1 # tab window
GETITEMTEXT $2
STORE $3 # path to find
POP $1
GETCOUNT $4
DECR $4
LABEL inner
POP $2
EQUAL $4
JUMPOK skip # skip current tab
POP $1
GETITEMTEXT $4
EQUAL $3
JUMPERR skip
POP $1
SELECT $4
COMMAND "close tab" # close duplicate
POP $1
GOTO restart # tabs changed
LABEL skip
DECR $4
JUMPOK inner
DECR $2
JUMPOK loop

# property control (options) scripting
# ------------------------------------
COMMAND 32974 # Options
WAITWND
# select tree category
FINDCLASS WTL_PropertyTree
SELECT General
POP 0
FINDCLASS listbox
# select option and use SETTEXT to change
SELECT 1 # save settings
SETTEXT "windows registry"
SELECT "plain menus"
SETTEXT No

# flip Error beep option
# ----------------------
COMMAND 32974 # Options
WAITWND
FINDCLASS listbox
store $1
select beep
getitemtext 0 # this is 0 or 1
equal 1
jumpok untick
pop $1
settext 1 # tick
exit
label untick
pop $1
settext 0

# change sort order to NAME column
# --------------------------------
GETFOCUS
FINDCLASS sysheader32
CLICKDEF name
| |
Scrap container windows have almost the same menu commands, except for those special in the table below
Table 13. Scrap window special menu commands
| |